Category Archives: Projects

Super Boost

This is the how to page on how to build the SUPER BOOST pcb. Please refer to the disclaimer first. For hobby use only. This design is completely open source. Check the Super Boost project page for the file downloads.

Since the board contains almost only SMD parts you should be familiar in soldering them. If not SparkFun has a really nice SMD soldering guide.

You will need the following parts.

Bill of Materials


Name:            MFG P/N:               Mouser P/N:             QTY:
U1               LM2700MT-ADJ/NOPB      926-LM2700MT-ADJNOPB    1
L1               VLC5045T-100M          810-VLC5045T-100M       1
D1               B130-13-F              621-B130-F              1
C1               C1608X5R1A106MT        810-C1608X5R1A106M      1
C2               CC0805KRX7R9BB472      603-CC805KRX7R9BB472    1
C3               UCL1A471MCL6GS         647-UCL1A471MCL6GS      1
R1               CRCW060320K0FKEA       71-CRCW0603-20K-E3      1
R2               CRCW06033K01FKEB       71-CRCW06033K01FKEB     1
R3               CRCW06031K02FKEA       71-CRCW0603-1.02K-E3    1
R4               CRCW060375K0FKEA       71-CRCW0603-75K-E3      1
R5               CRCW060343K0FKEA       71-CRCW0603-43K-E3      1
R6, R7           CRCW060351K0FKEA       71-CRCW0603-51K-E3      2
USB Plug         87520-0010BLF          649-87520-0010BLF       1


Bill of Material list on Mouser

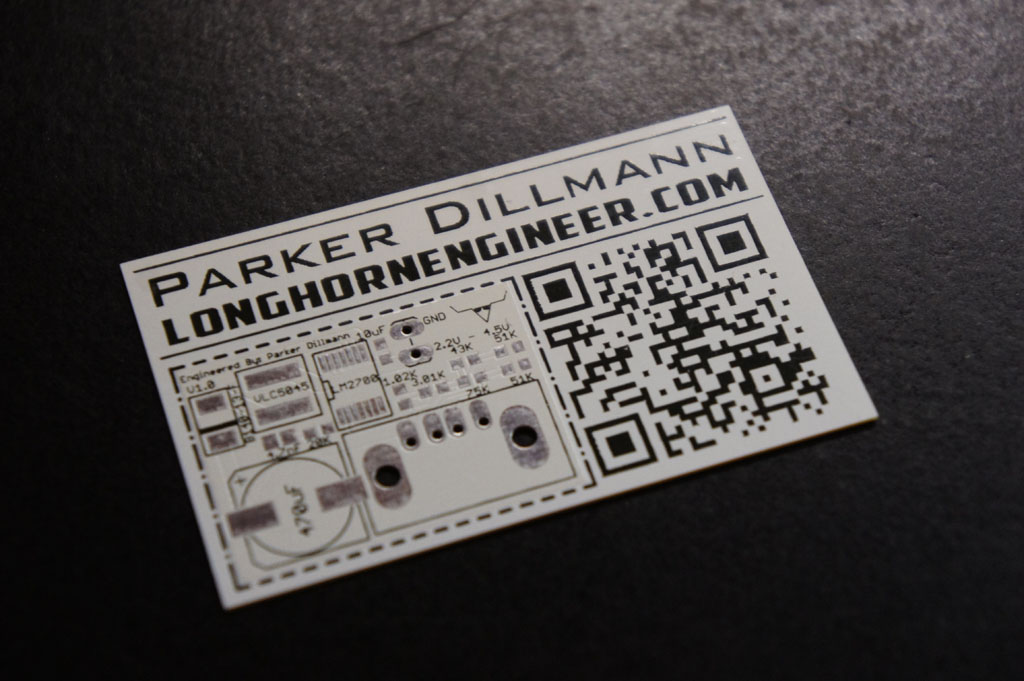
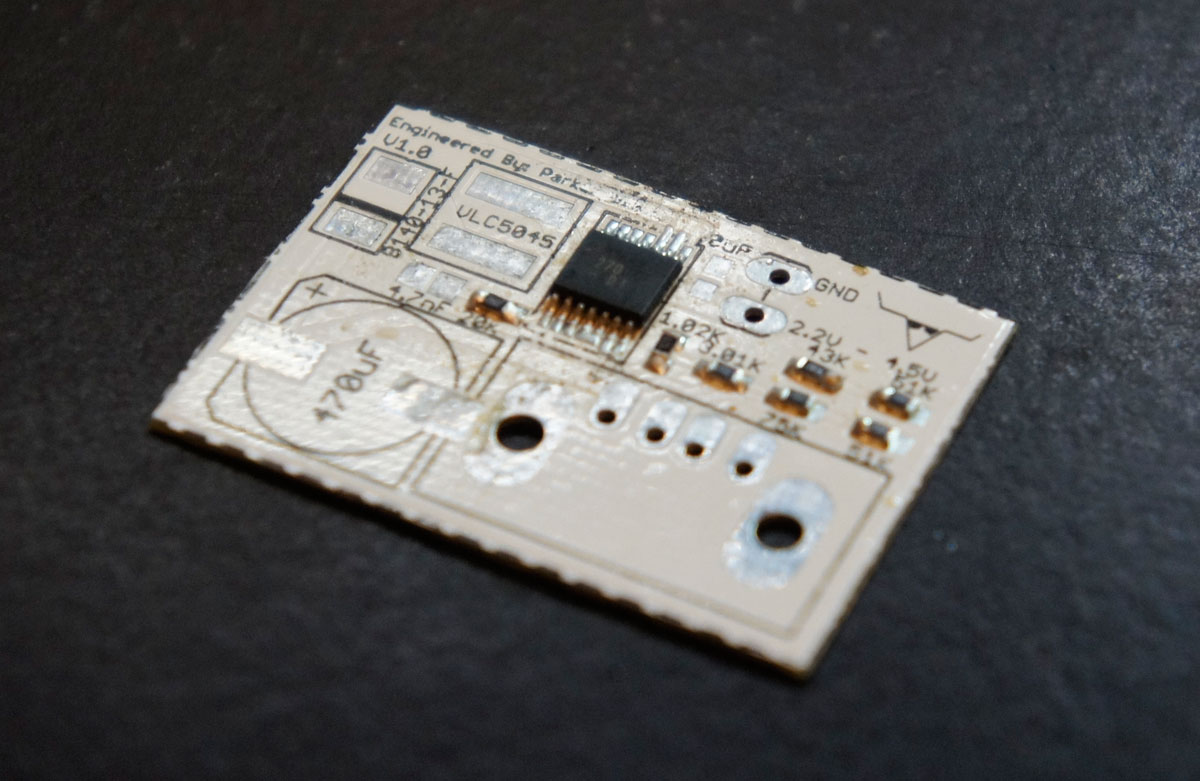
If you received the PCB on a business card you can cut the PCB out around the dotted lines or leave it as is.

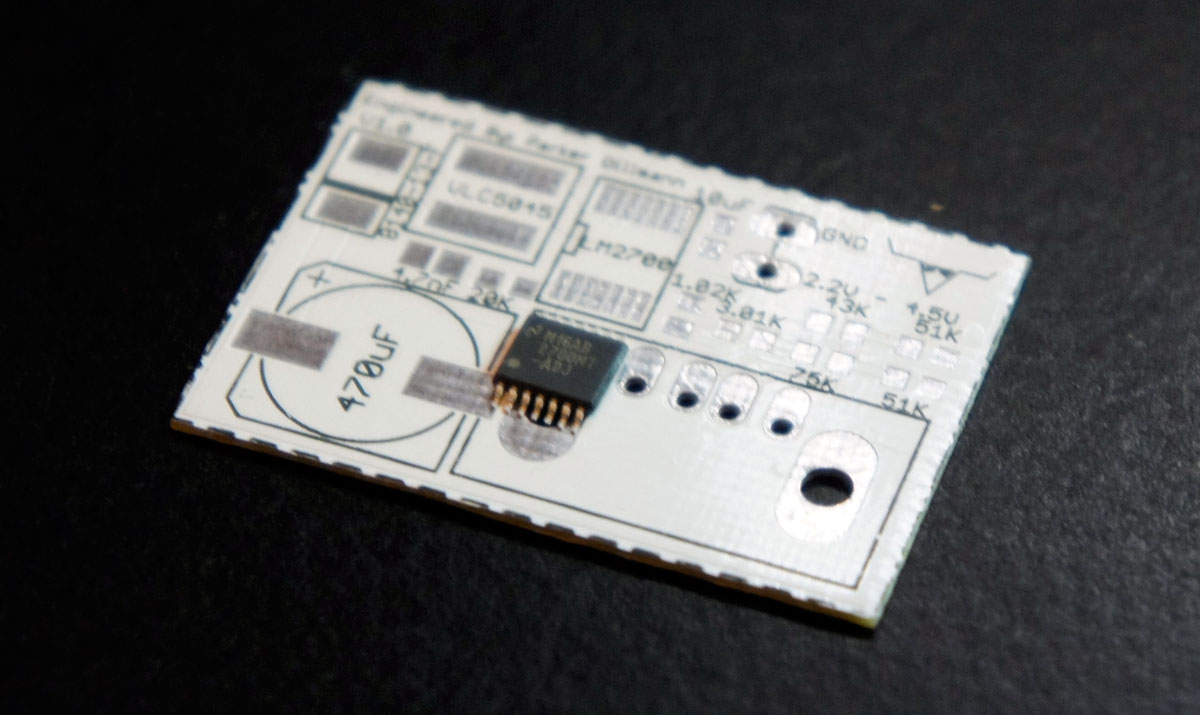
Start by tacking the LM2700 chip down with a soldering iron in a single corner.

I usually tack down the pin 1 on the chip then apply some flux then finish the chip. After soldering the LM2700 down solder the resistors down.

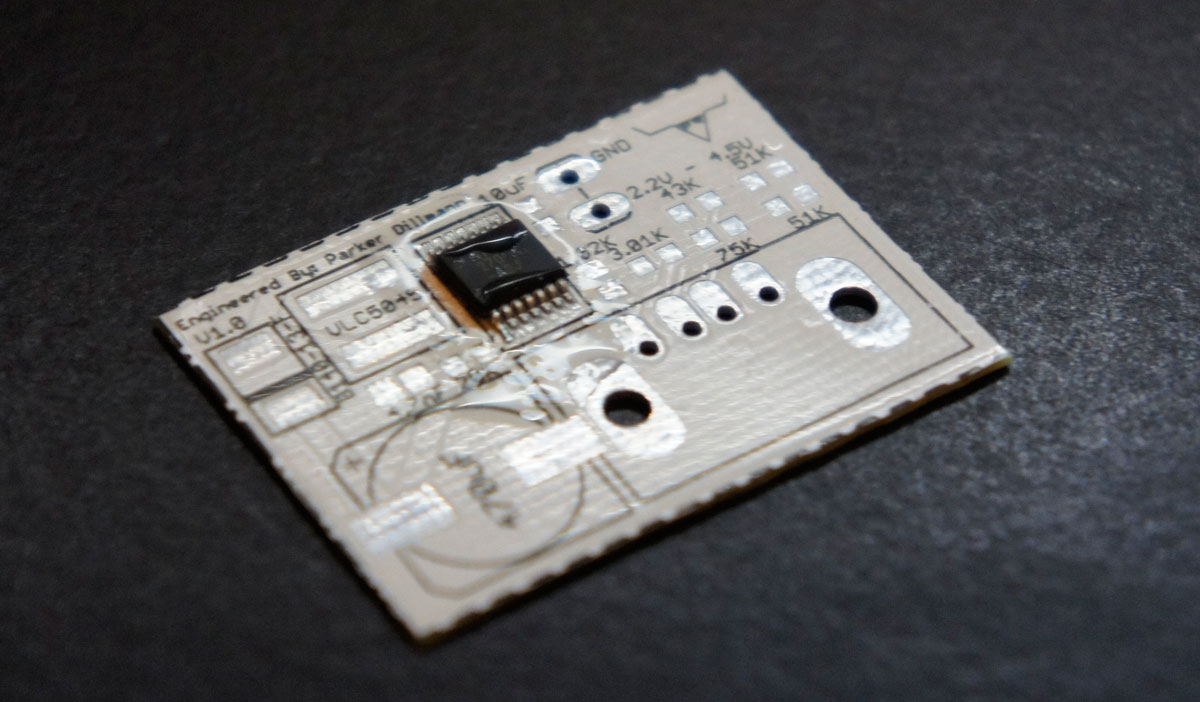
Then the two small SMD capacitors.

The inductor, diode, and large 470uF capacitor should be soldered next. The inductor is non polarized but care should be taken with the 470uF cap and diode to make sure they are originated correctly.

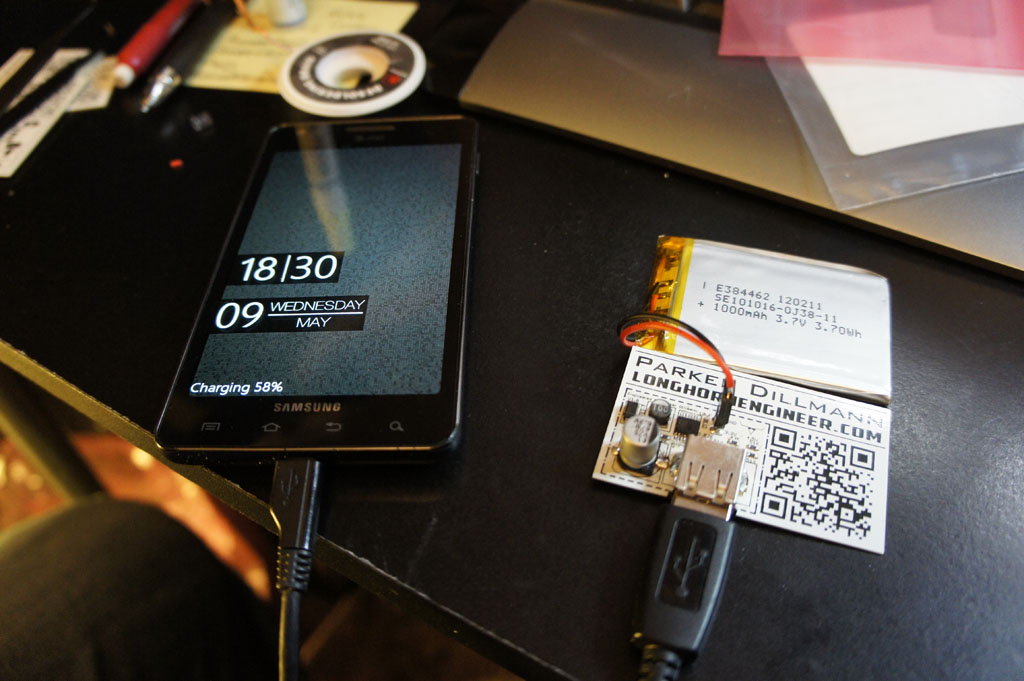
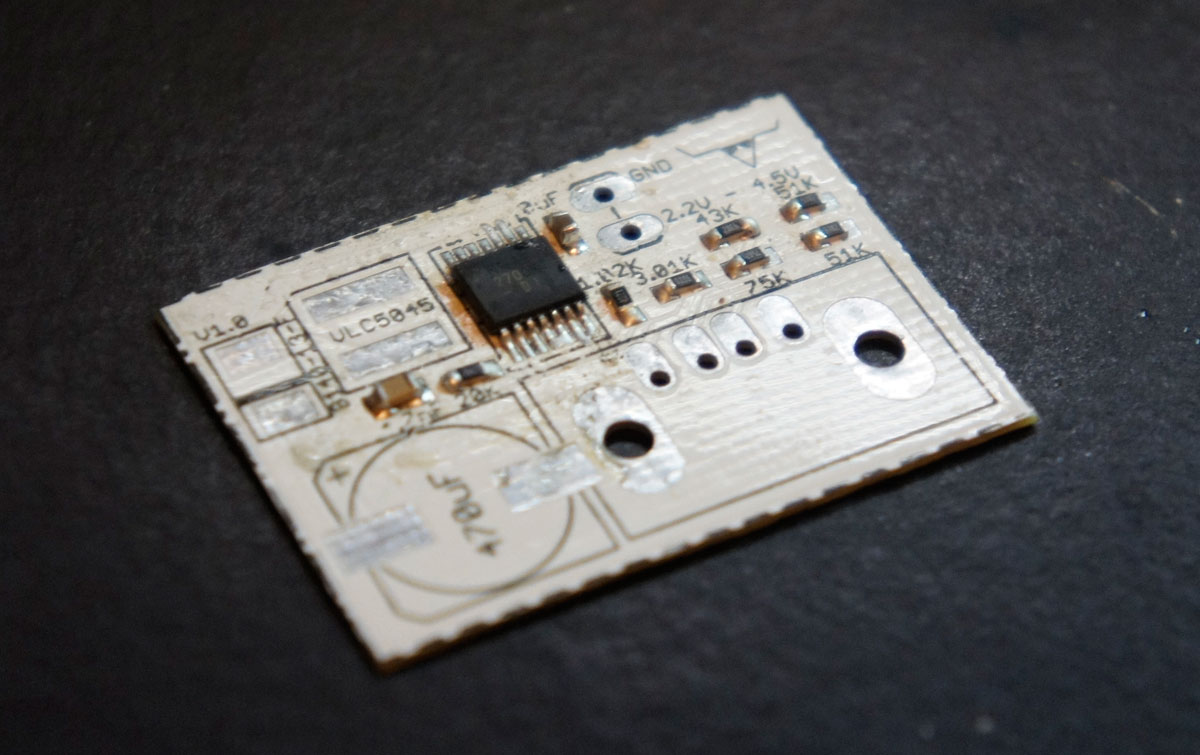
The USB port is the last thing to install. Before connecting your device to charge it use a multimeter and verify that 5V is across the 470uF capacitor terminals.

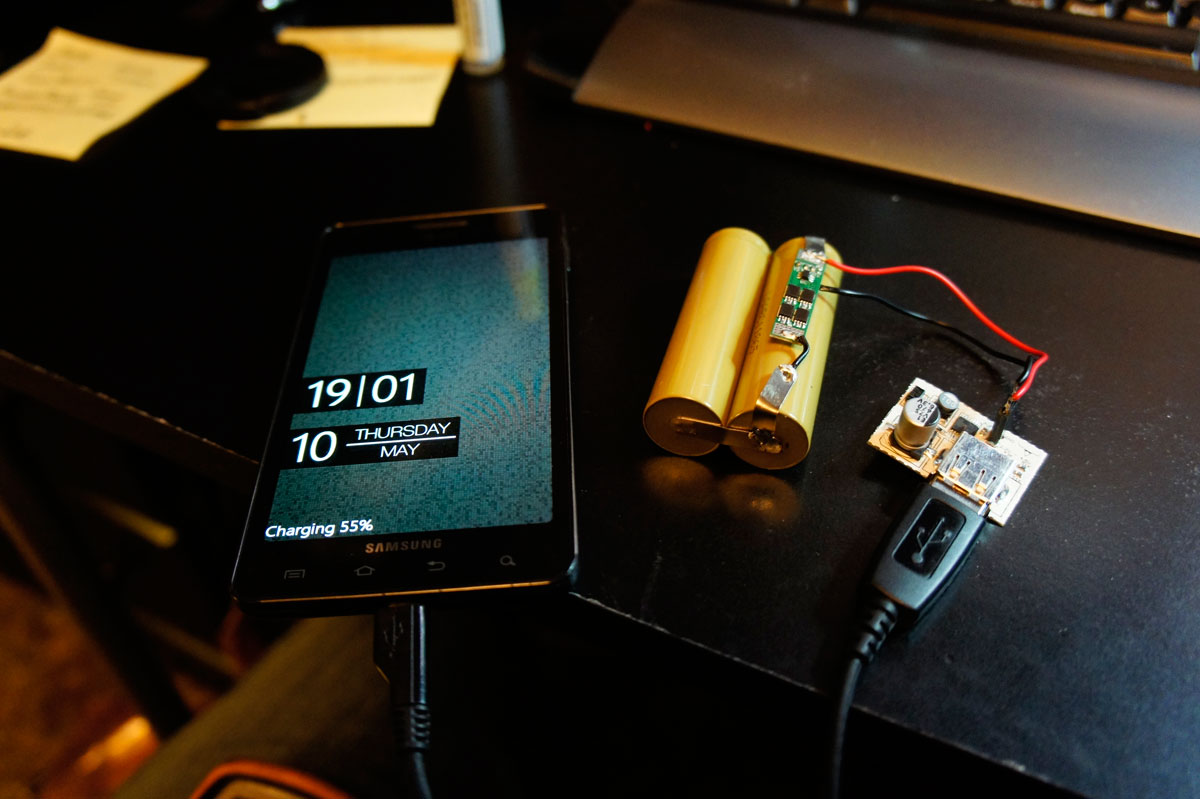
Success! Android phone charging. It is charging at a steady rate of 750mA.

Super Boost Schematic

This design is inspired by the Minty Boost but it fixes some of the issues in that design. The Minty Boost is limited to 600mA due to the LT1302 chip. The Super Boost uses the LM2700 which can push up to 3.6A. This will enable iPhones to charge much more quickly.

Charging more quickly will drain and reduce the life span of AA batteries so lithium batteries are the ideal source.

LM3S1968: 74HCT595 Shift Registers

For one of my up coming Labs for EE445L I am going to need to expand the I/O of the LM3S1968. I am using the 74HCT595 much like on my pinball machine. One 74HCT595 allows you to turn 3 output pins into 8 output pins. They can be daisy chained so you can have any multiple of 8 output pins for those 3 original output pins.

In this demo I have 3 74HCT595 chips wired up. Instead of using the SSIO ports on the LM3S1968 I bit banged the port. SSIO is built in hardware that does serial communication. I decided to not use is for the 74HCT595’s because I am going to use it in controlling a DAC.

http://www.youtube.com/watch?v=_bkljz3YN60

The code is fairly module and easy to change to different ports and pins.

Link to the code.

EE445L : Lab 7 Temperature Data Acquisition System

I am taking a class called EE445L which is microcontroller applications. It is a mainly lab based class where we design and prototype a new embedded system every week. We are using the Texas Instruments LM3S1968 Evaluation Board. The microcontroller is a ARM Cortex M3. It has an on board OLED display and a USB debugger. It is a fairly impressive piece of kit.

This is Lab 7 which is a Digital Thermometer. I can not post the code or schematics due to this being a Lab and it would be looked upon as academic dishonesty.

Lab 7 Problem Statement.

The Thermistor is a non linear device. That is as temperature increases linearly the resistance across does not scale linearly. Part of the circuit involves a resistor “bridge” this is a non linear setup. If you combine two non linear systems you can roughly get a linear system. It is not perfect but it is close enough.

After the bridge part the voltage level goes into an amplifier which boosts the signal to a level that the LM3S1968 can read via its ADC (Analog to Digital Convertor) ports. This signal is the passed through a Low Pass filter. The filter is set to cut off at 10Hz. The LM3S1968 is configured to sample at 100Hz. The signal is low passed to prevent aliasing from high frequencies which would cause interesting glitches on the ADC.

http://www.youtube.com/watch?v=prSfExM7wfY

I will be recording all the major EE445L labs in the next coming days.

MSP-430: IEEE CS Competition – Knock Knock Security System

Matt and I won a TI sponsored Launchpad programming contest that was held by the IEEE CS here at The University of Texas at Austin.

Here is the link for the details. In case the IEEE site goes down here is a screen cap of the page.

The idea was to create a simple secret knock security system that could record a knock “pattern” and then only unlock a door when the pattern was repeated. Only three hours where given for the competition and we where the only ones to finish everything in that time slot. They extended the contest another hour to permit more teams to finish. More details about the contest can be had by downloading the packet they gave us.

http://www.youtube.com/watch?v=WrIKSftj4l4

Code


main.c


The code is a bit rough around the edges and the bulk of the program happens in the timer interrupt (which is a no no) but for only 3 hours to solve, design, program, and debug a solution; sloppy code is a bit expected.

Points where awarded based on a few areas.


Points:
Your solution will be graded and scored on the following categorizes
1)  Time it took for your team to create the solution and produce a working
prototype to the Company.
a.  Every 1 min is -1 pts
b.  Ex: if you finish in 1:30 in you will get -90 points
2) Working prototype: after you submit your prototype to the company,
Quality Control will take it into their lab and run test on your system. Their
test will not exceed the specified requirements and each test you pass you
will get +10 points to your score. (MAX 80pts)
3)  Documentation: As in any real project you should keep a good record on
how you came up with your idea for your solution. This is to keep the
company safe from legal problems, have a record of our intellectual
property.
a.  Submit your code
b.  Submit any notes
c.  Document any resources for the internet
d.  Instruction Manual
Our legal team at the company will take a look over and award points
(MAX 10pts)
4)  Creativeness of the solution: When you submit your solution to the
company, your manager will take a peek at your solution. If you solved it in
a new and ‘creative’ way, this many include additional functionality, more
efficient algorithms, or intuitive (easy to use) interface. (MAX 30pts)
5)  Cost: The Company does have a parts store. You will be able to buy extra
parts such as button kits and if you burn out your chip you can buy a new
one.
Help:
If you get stuck we do have an internal consulting group which will help you but
for a cost of 2pts per 1 min. This is not for questions about the contest or
questions about the problem; this is for help solving the problem.

We scored 65 points where the nearest team behind us only scored 22 points. We dominated the competition. The judges loved the simple interface and the admin password setup. The code was fairly changeable so you can adjust the precision of the knock (humans are not robots) and how long the passwords are. Teams that did finish had no where near the feature set our solution had.