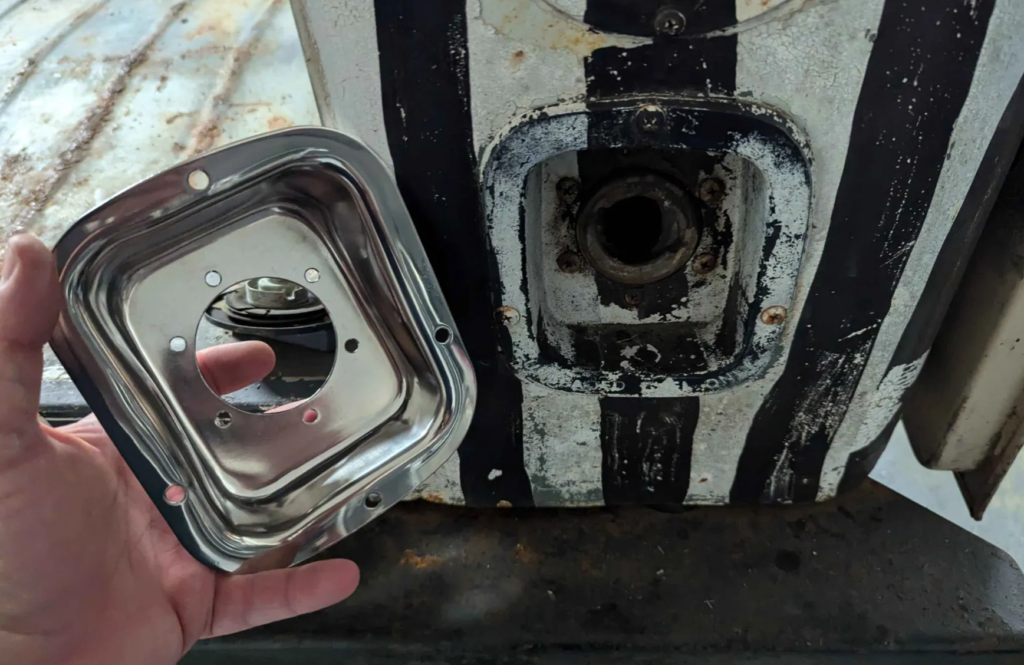
My friend had this polished stainless fuel filler for a CJ/YJ in his part box. He ended up going with a chromed unit. Well It looked like the same part on the DJ but the DJ one was plastic and warped. Lets see if the stock CJ/YJ filler will fit.
Looks similar minus the bottom mounting hole is on the CJ/YJ unit and the DJ doesn’t have that.
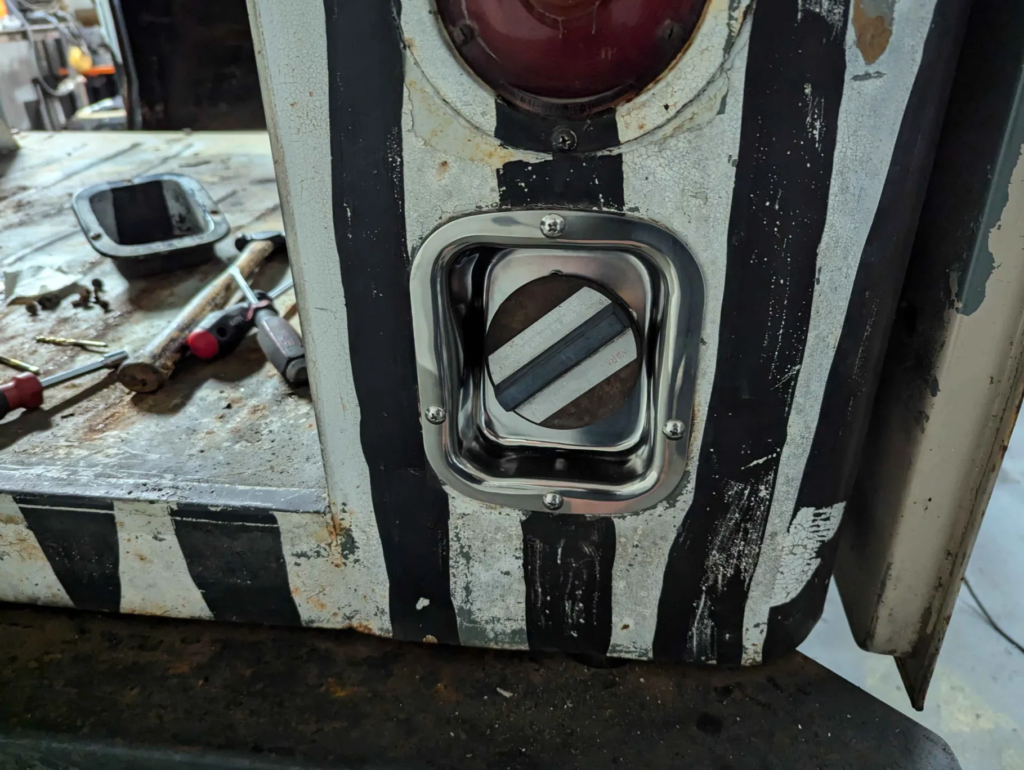
Fits perfect. Just had to drill out the bottom hole and tap it for a 10-24 thread.
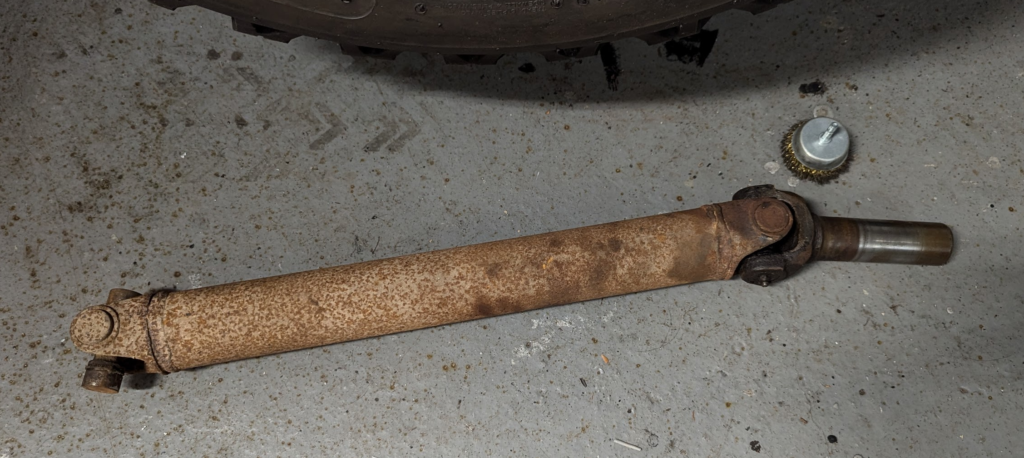
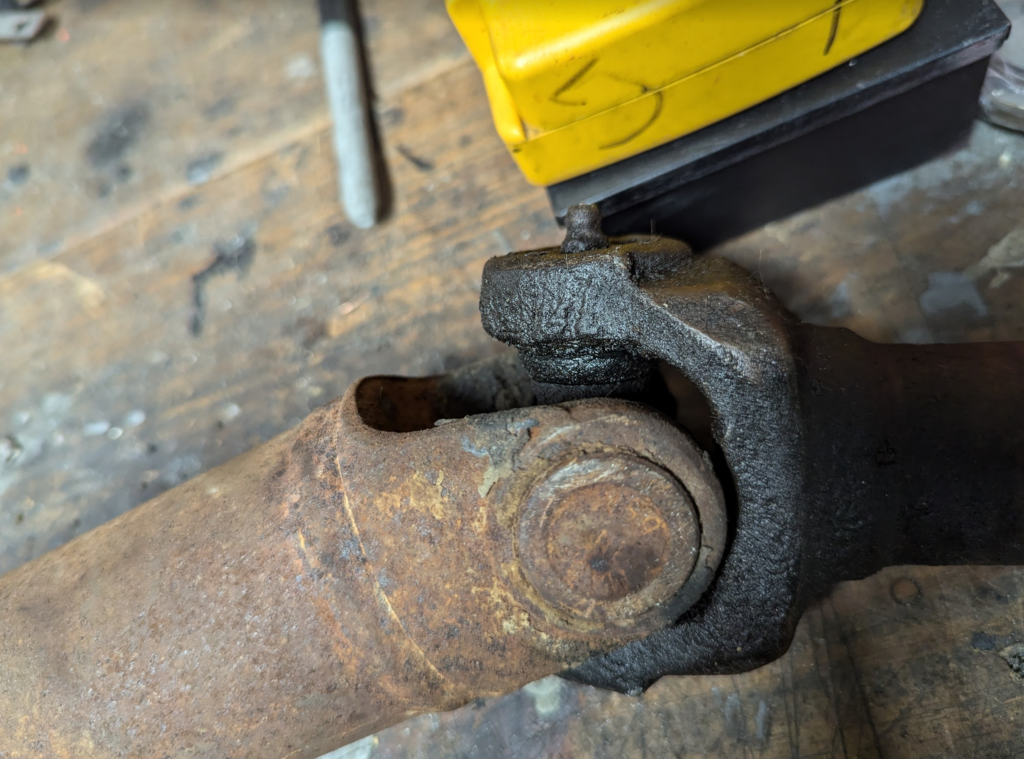
The u-joints on the DJ had a tad of play in them but moved well and didn’t seem to cause any problems. I had to remove the driveshaft since I am currently working on the transmission and decided to rebuild the u-joints with new grease.
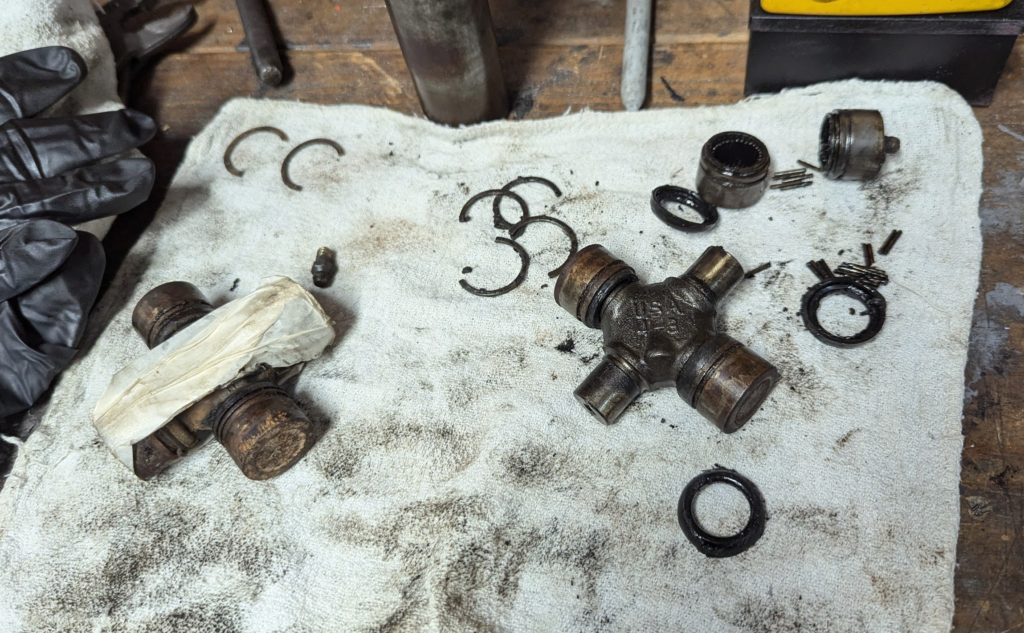
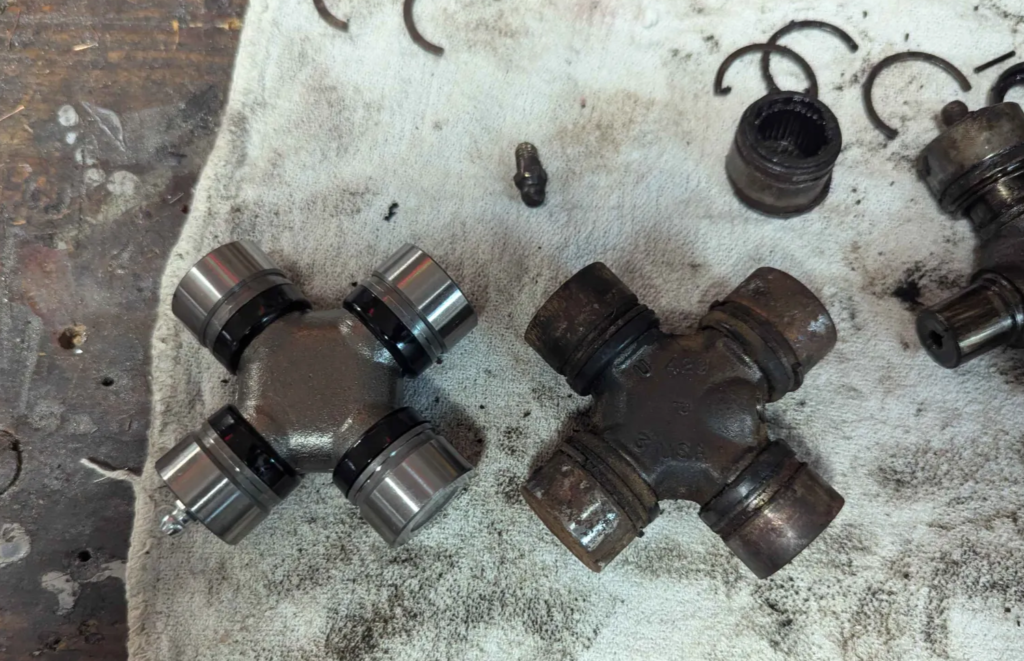
Well the little play in the u-joints was cause the end caps are missing some of the rollers for the bearings! What is also weird about these u-joints is they are internal clipped instead of external clipped like ever previous jeep driveshaft I have worked on.
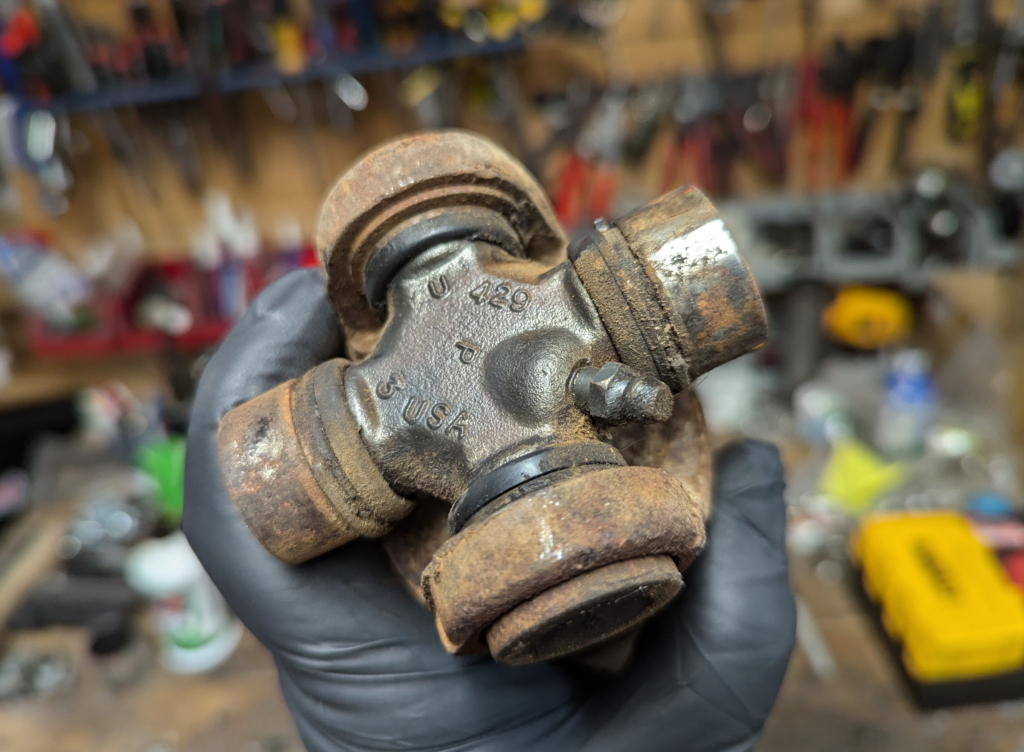
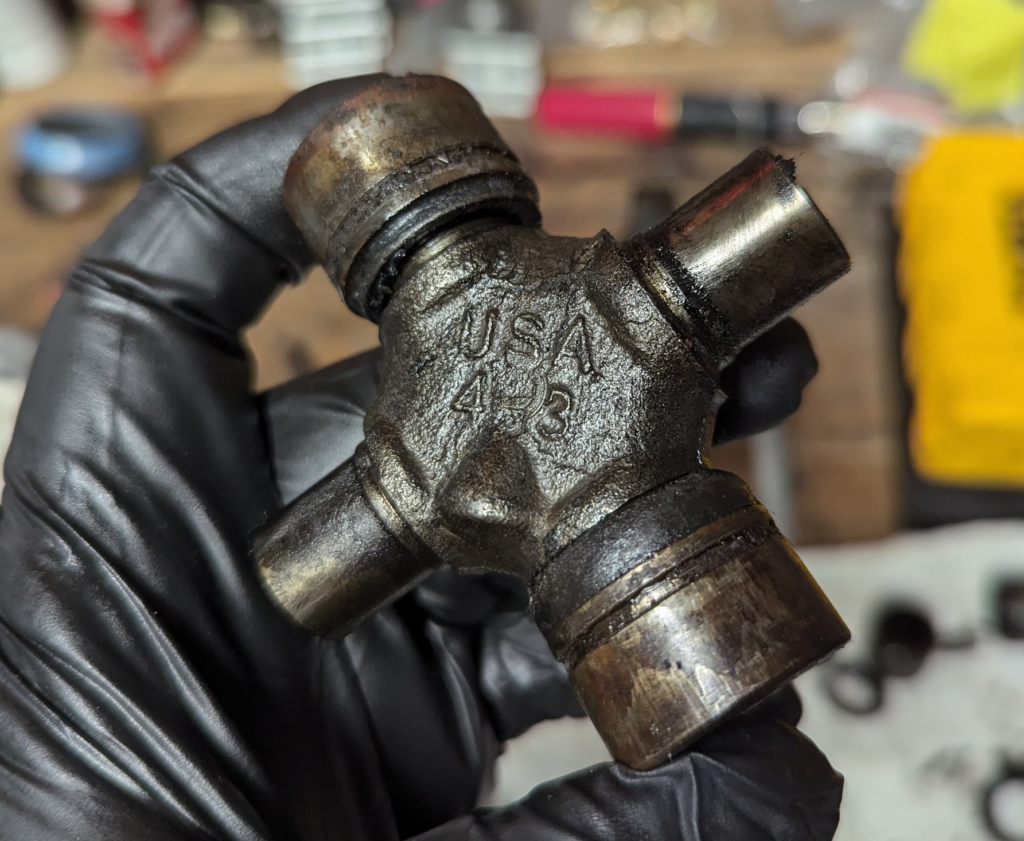
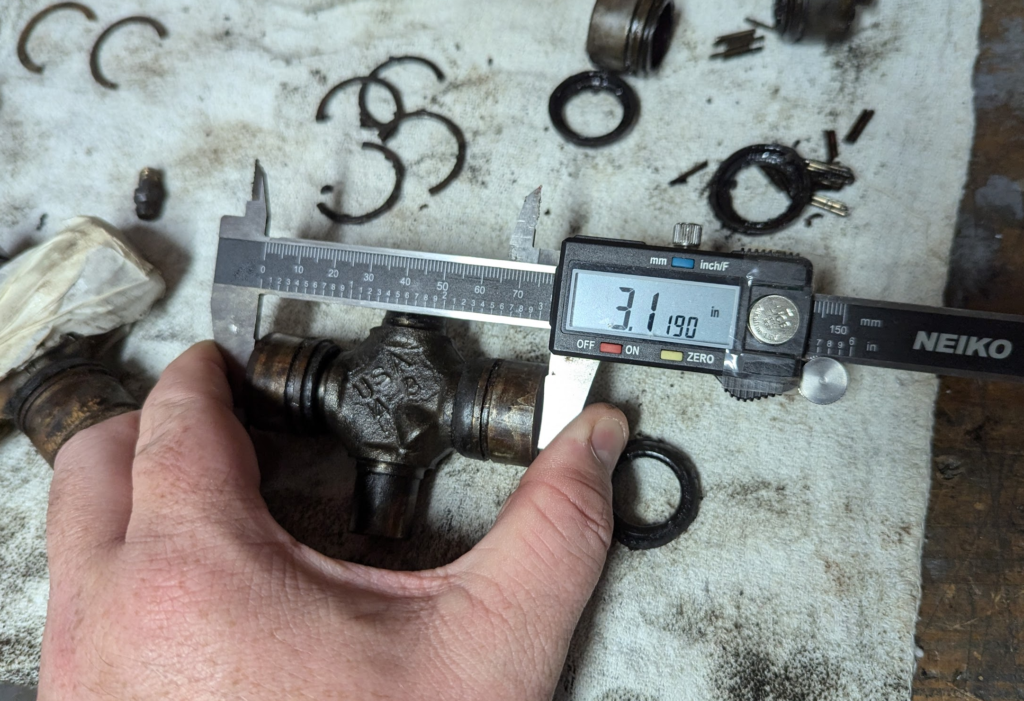
Both u-joints are different. One end has a 429 stamping and the other is USA 4 – 3. Maybe that last one is some sort of soccer score? ;) Googling 429 u-joint the Moog 429 pops up but that part does not match the physical dimensions of this 429 u-joint.
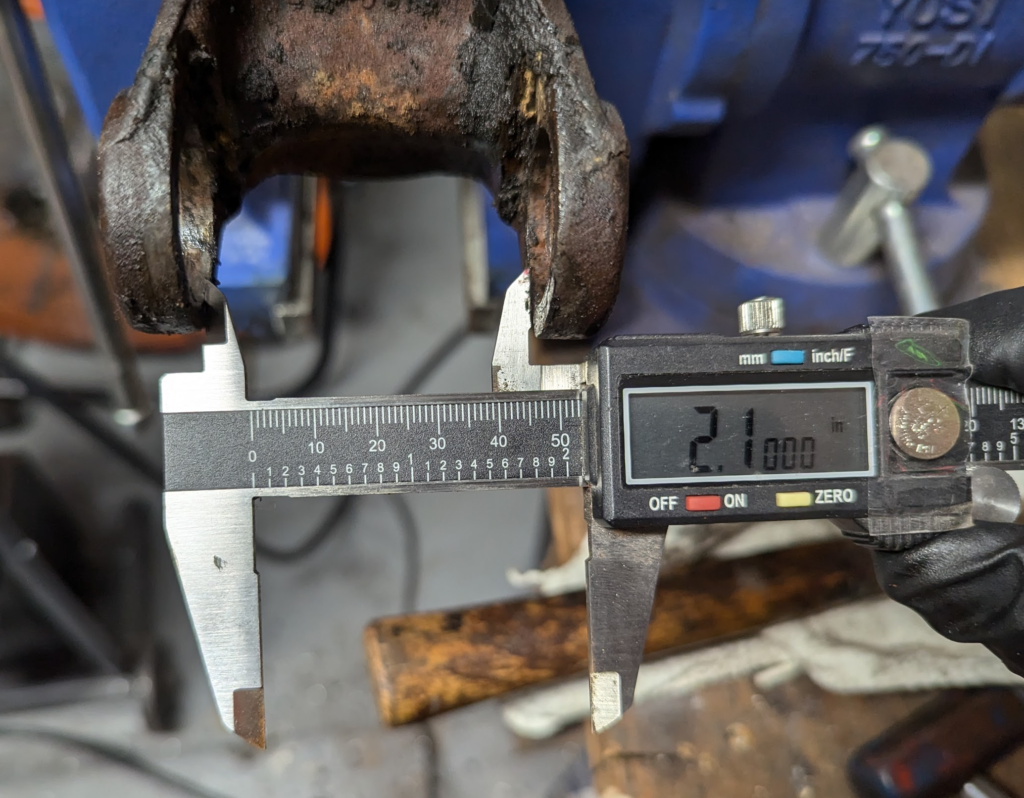
These u-joints don’t match up with the typical 1310 style u-joints you see on Jeep driveshafts and there are no part catalogs for the DJ-5G to tell us what the cross parts are for these. So we are going to need to measure everything.
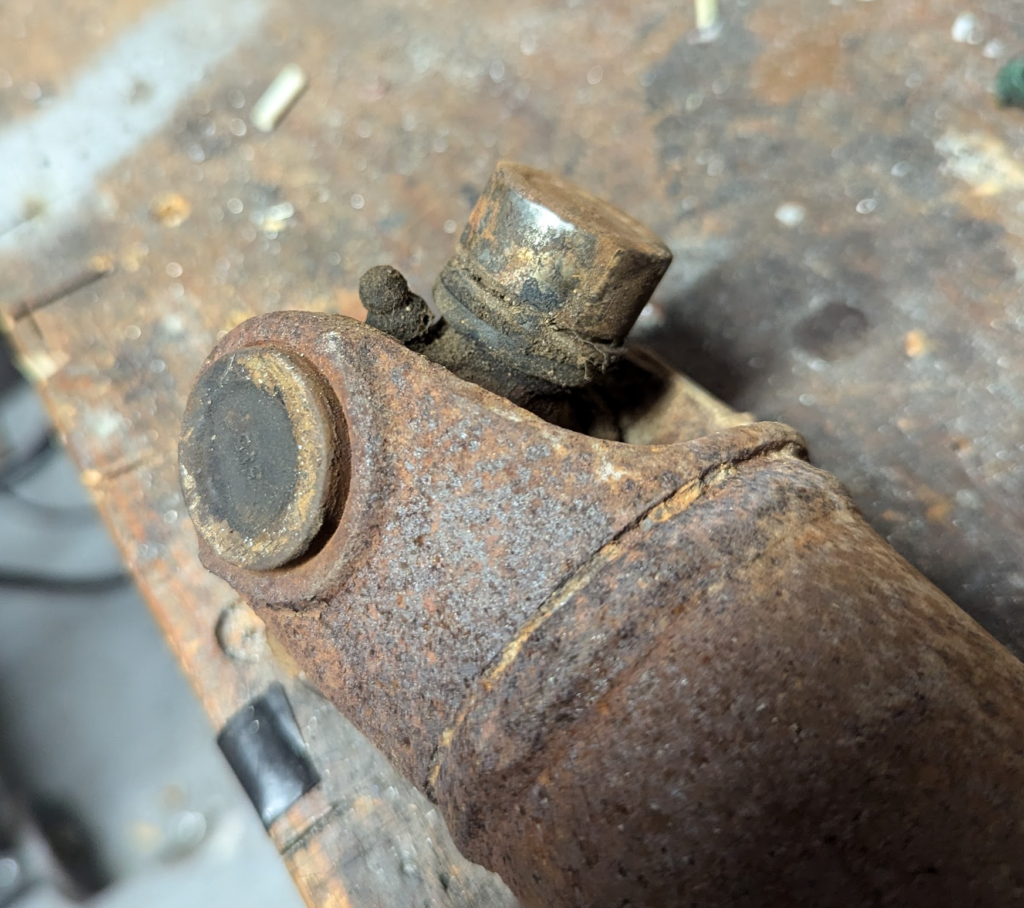
Inner locking area is around 2.1″ wide.
End caps are around 1.079″ in diameter.
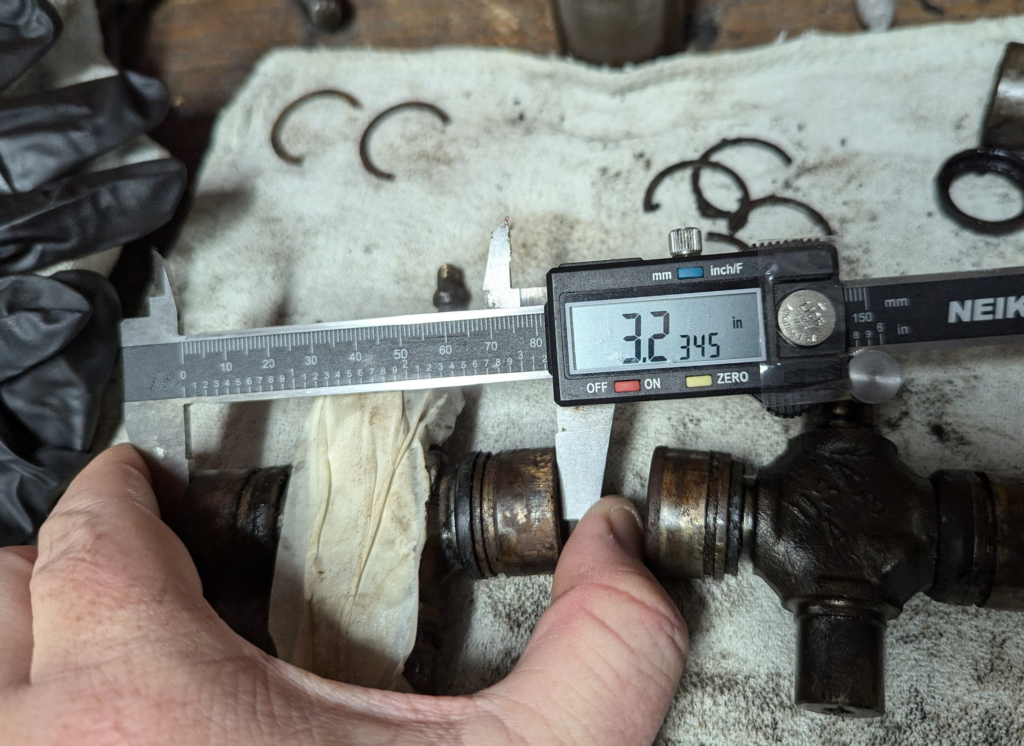
End cap to End cap span is in the 3.2″ range.
This website has a good list of different u-joints by size. I would love to find a more comprehensive list if someone knows where I can find one.
Doge 7260 is the only u-joint that comes close to the measurements. Thats 2.125″ inner lock and 1.078″ cap diameter.
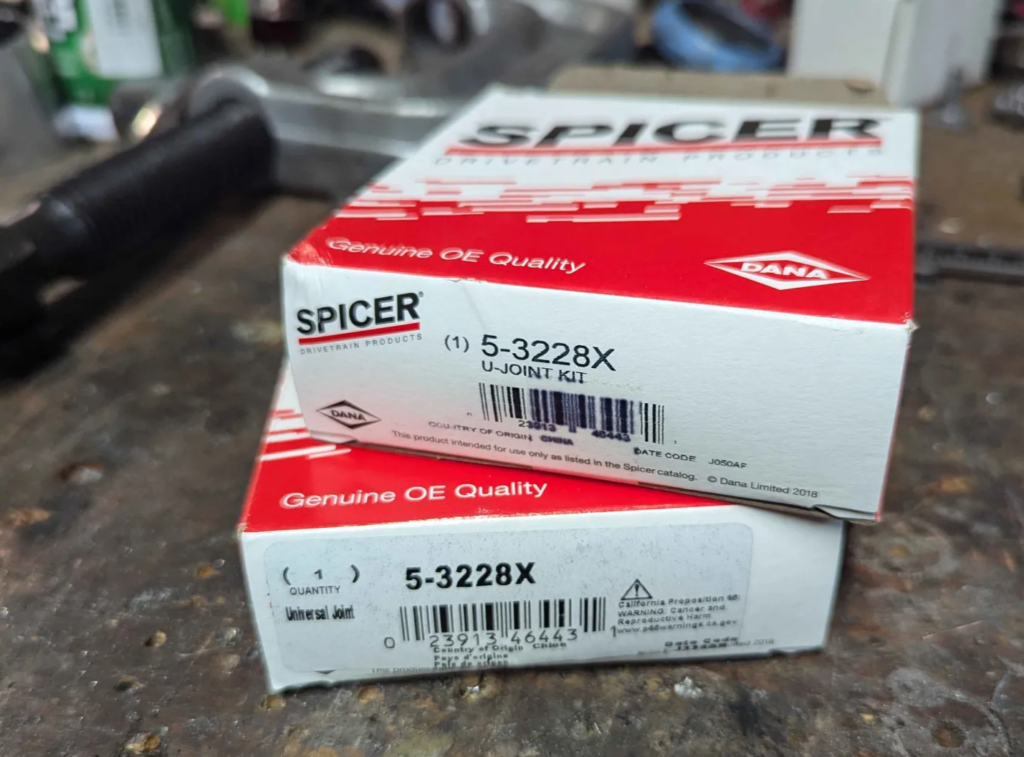
Dana Spicer 5-3228X is the u-joint I ordered. This has the grease insert in the cap which makes greasing easy. The ones with the grease insert on the cross or spider part is always a PITA to get grease in… doesn’t get broken by rocks tho!
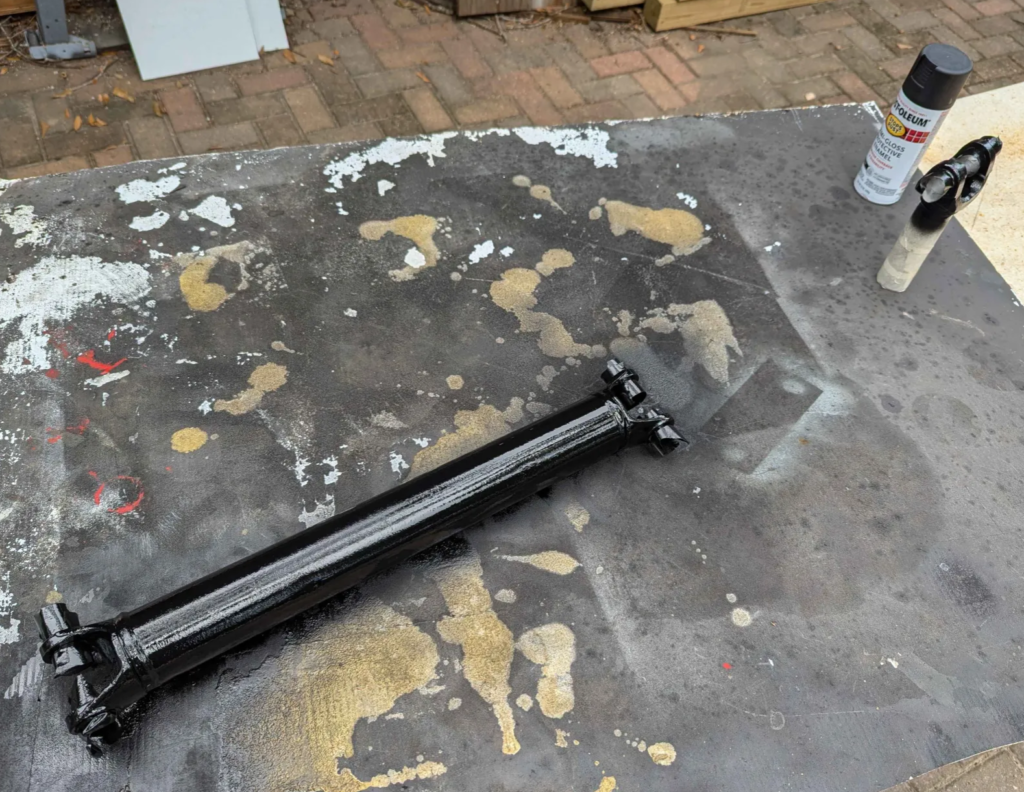
While waiting for the u-joints. I wire-wheeled the slip yoke and driveshaft and gave it a coat of everyone’s favorite rust-oleum semi-gloss black. Turns everything into a new old stock part!
Then the u-joints arrived.
They look the part and measure up the same. Lets press them in!
That driveshaft is way to nice for this rusty jeep!
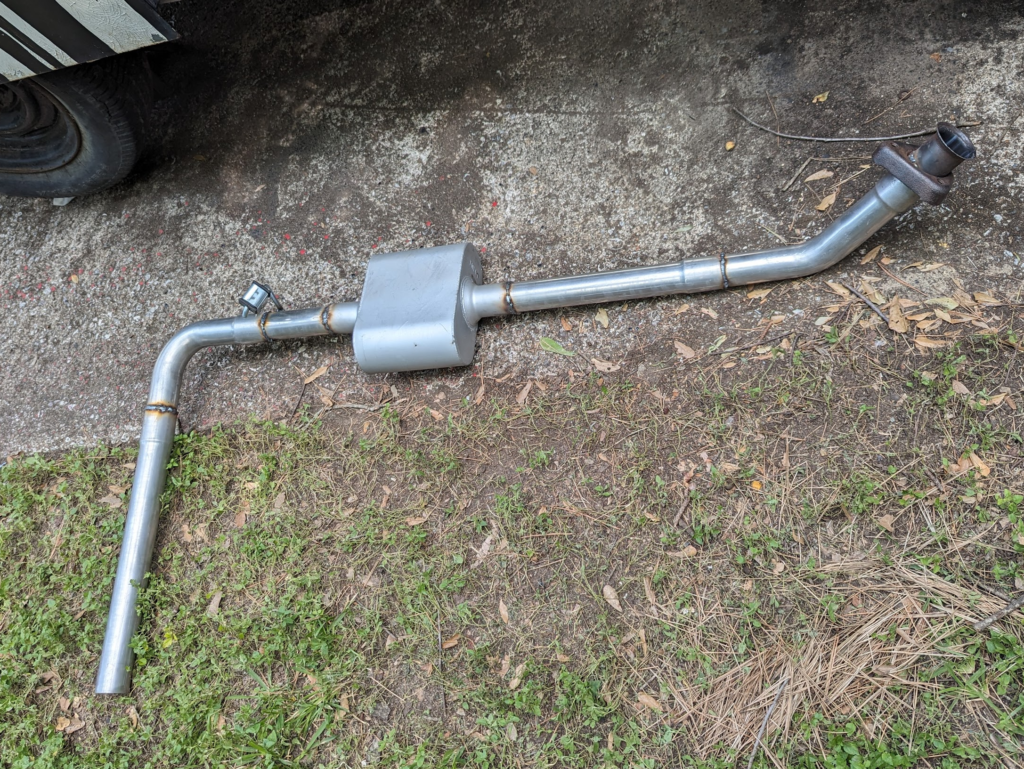
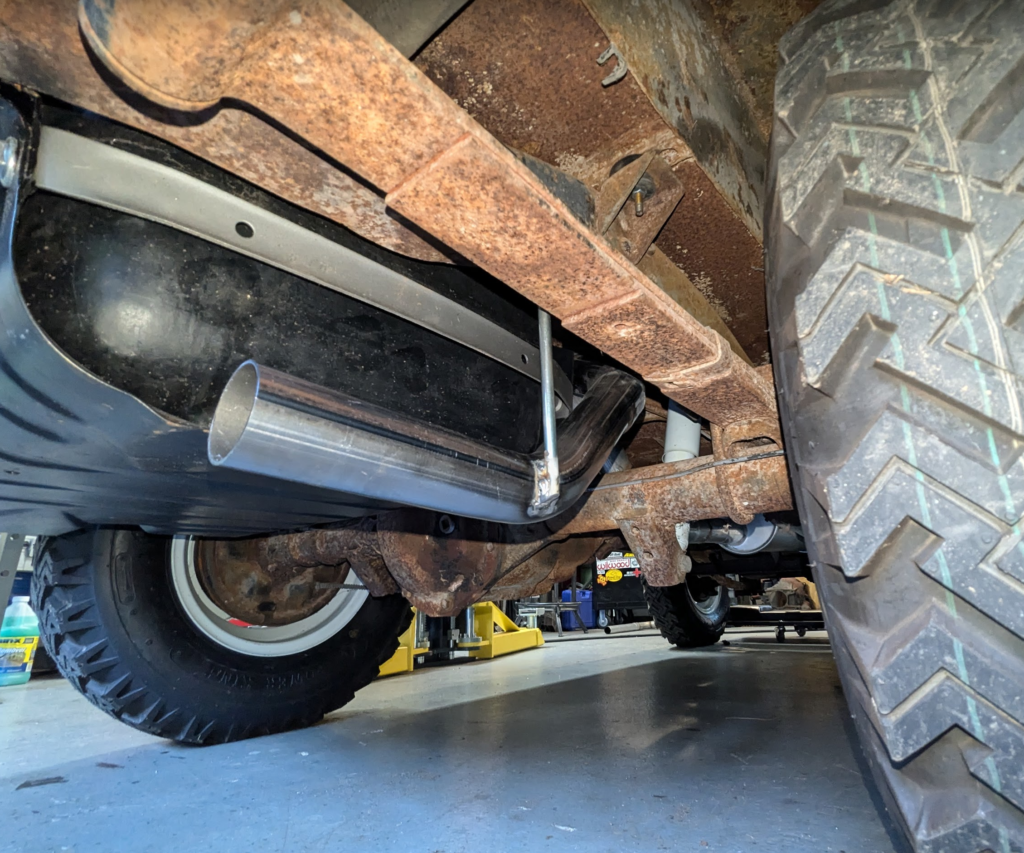
The exhaust system I built for the DJ originally was just to get something on the Jeep to prevent myself from going deaf. It was still way to loud and sounded like bung holio.
Above is what I built. Used parts I had left over from previous projects. That muffler is tiny! The exhaust also dumps right before the rear tire. This looked cool but when you had the doors opens you always got exhaust when stopped. The new exhaust needs a larger muffler and a proper over axle exhaust tail pipe.
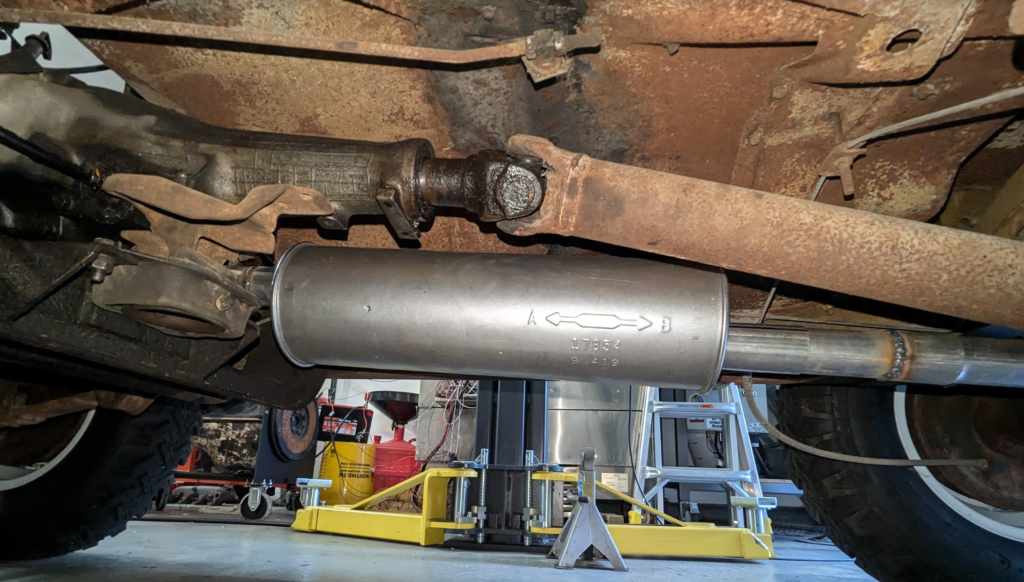
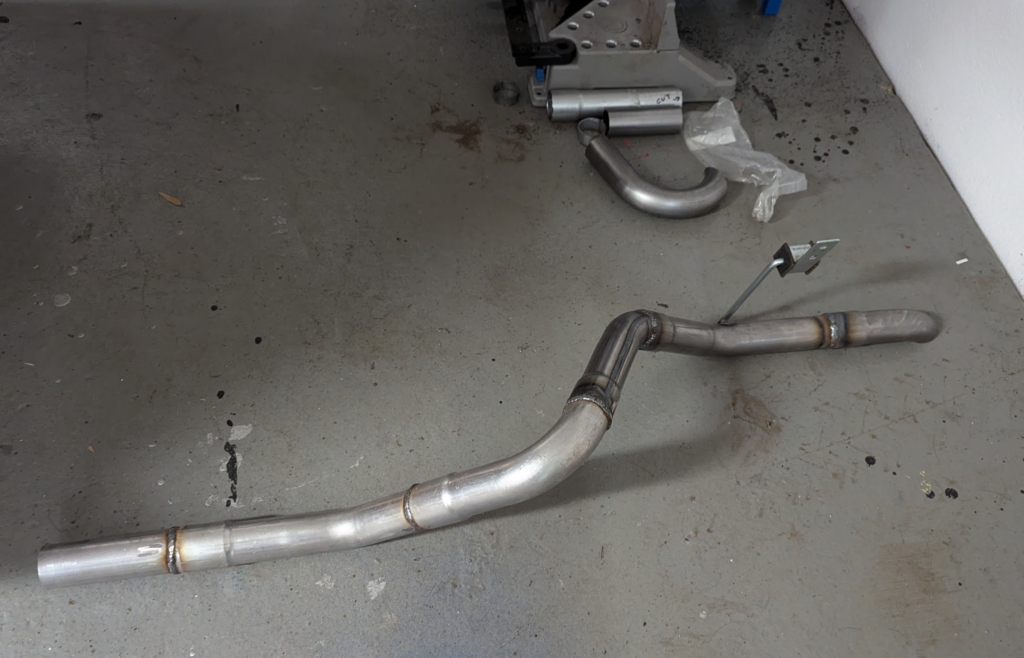
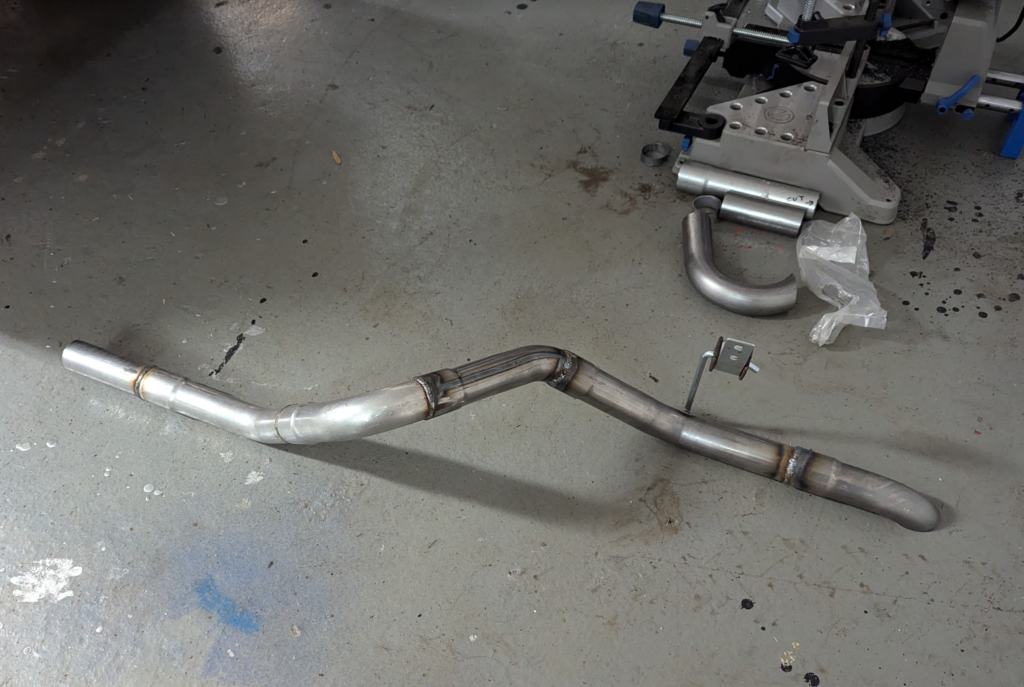
The exhaust from the manifold all the way back is all 2″ mild steel tubing. New muffler is a Walker SoundFX Universal 17854. It barely fits but it does fit. Could be shorter. For exhaust hangers I really like using Walker part number 36516.
The exhaust bolts to the manifold with the stock setup (3 bolt setup) but I swapped out the hardened steel donut with a 2″ crush gasket. I never could get the hardened steel donut to seal but the crush gasket sealed up first try!
After the muffler there is a slip fitting that the rest of the tailpipe slides into. An exhaust clamp holds the two together.
This is the tailpipe all welded up. The tailpipe was cut from a 180 piece of tubing. You can see the left overs from the cut.
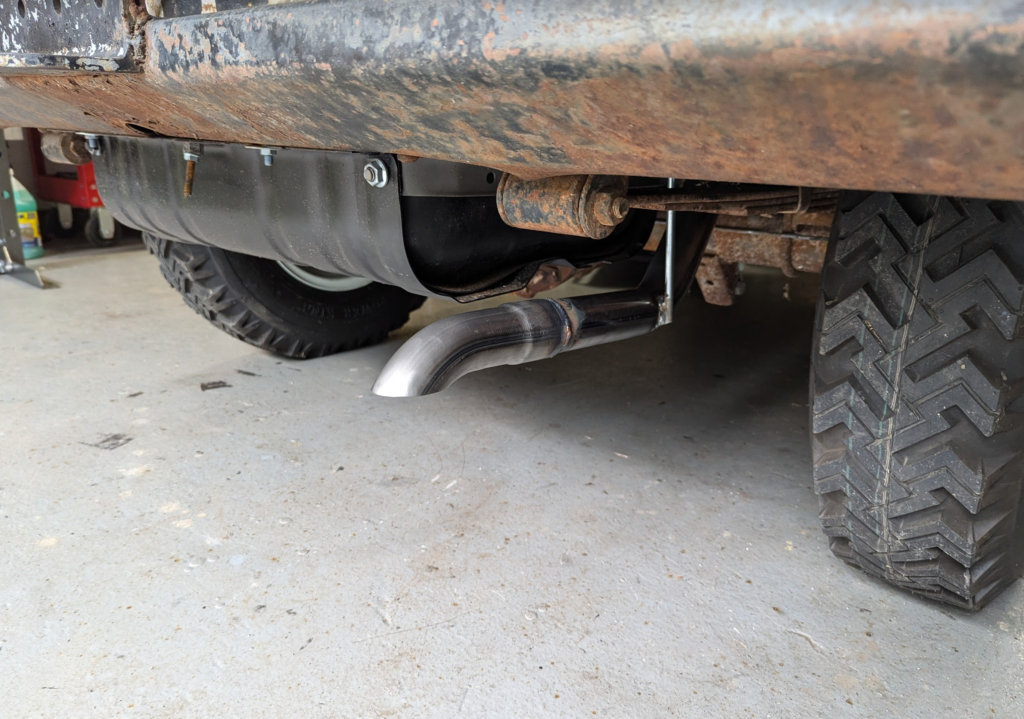
Exhaust installed back in!
Here is what it sounds like. The new muffler sounds much better (no rattle 4 cylinder noises) and fixing the manifold to down pipe connection got rid of the nasty exhaust leak.
And from the driver seat. Sorry for the YT Link for this one.
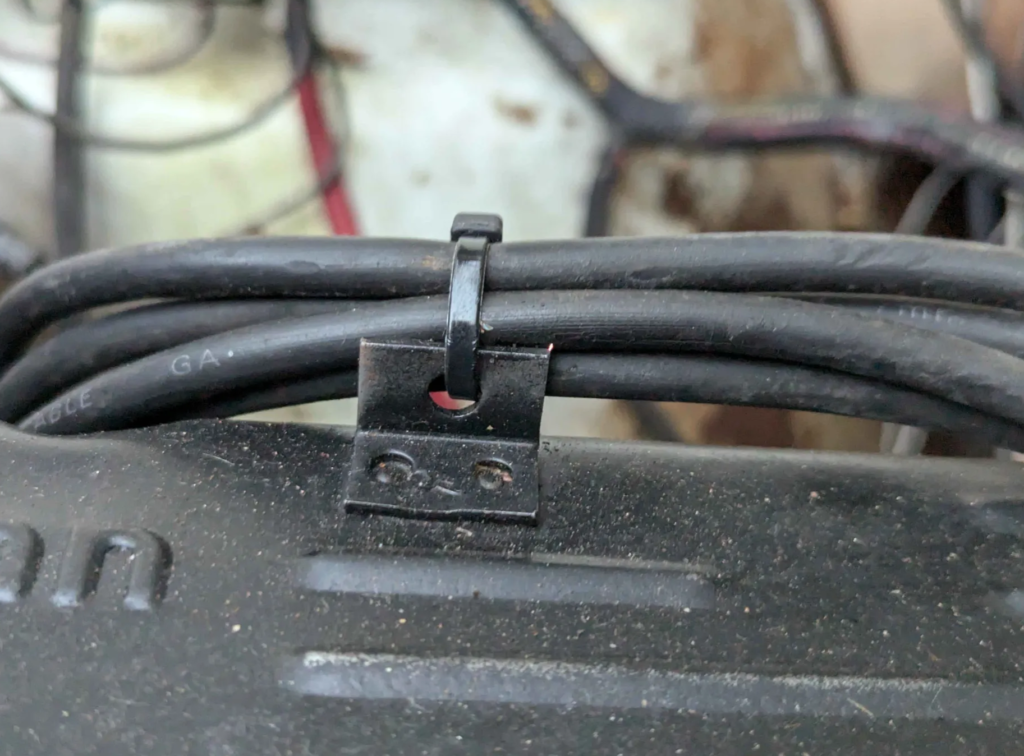
Looks like the spark plug wires on the DJ jeep have some micro cracks. Manifested as a spark hitting the valve cover here! Good thing the DJ jeep’s part box has a full set of new spark plug wires.
Easy fix. Interesting that the engine didn’t really have any problems running like this but the cracks would probably get worse over time.
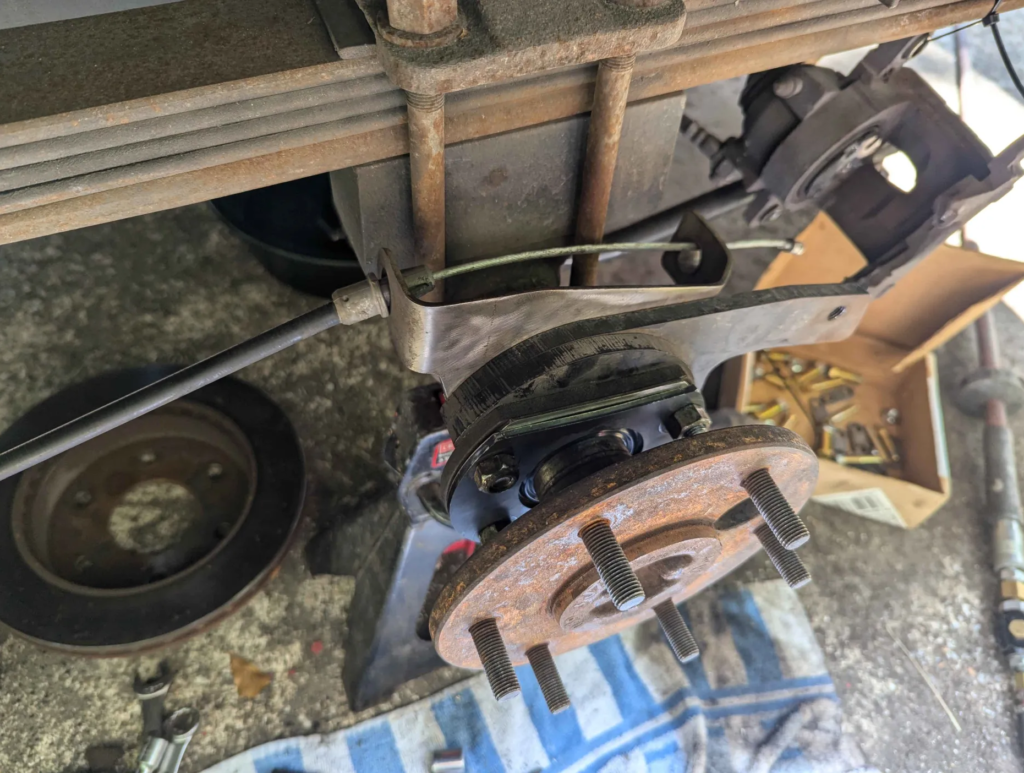
The wagoneer has started to make noises in the rear driver side area. It sounded like shaah shaah shaah. Applying brakes didn’t change the noise. Probably bearings?
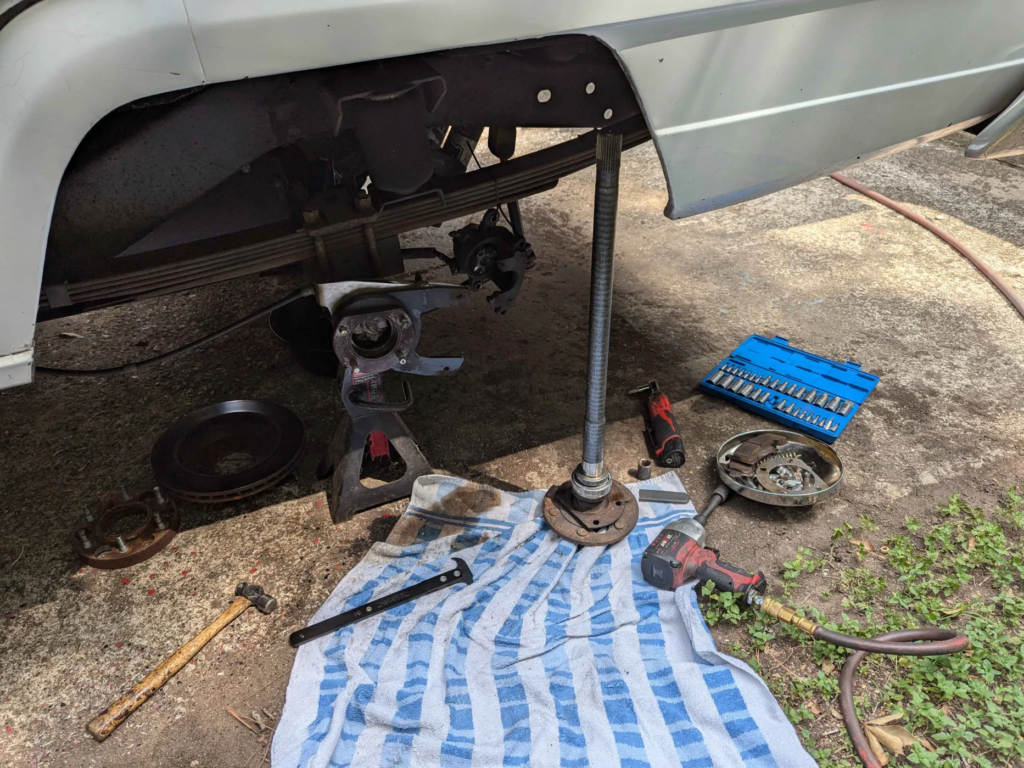
I tore down the driver side and found that the axle flange had more then 1/8″ of axial play!
These are the references I am using to help reassemble everything
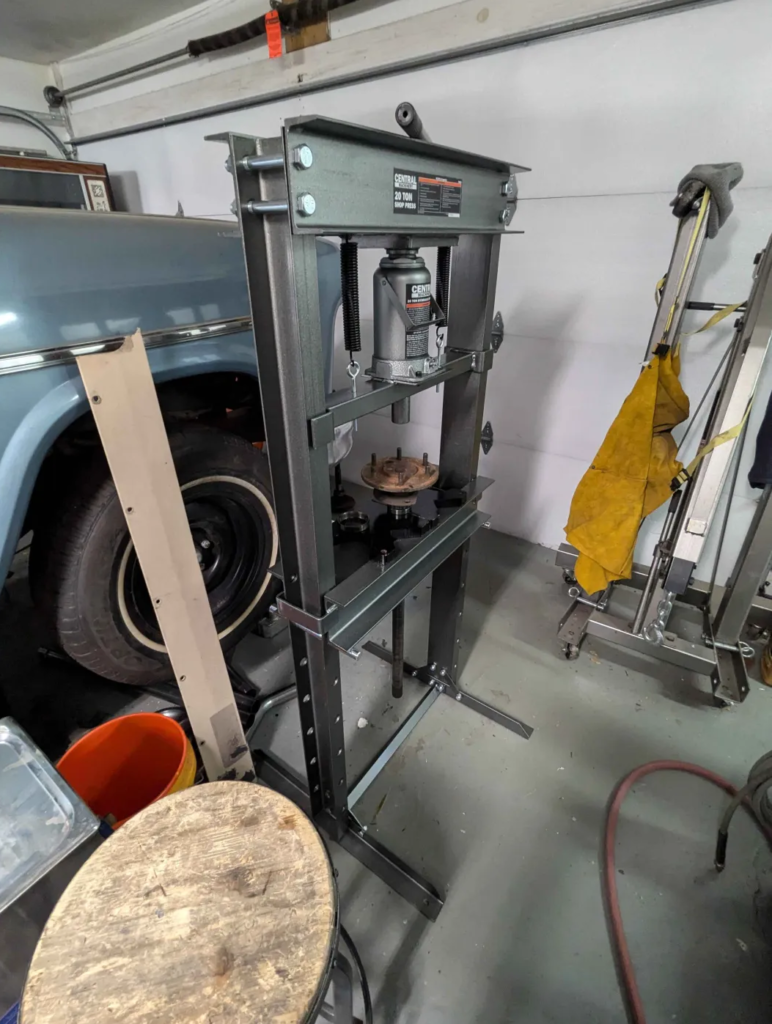
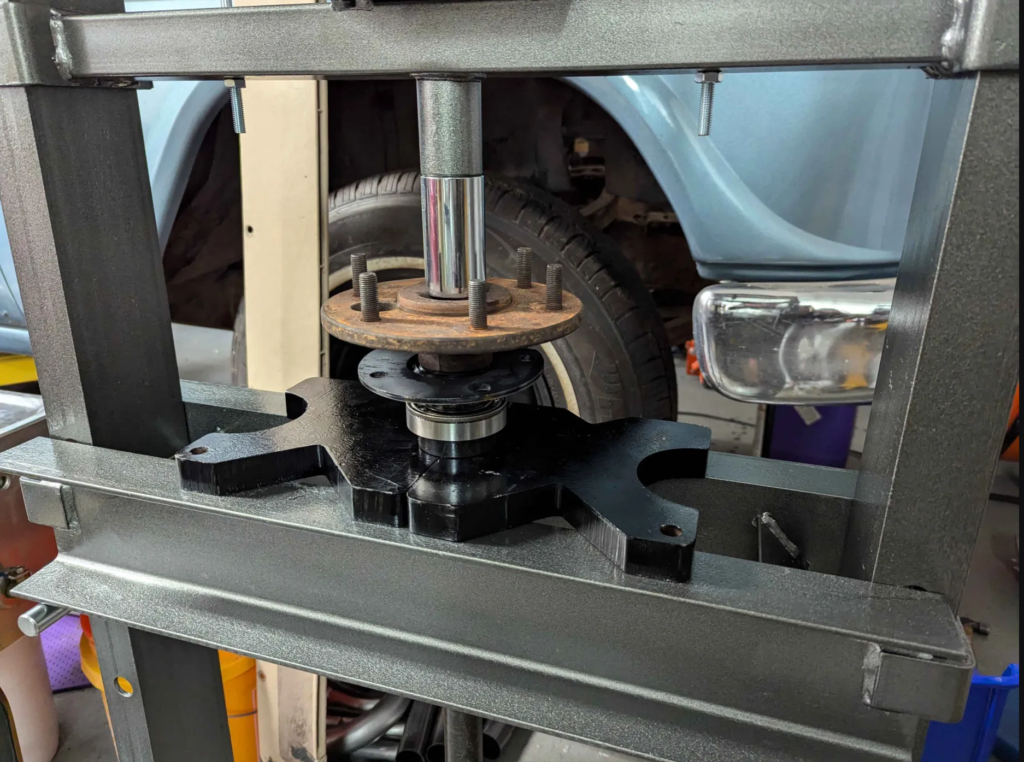
Disassembly is easy. Reassembly requires a press to push the bearings onto the axle shaft. A trip to Harbor Freight and some assembly later, a 20 Ton Press appeared in my garage.
After reassembly, the play in the bearings was gone and there was no noise on the test drive! Another thing fixed.
The cabling for the fan arrived today. 8AWG wire and the appropriate cable lugs to attach it to the battery.
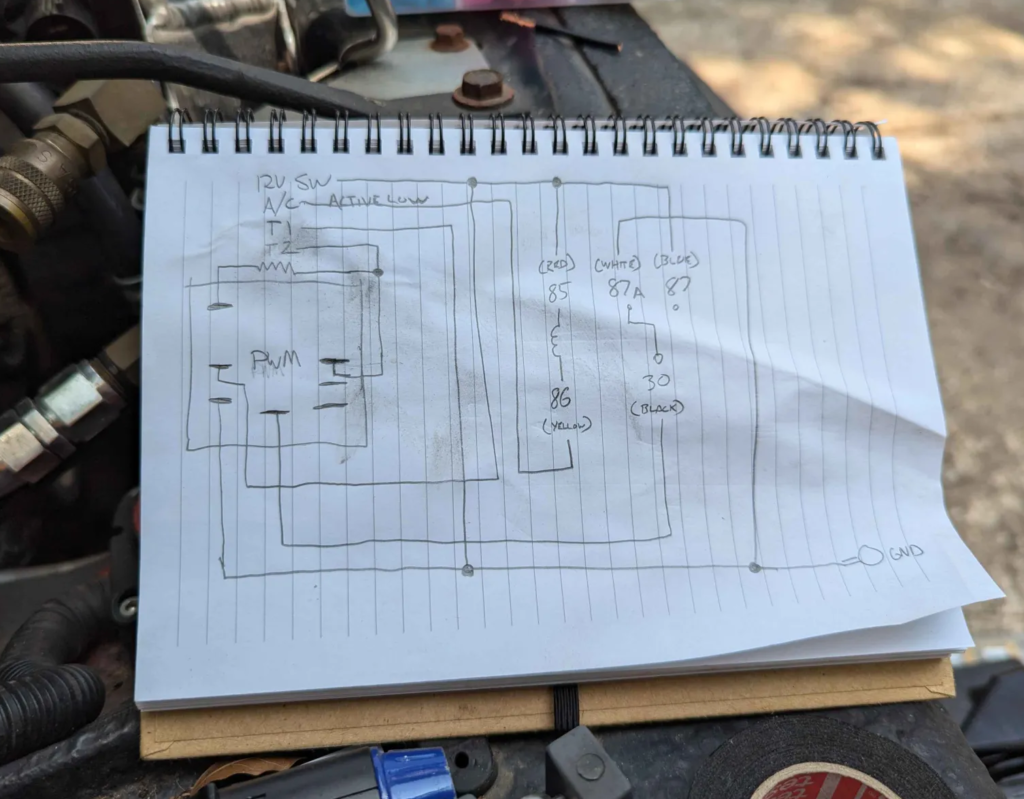
This is the PWM controller I am going to use while I test this fan out. It seems built well but the only problem is the A/C override is active high (apply 12V). This is the old school way of running your electric fan when the A/C is running. Essentially, you would just tie this to your compressor clutch on the A/C. Fan turns on when the compressor is running. This isn’t the correct way to do this though. When you are at highway speeds you don’t want the fan to spin up just when the A/C compressor is running. The airflow from driving should be more then enough to cool the condenser.
To activate the fan for the A/C system a trinary switch should be used on the high side of the compressor. This is basically a high pressure safety switch and a lower “fan enable” switch built into one component.
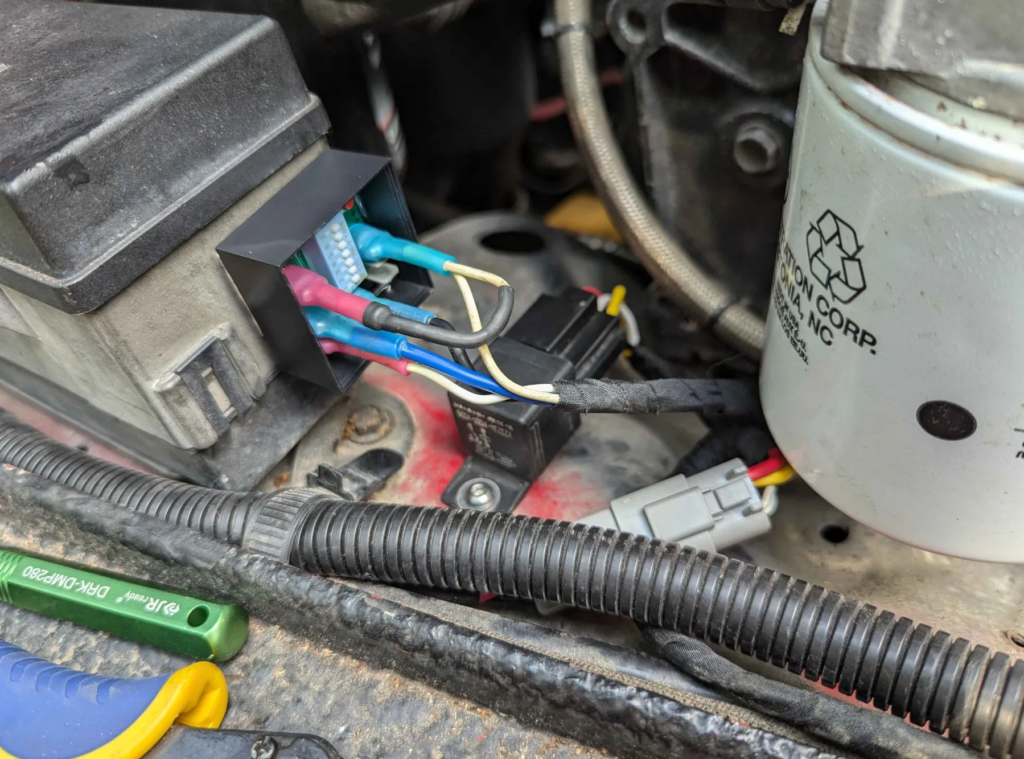
These trinary switches switch to ground to enable the fan for the A/C. Exact opposite of what this PWM controller wants. I flipped the logic with a relay.
I currently have the PWM controller programmed to start spinning the motor at 196F. Then full speed is set at 225F. As the temperature swings during that range the fan goes faster.
Current testing shows this fan is amazing. It was 99F today. With A/C on max, the fan was running at the slowest speed and kept the engine at 198F. The old fan would barely keep it at 220F.. routinely peaking at 230F.
The wagoneer needs one of these fans! Next week I will be taking the Jeep on road trip and will be able to test heat soaking the engine, highway cooling, traffic, ect. and really see what this fan can do.
The PWM controller is set to 100Hz PWM with negative polarity. Range of pulse swing is 15% to 90%.
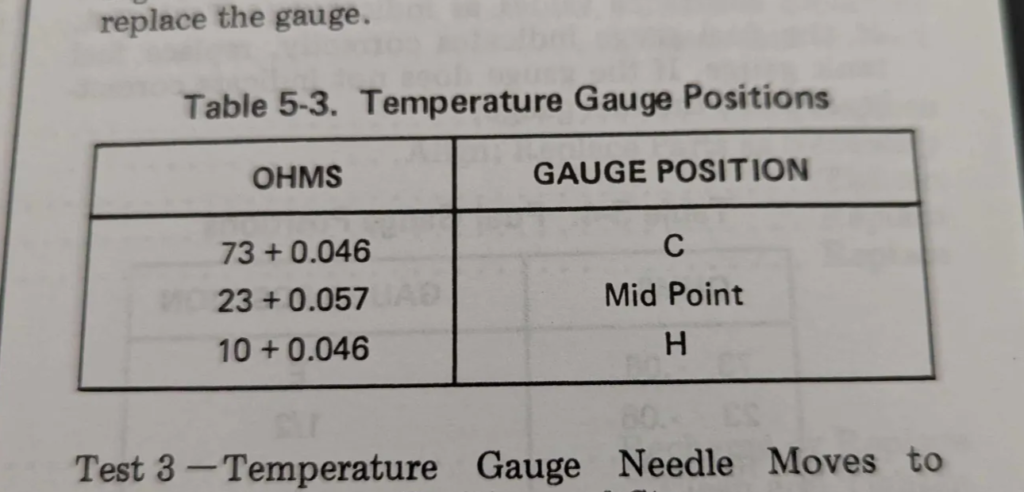
When i was getting all the wiring and electronics working for the DJ jeep, the temperature sensor didn’t seem to work. Turned out the sensor was the wrong resistance range. The factory servcice manual says the sensor should read like the following.
After some searching I found that the part should be J3177593. When it arrived I tested it.
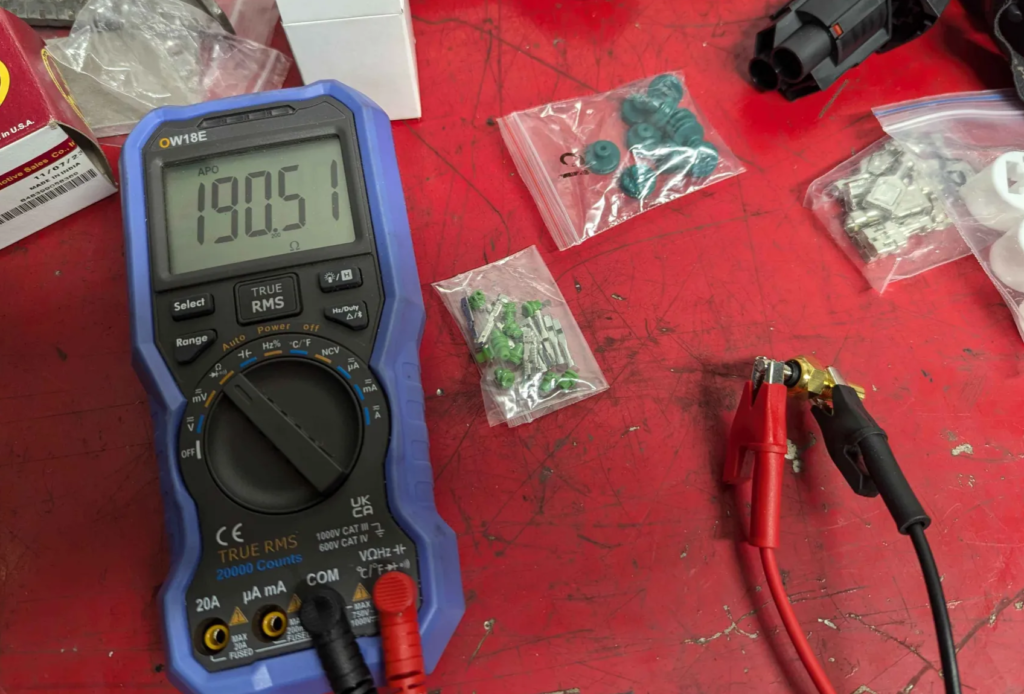
Hmm at room temp (cold?) I am reading 190 ohms. This is similar to the sensor I was using. Not a good sign.
In ~200F water, we are measuring 26 ohms. Which is closer to what we want! The current sensor the DJ has was reading around 66 ohms at this temperature.
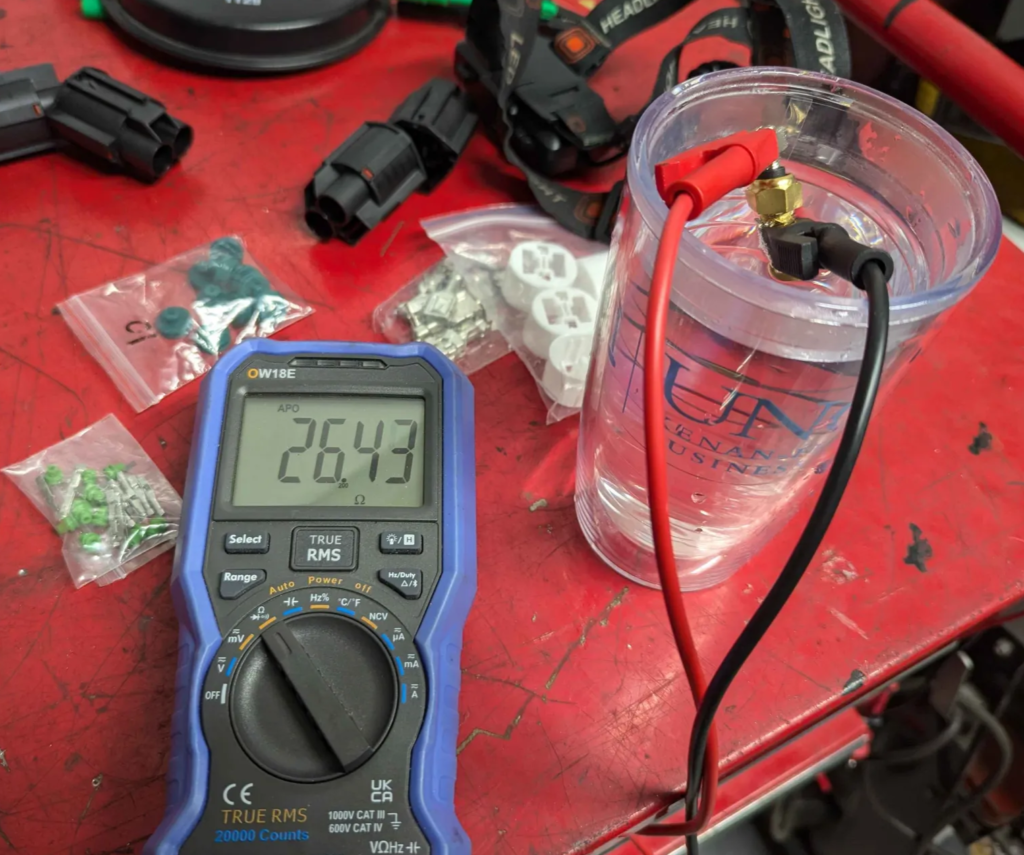
I installed the sensor and brought the engine to temperature. The gauge is in the middle of the green area.
Lets call this a success! Temperature “idiot” gauge is working. If it hits the H area that is the “turn it off now” range of temp :)
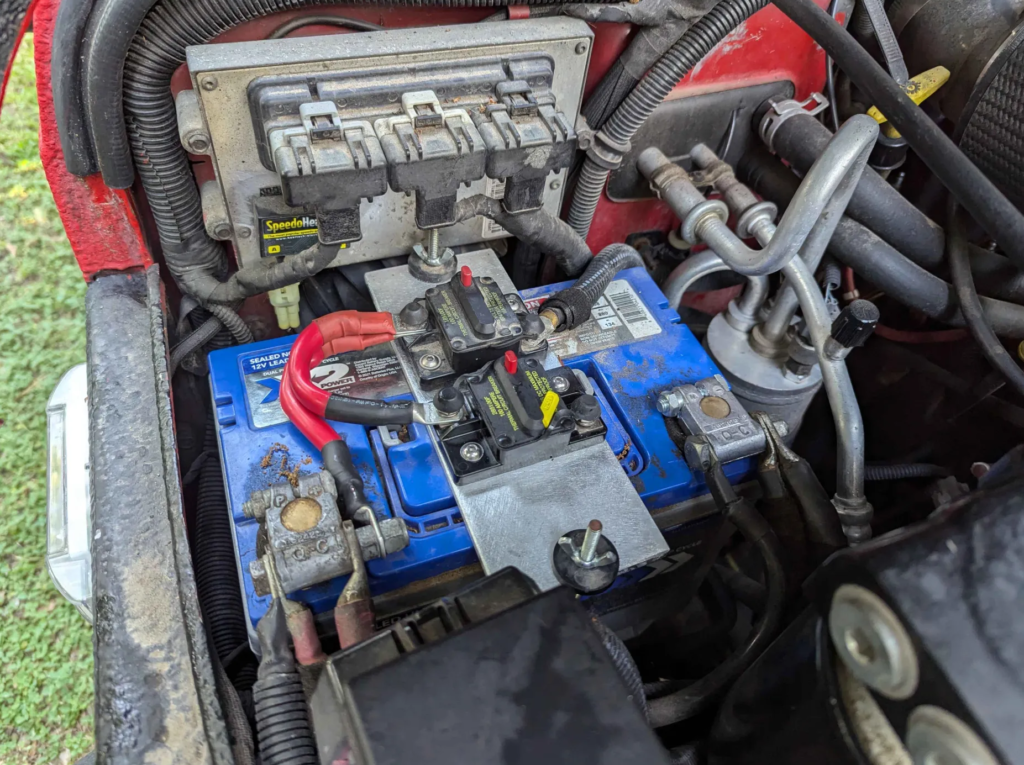
That big 850W fan needs some big wires and a way to safely deliver the current. I am going to use a 100A automotive breaker by Blue Sea. I’ve been using one for the rest of the Auxilary Power on the Jeep for years now and its been working great.
I cut a new battery hold down and mounted the breakers on top. One goes to the rest of the auxiliary system and the new one (its clean!) will route to the fan.
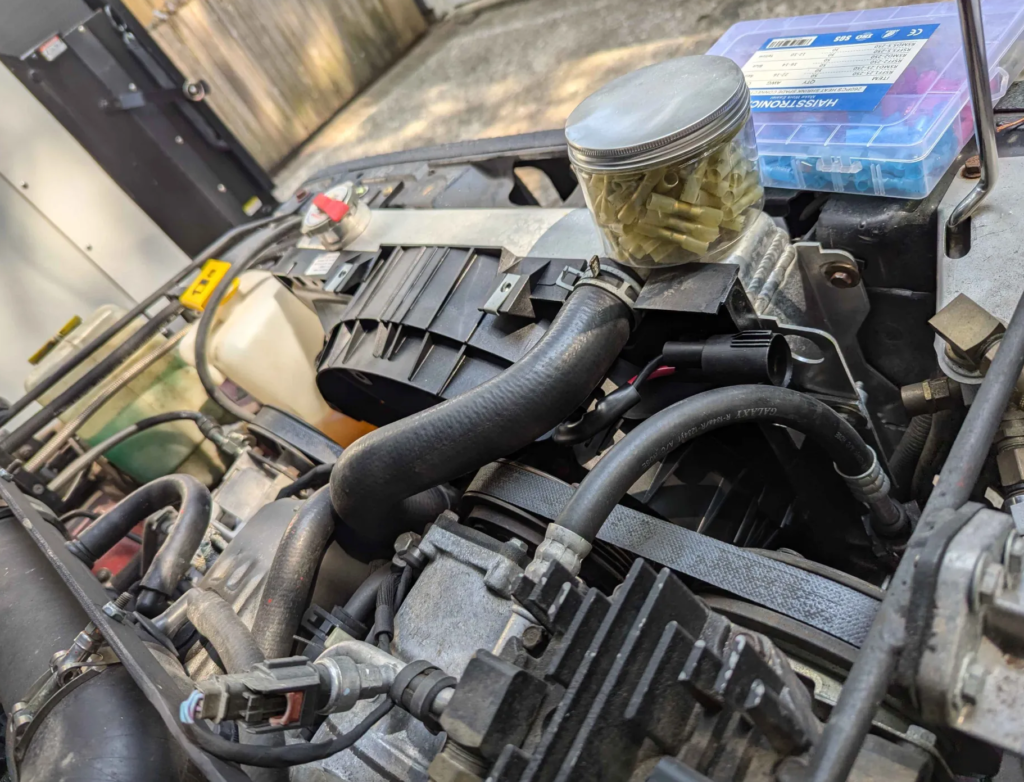
Next is to wire 8AWG wire from the breaker to the fan. I also have an off shelf PWM fan controller I will use till I get mine designed and built.
I have been running different combinations of mechanical and electric fans over the years to try to keep the TJ jeep cool. I have been running a Delta Pag 18″ brushless fan with much success for the past 2 year. The fan kept the engine cool at all conditions but had longevity problems. Currently the fan makes tons of bearing noise now and keeps killing the motor controllers. Lets get rid of it and go with something that is cheaper and OEM spec.
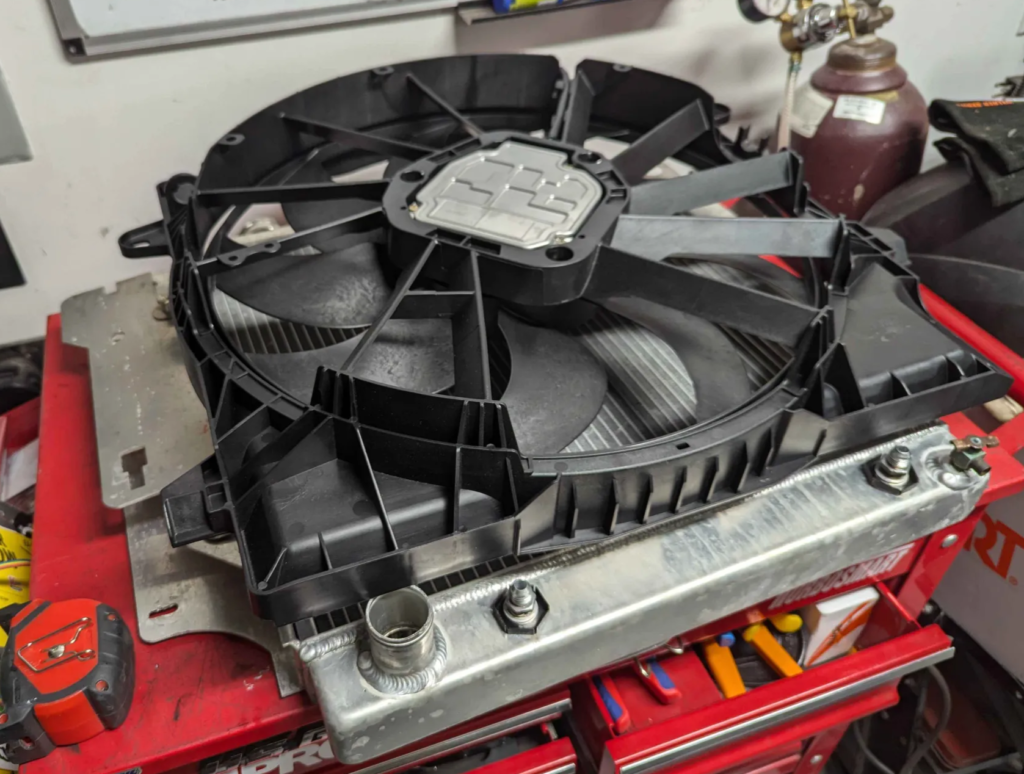
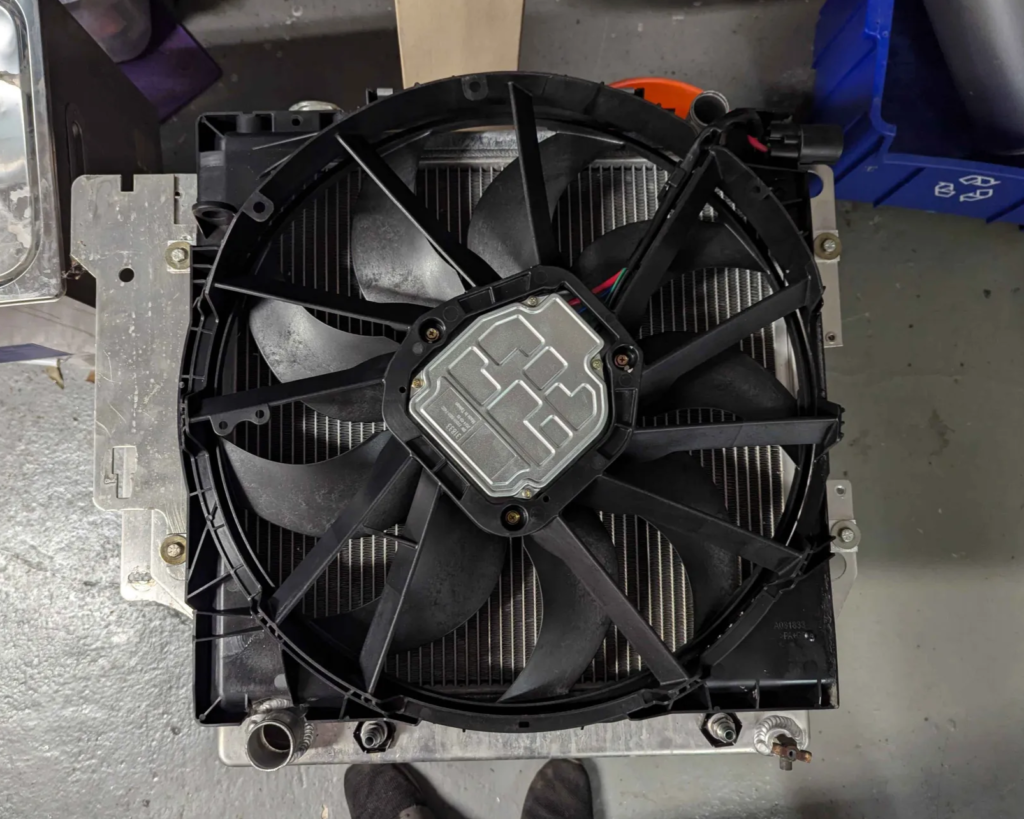
Top is the new fan I am going to try. It is an OEM fan for a JL/JT Jeep in Mojave Trim or Heavy Duty tow package. This fan is rated for 850W with 20″ of blade. Part number 68272755AD. These fans are used on lots of modern vehicles ranging from dodges, Jeeps, Mercs, BMWs, ect. Really easy to find. They all have just some variation of plastic shroud on it. The old/current fan is a ~360W 18″ fan for comparison. The new fan will work… or else ;)
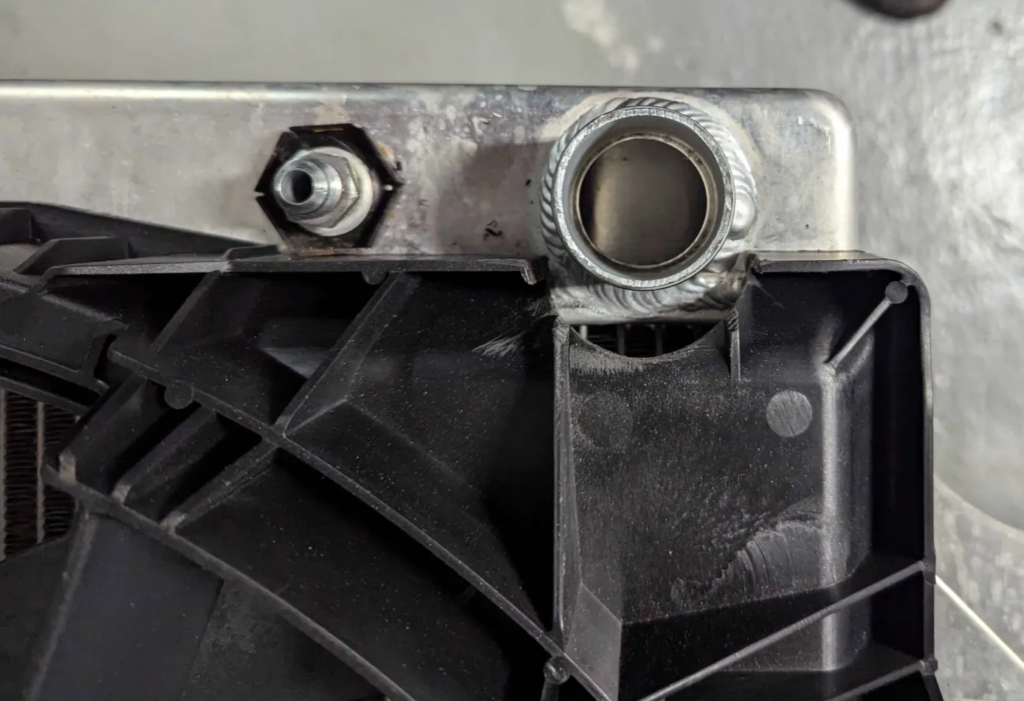
Here is the new fan set over the radiator. It is too large but I think I can trim the shroud to make it fit.
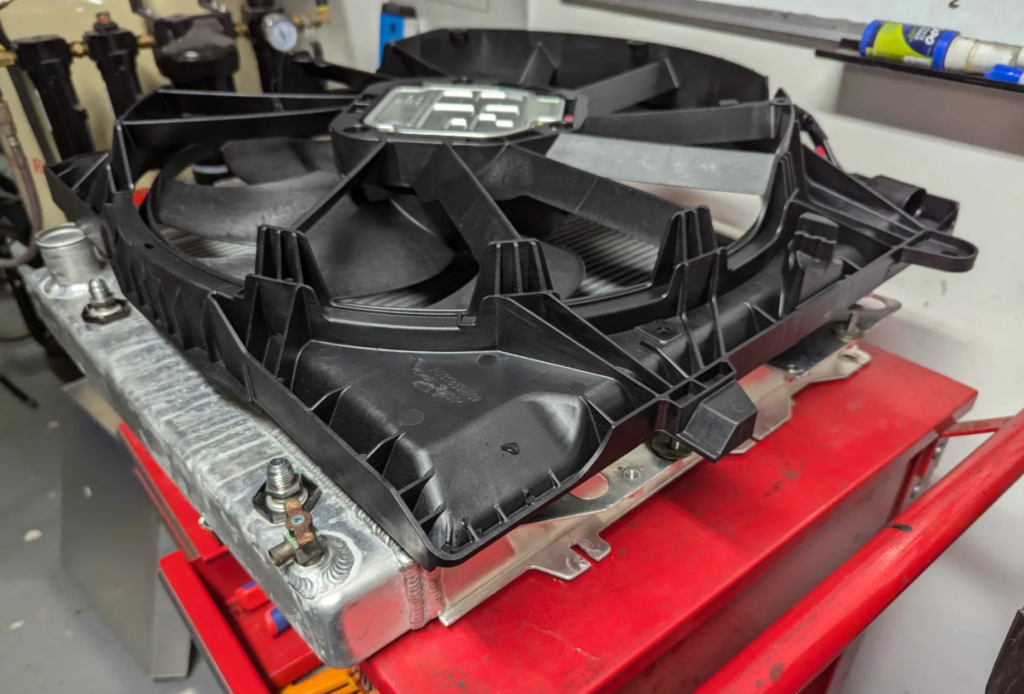
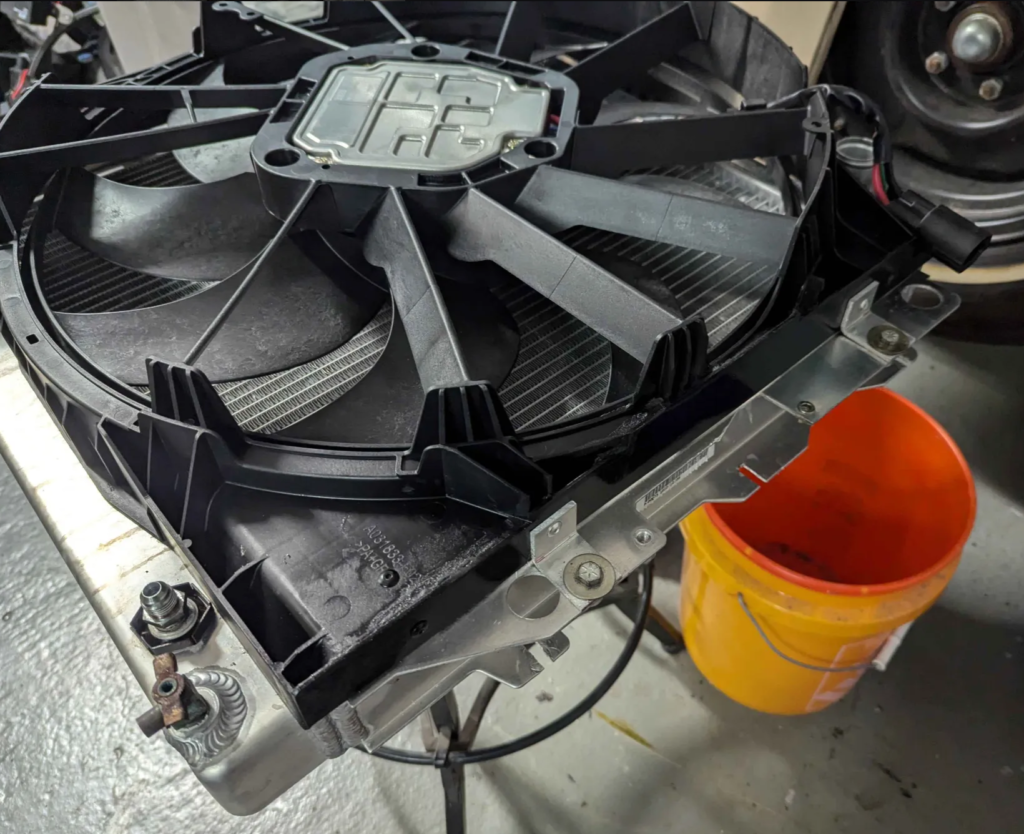
I trimmed the shroud for the hoses and then reduced the width and epoxied in an aluminum sheet cut to fill the opening. Then made some little aluminum brackets to mount the fan to the radiator.
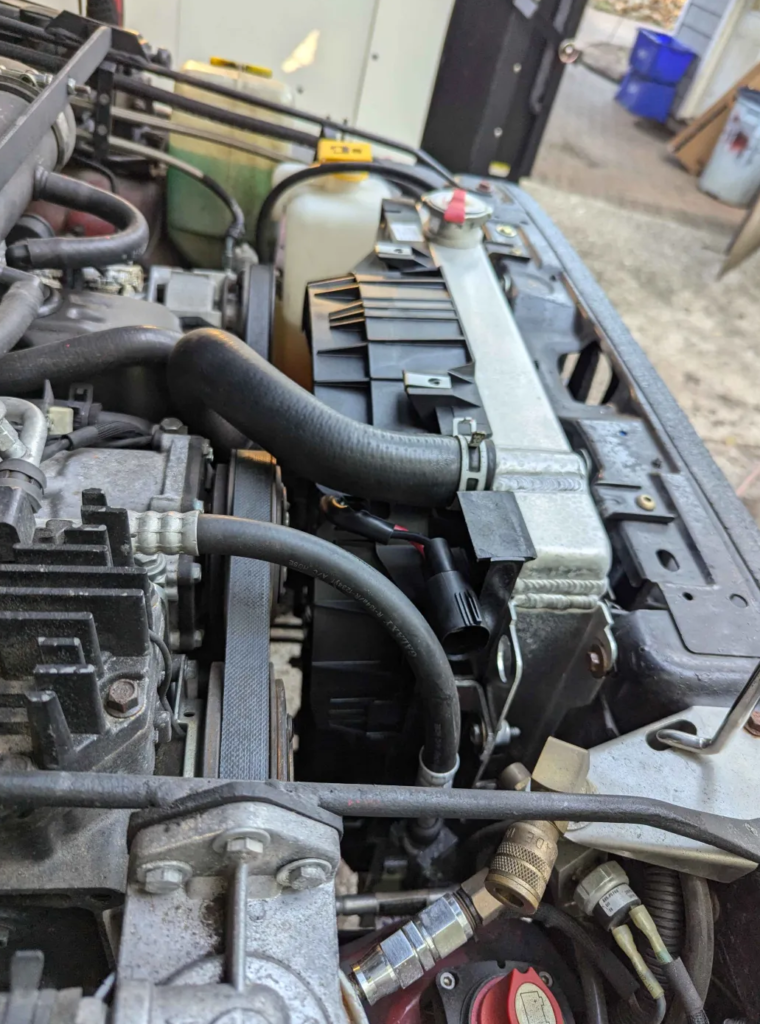
Fan fits! Takes up more space then the delta pag one but still clears everything. Will need a PWM controller for this fan. That is next.
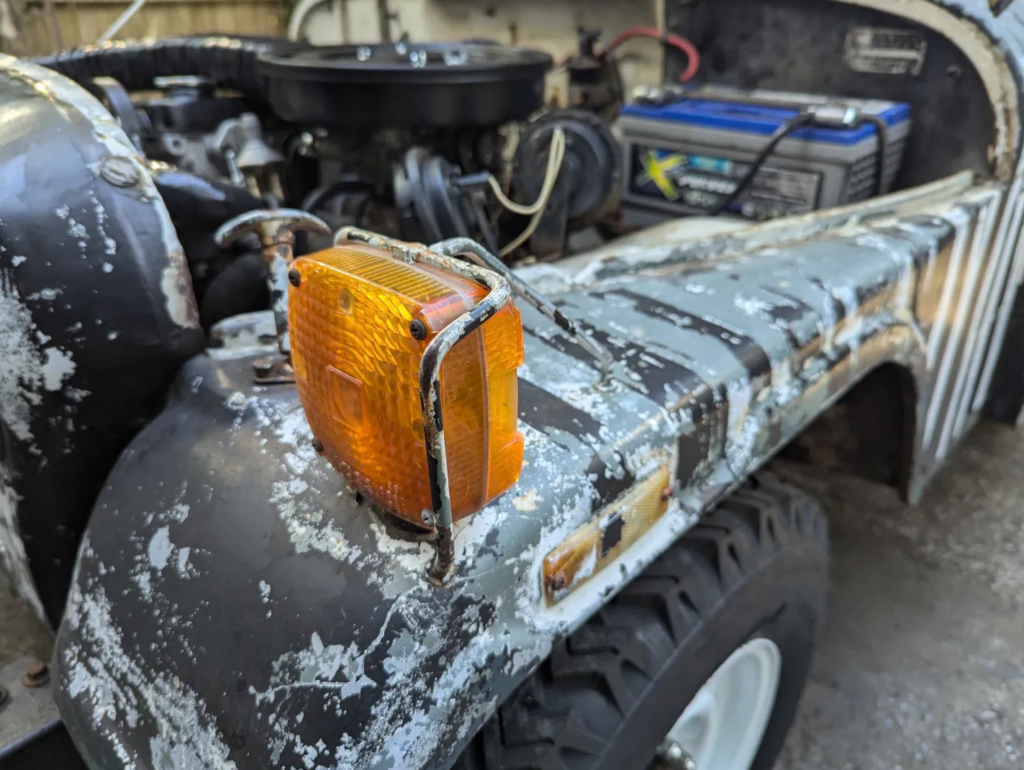
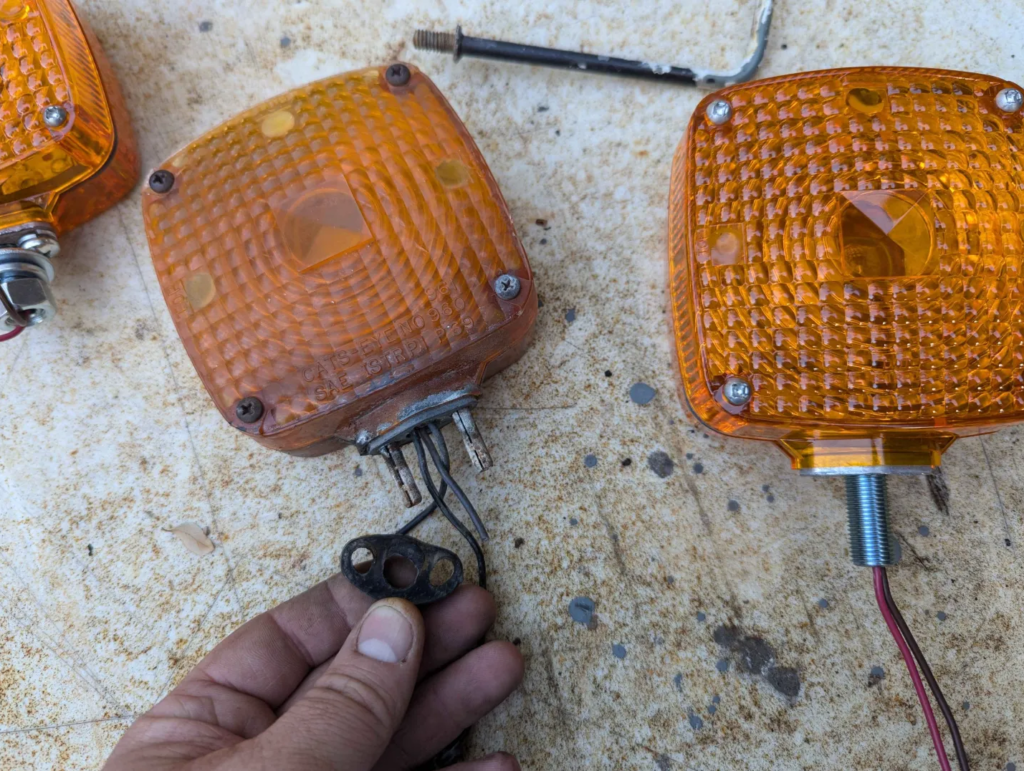
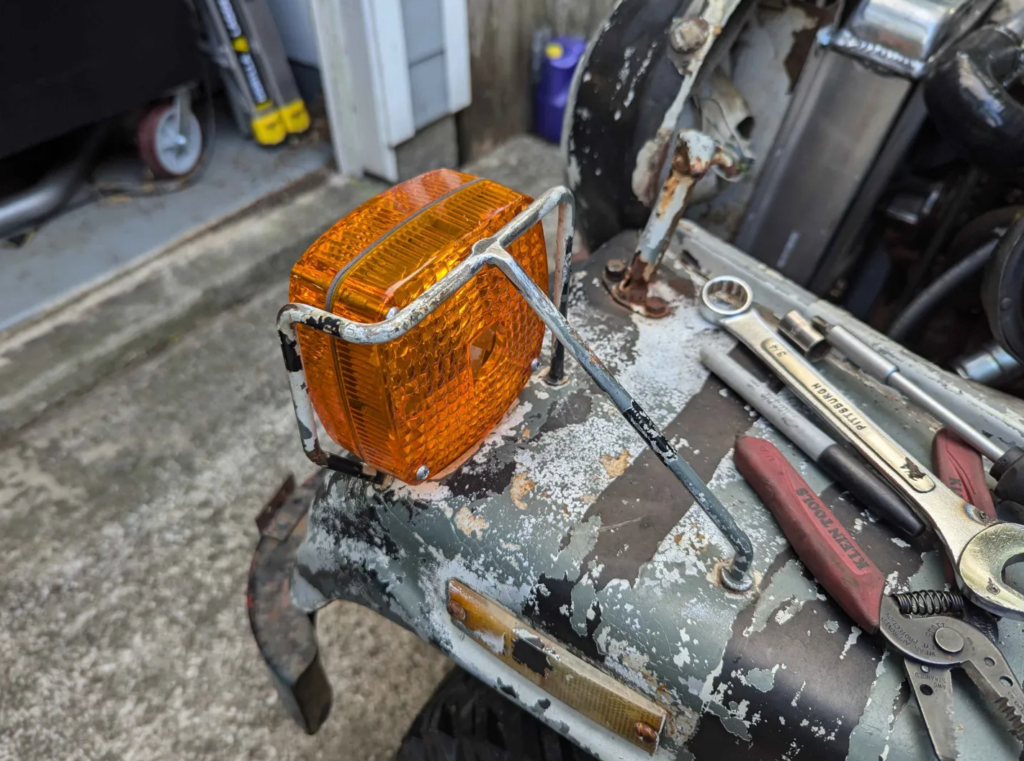
The original turn signals are crusty and leak water inside. I wanted to rebuild them with new lenses but the internals and the bulb housings contacts are all rusted and corroded up.
No one makes the same lights anymore but I found these on ebay that are similar.
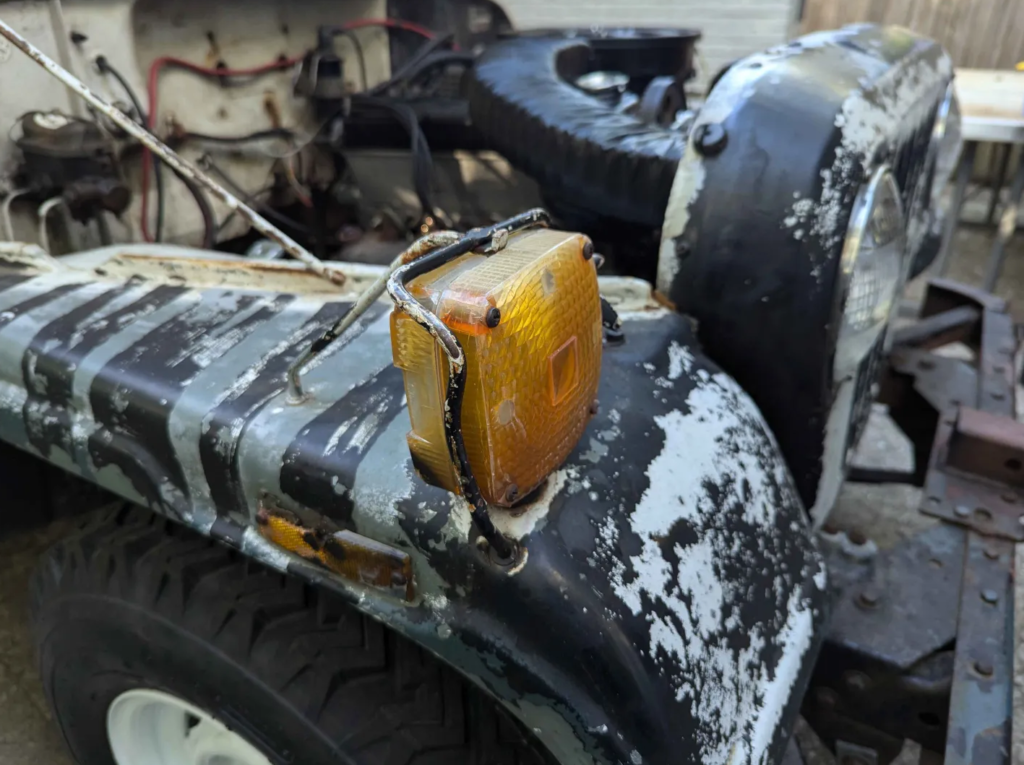
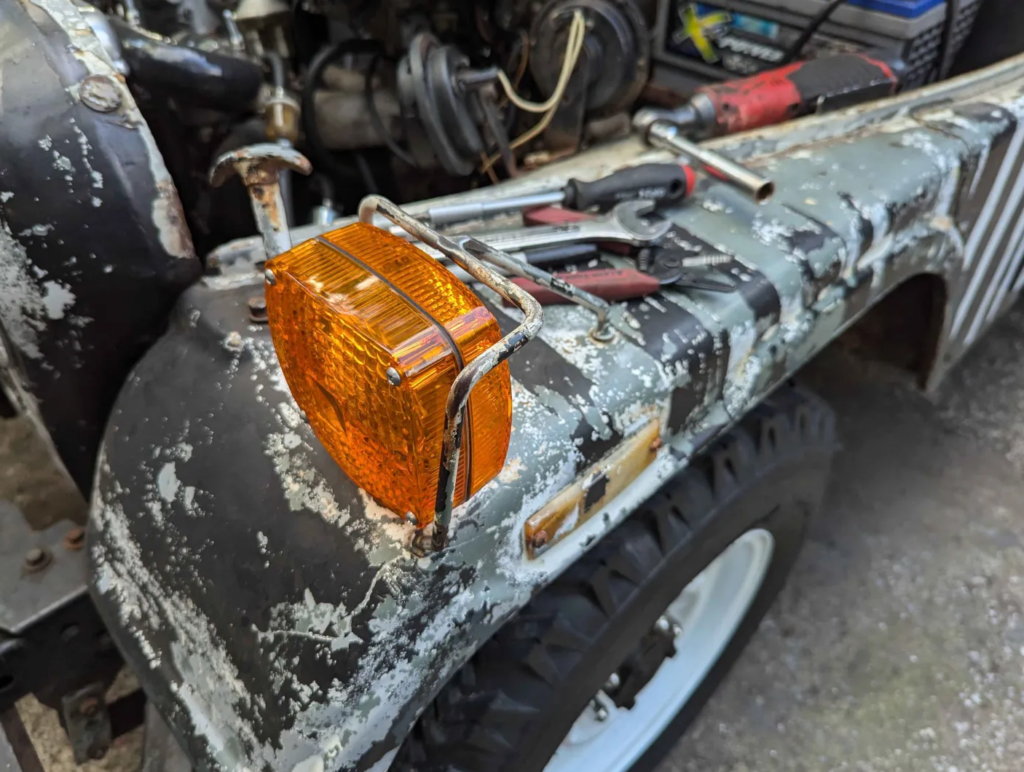
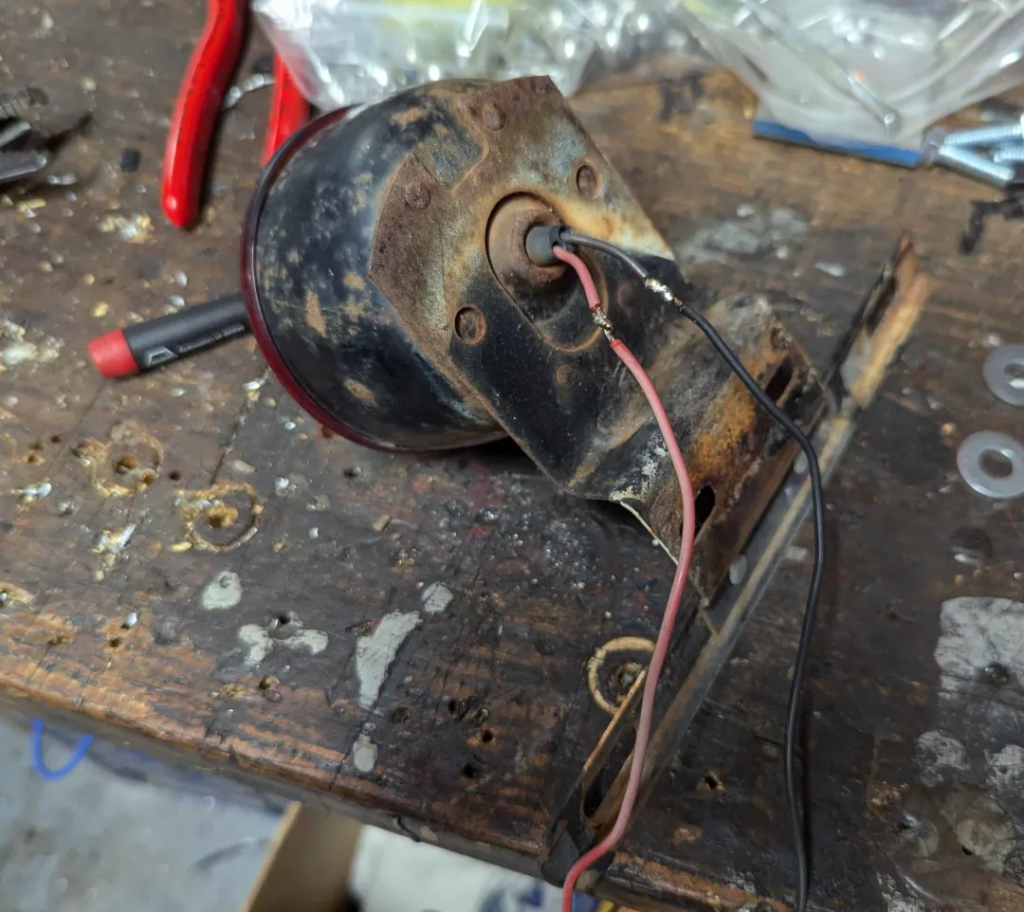
I had to adapt the stock plastic bracket/spacer to fit the single threaded stud. Then bolt it on and wire it up!
These new lights don’t have provisions for the metal cages to snap on. I could leave off the metal cages but part of the look is the cage. I welded the cages together to make up for this.
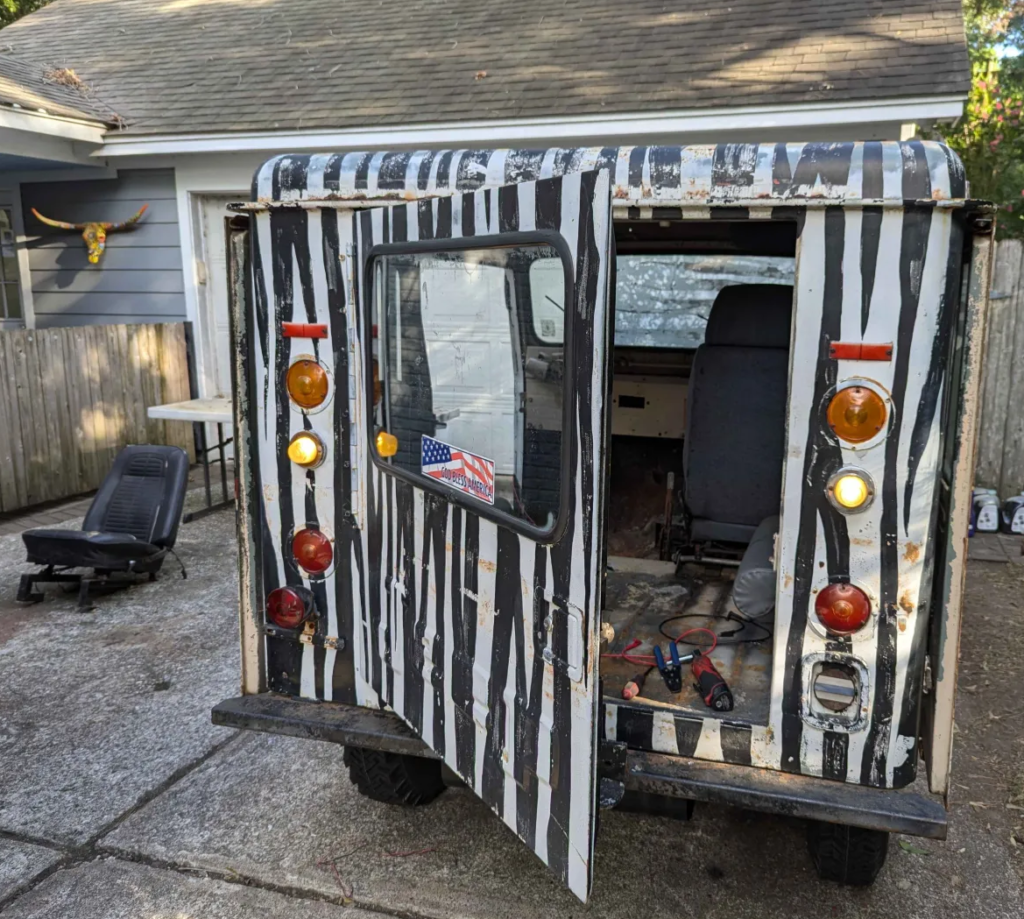
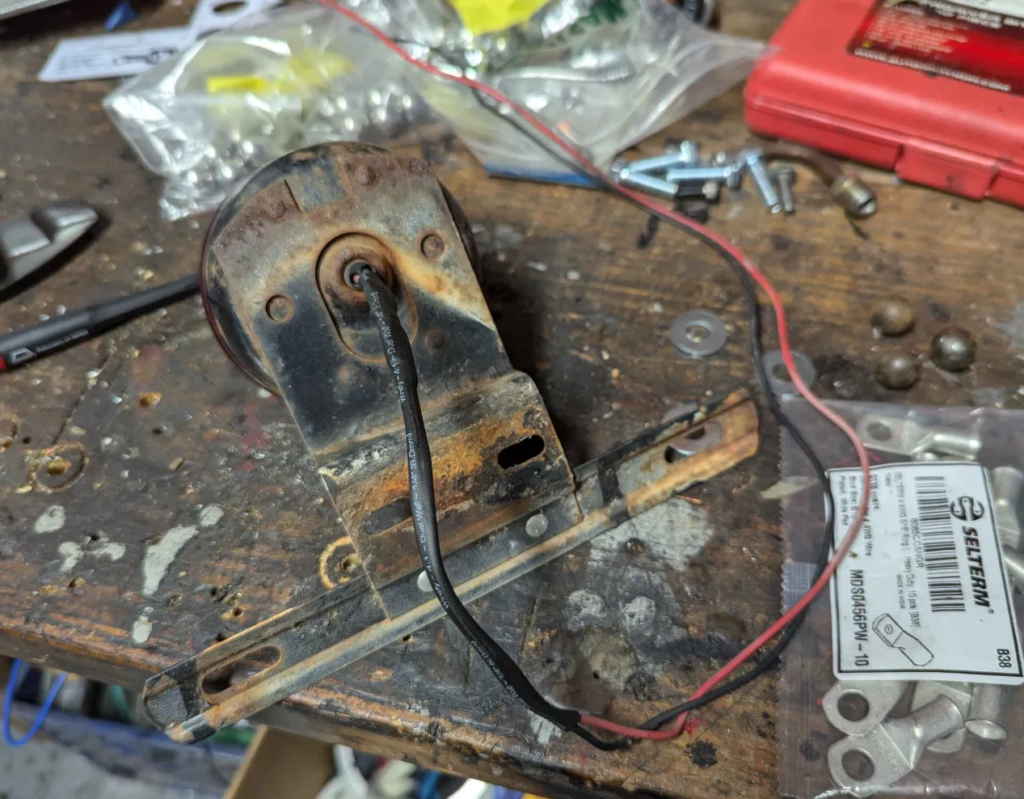
With the front headlights and turn signals working, lets go to the rear.
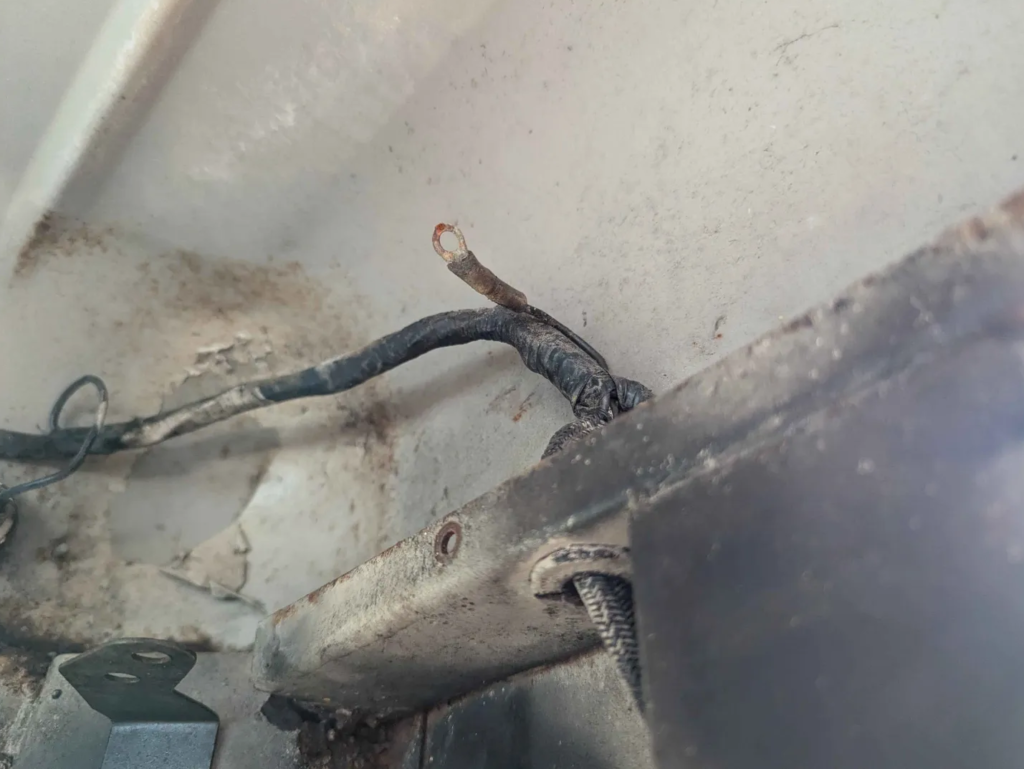
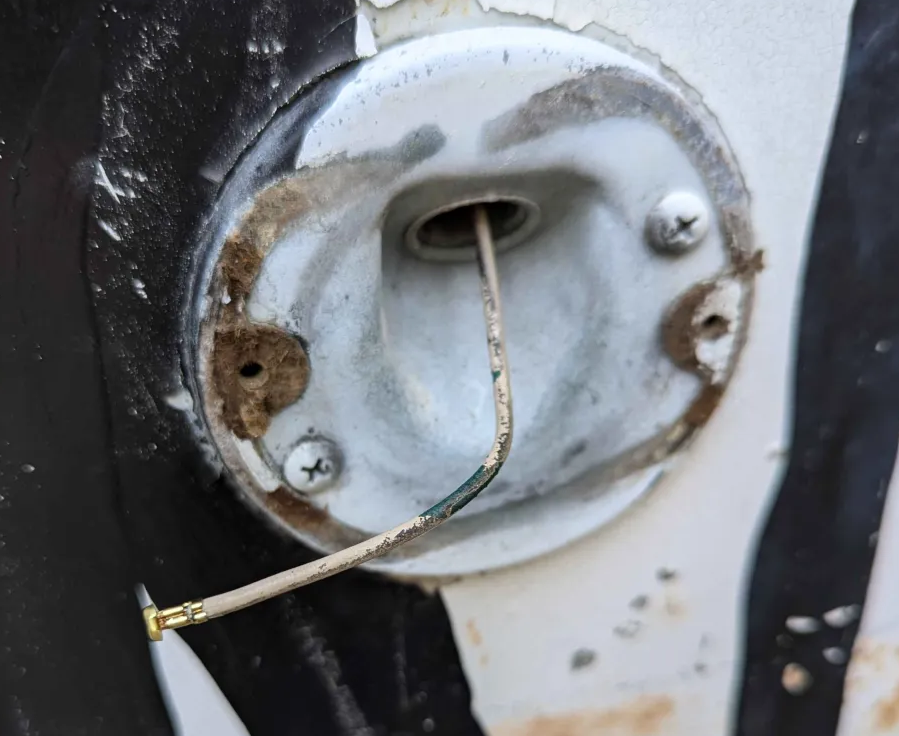
None of the lights in the back worked. Working through the harness I found this ring terminal not attached to anything.
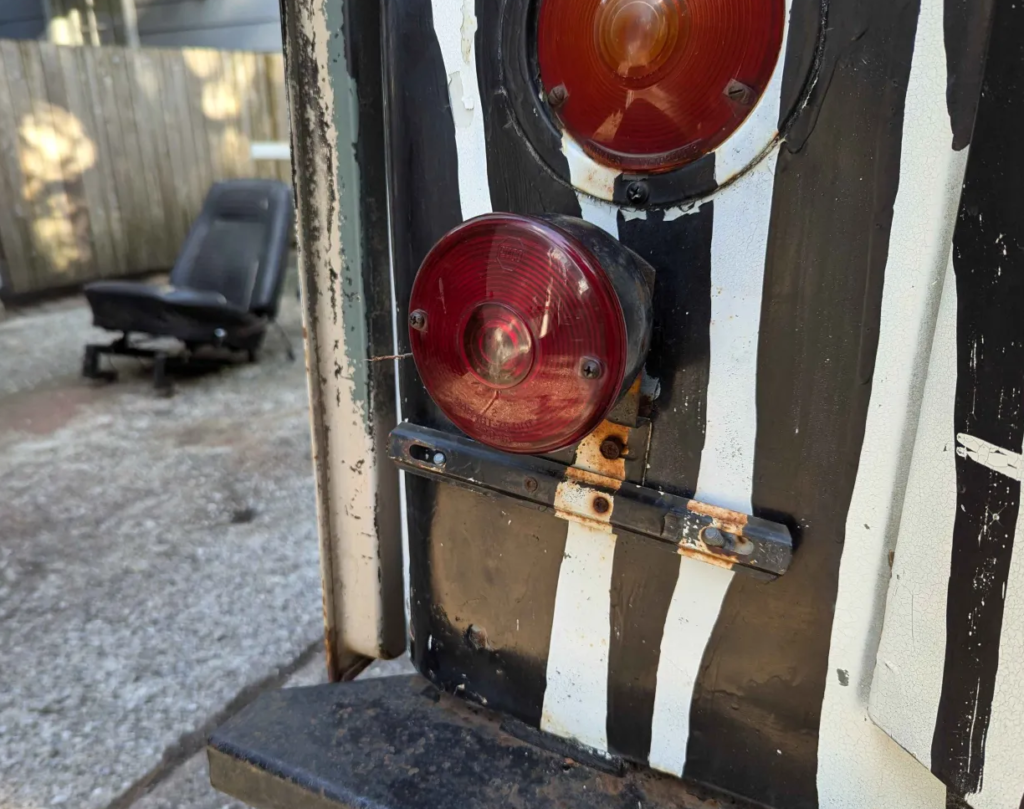
This terminal is connected to the ground side of the entire rear lights…. Well clean up the terminal and attach it to the chassis. This got most of the lights working. Brakes and Turn signals. Back up lights still don’t work tho.
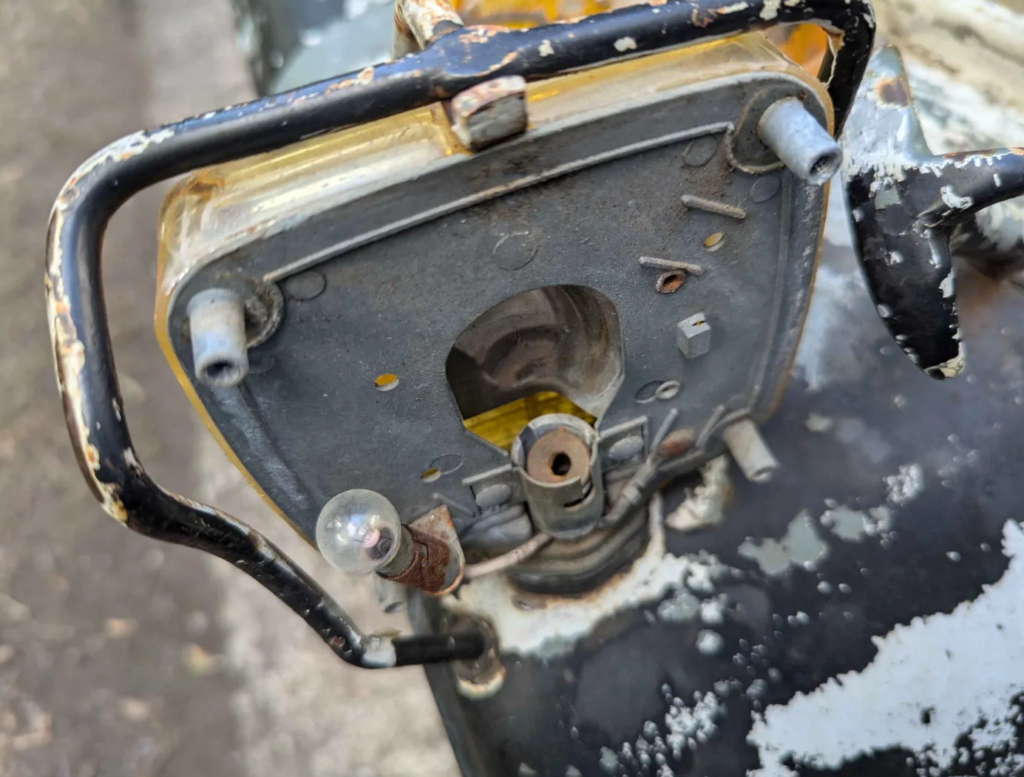
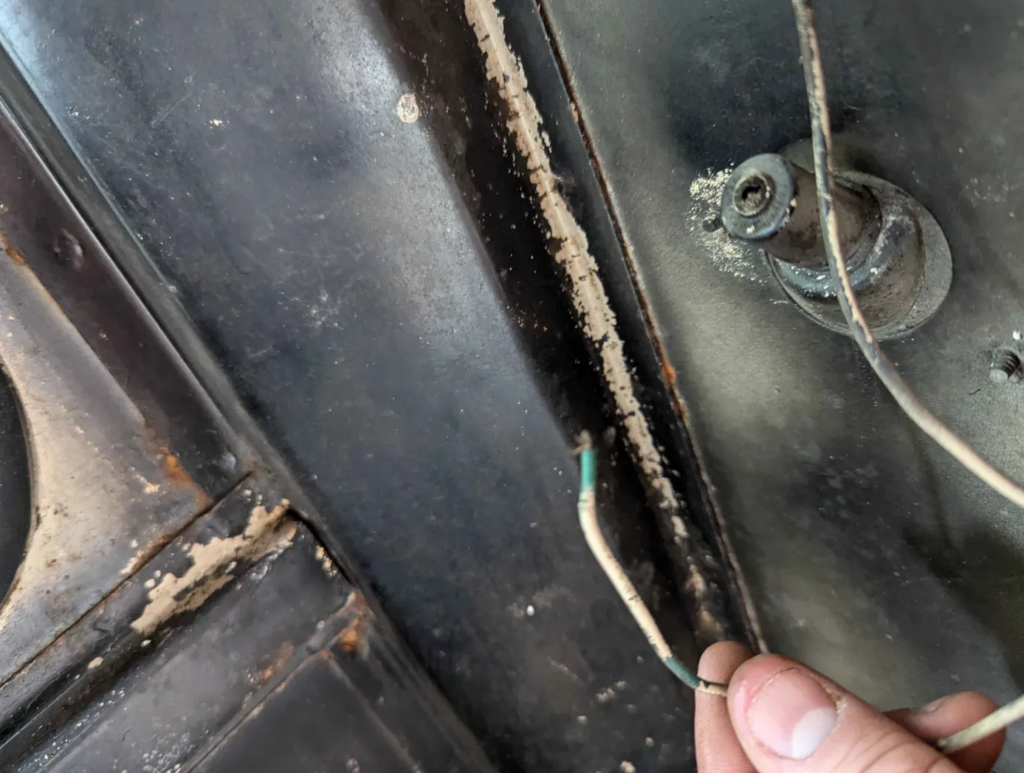
Taking apart the lights and I find that the bulb terminals are gone/corroded.
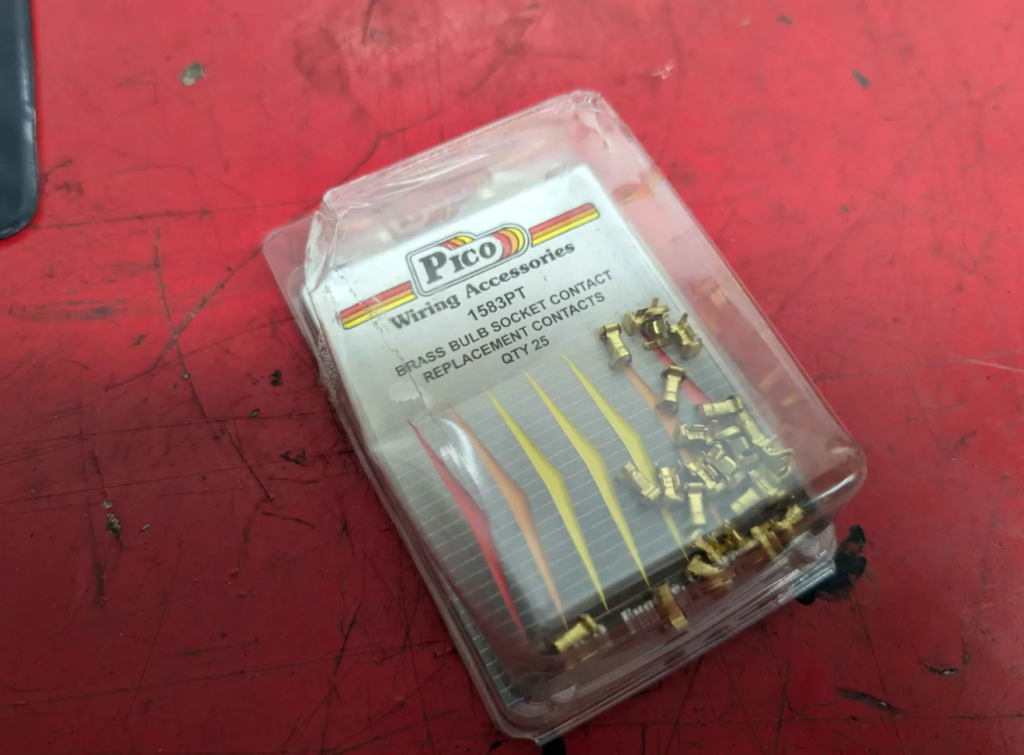
Pico makes crimp on bulb socket contacts. Part Number 1583PT. Kinda pricey but they allow you to rebuild old light housings with new contacts.
After putting it back together the rear lights still didnt work! Testing the neutral safety switch indicates that the switch is also broken, this switch also controls the reverse lights. Bypassing the NSS lights up the rear back up lights. Definitely the switch. Ordered a NSS that fits the TF-904 transmission.
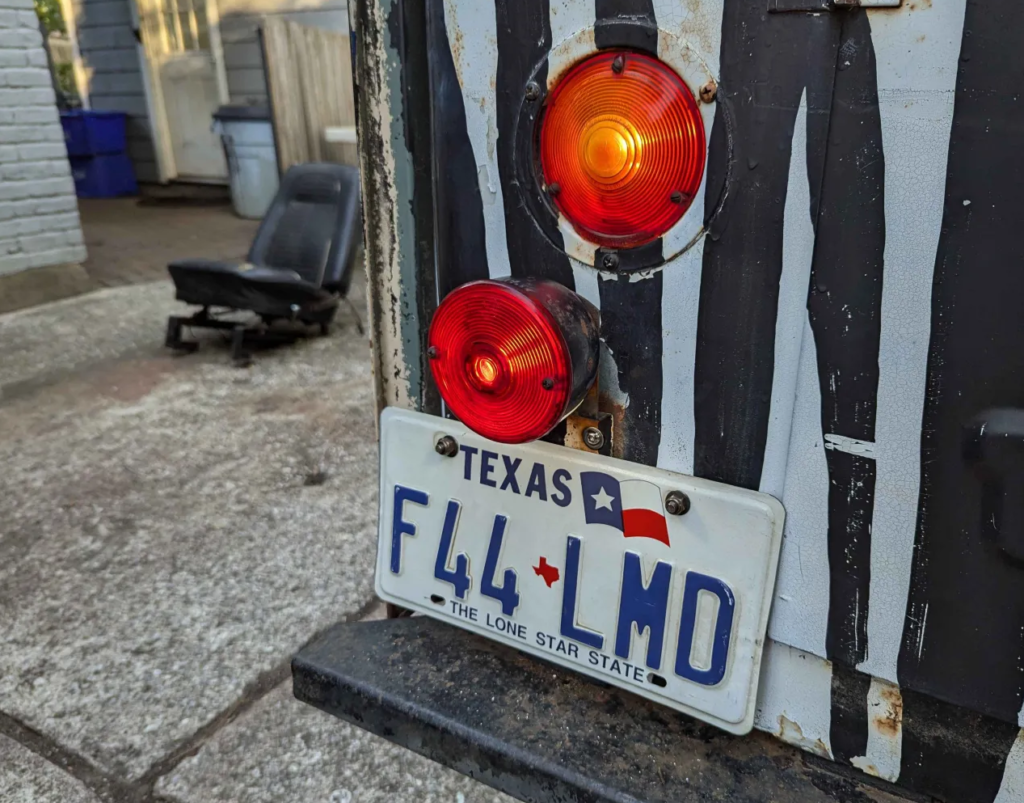
Last light to get working is the license plate light. The one on the Jeep isnt original but lets get it working since it exists.
The wiring was all jacked up so I cut it and put on new wires.
Then wired into the harness!
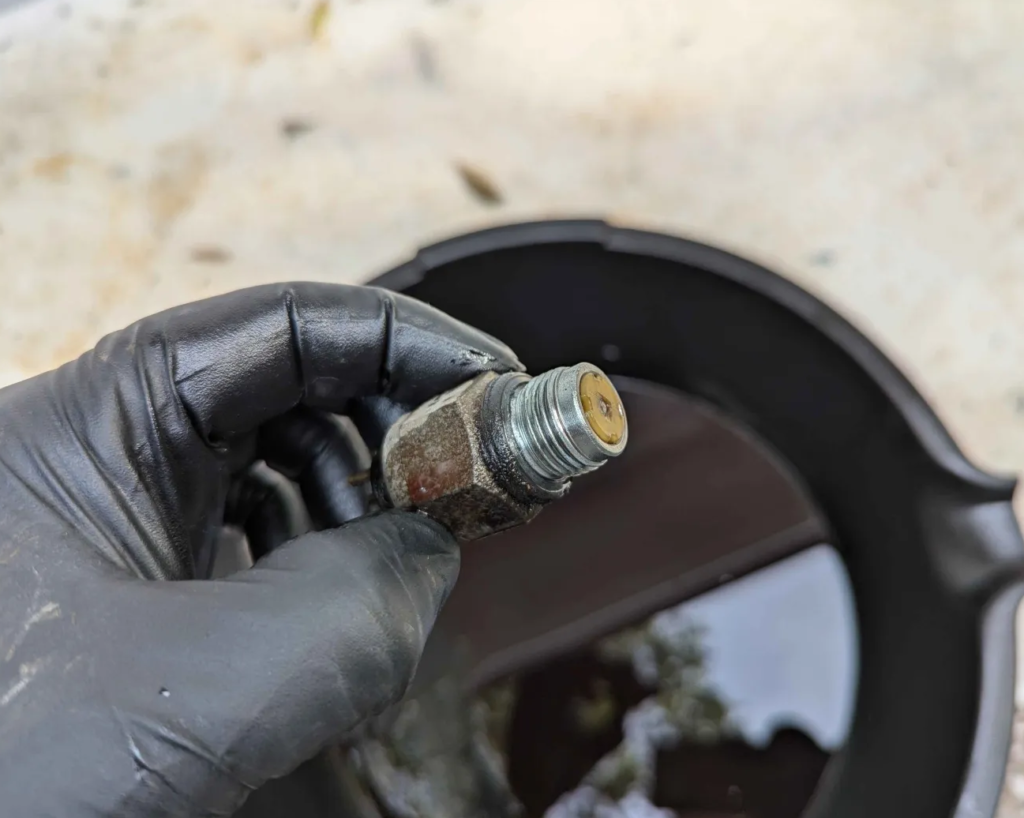
A couple days later, the new NSS arrived. Pulling out the old on shows what is going on.
The switch is jammed up. Replacing the switch got the safety part of the ignition system operating correctly and the reverse lights now work with the shifter in reverse.