How to make a Propeller Development Kit
Read through the instructions carefully before attempting. Also read the disclaimer.
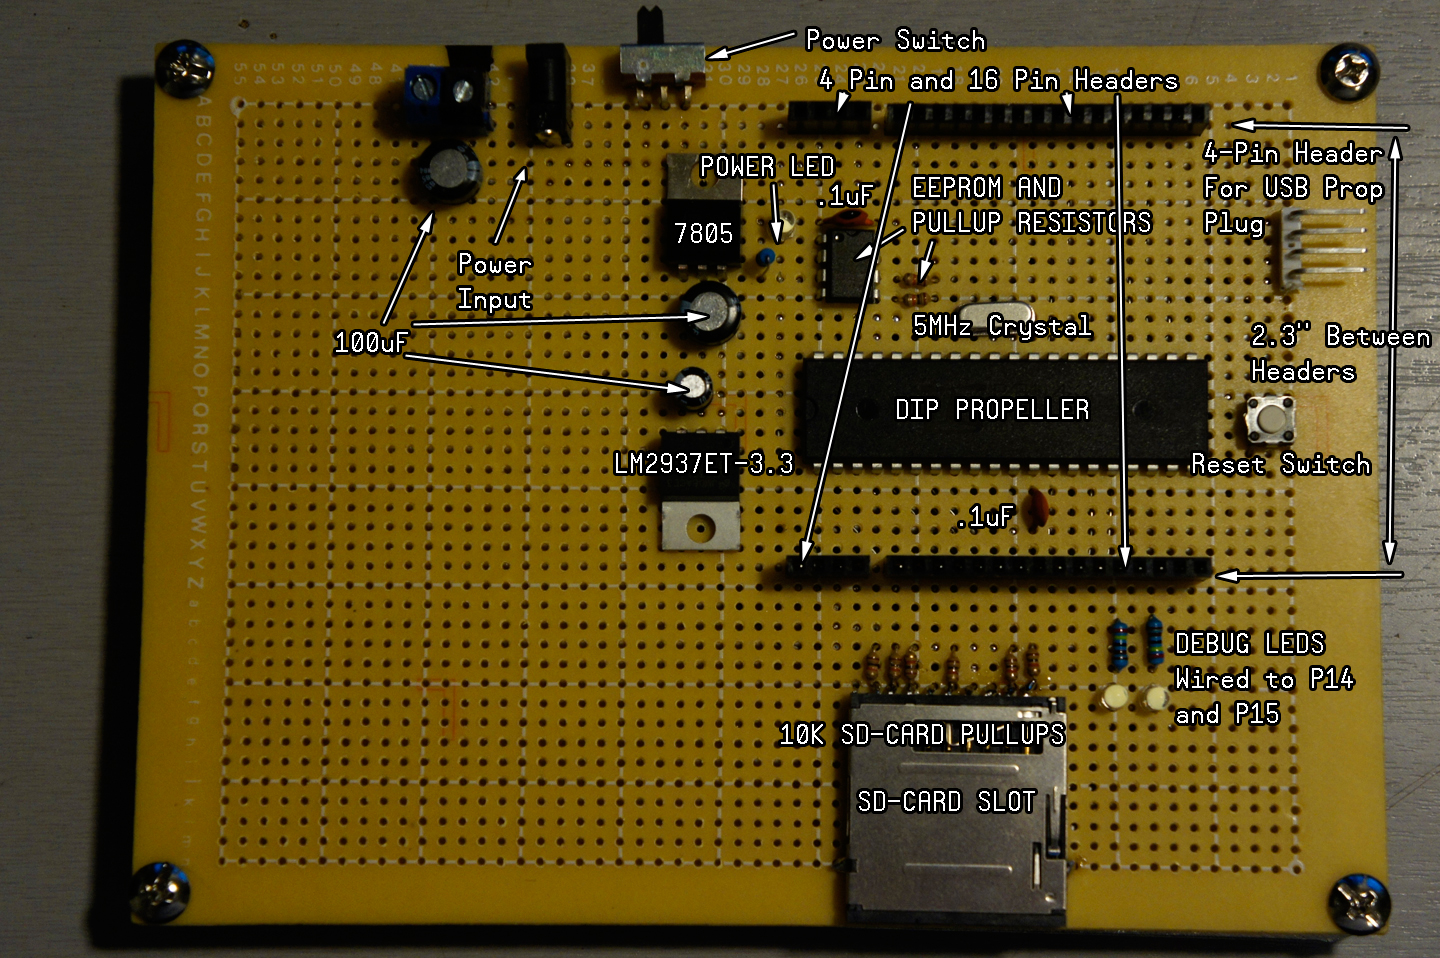
I needed a Parallax Propeller Development Board so I could keep working on my projects. Having to pull out my only prop from the pinball machine to test circuits was slow. I looked into getting the Gadget Gangster which lays out the propeller in a form familiar to those that have worked with the Arduino boards and has “shields” being built for it.
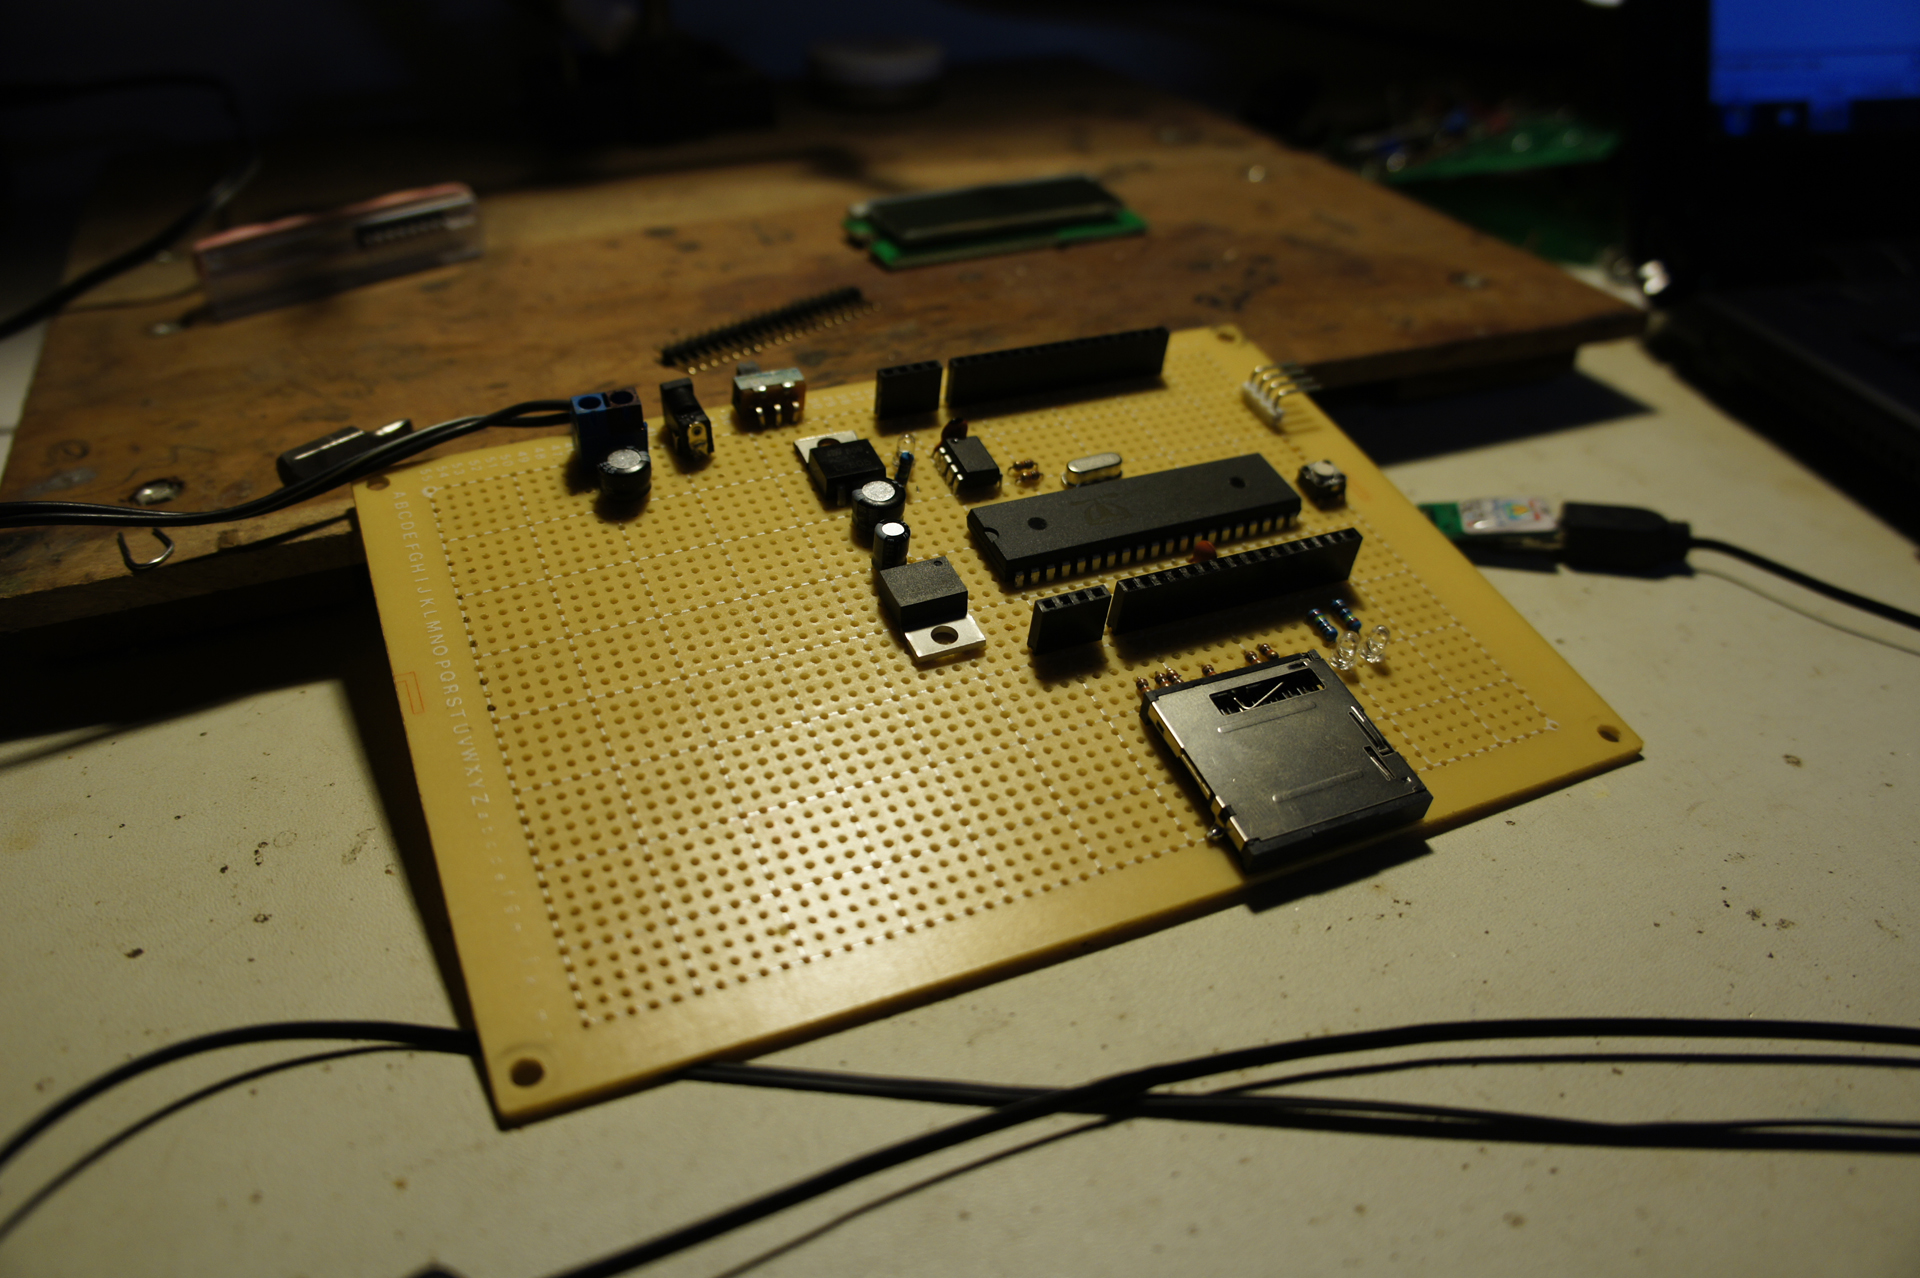
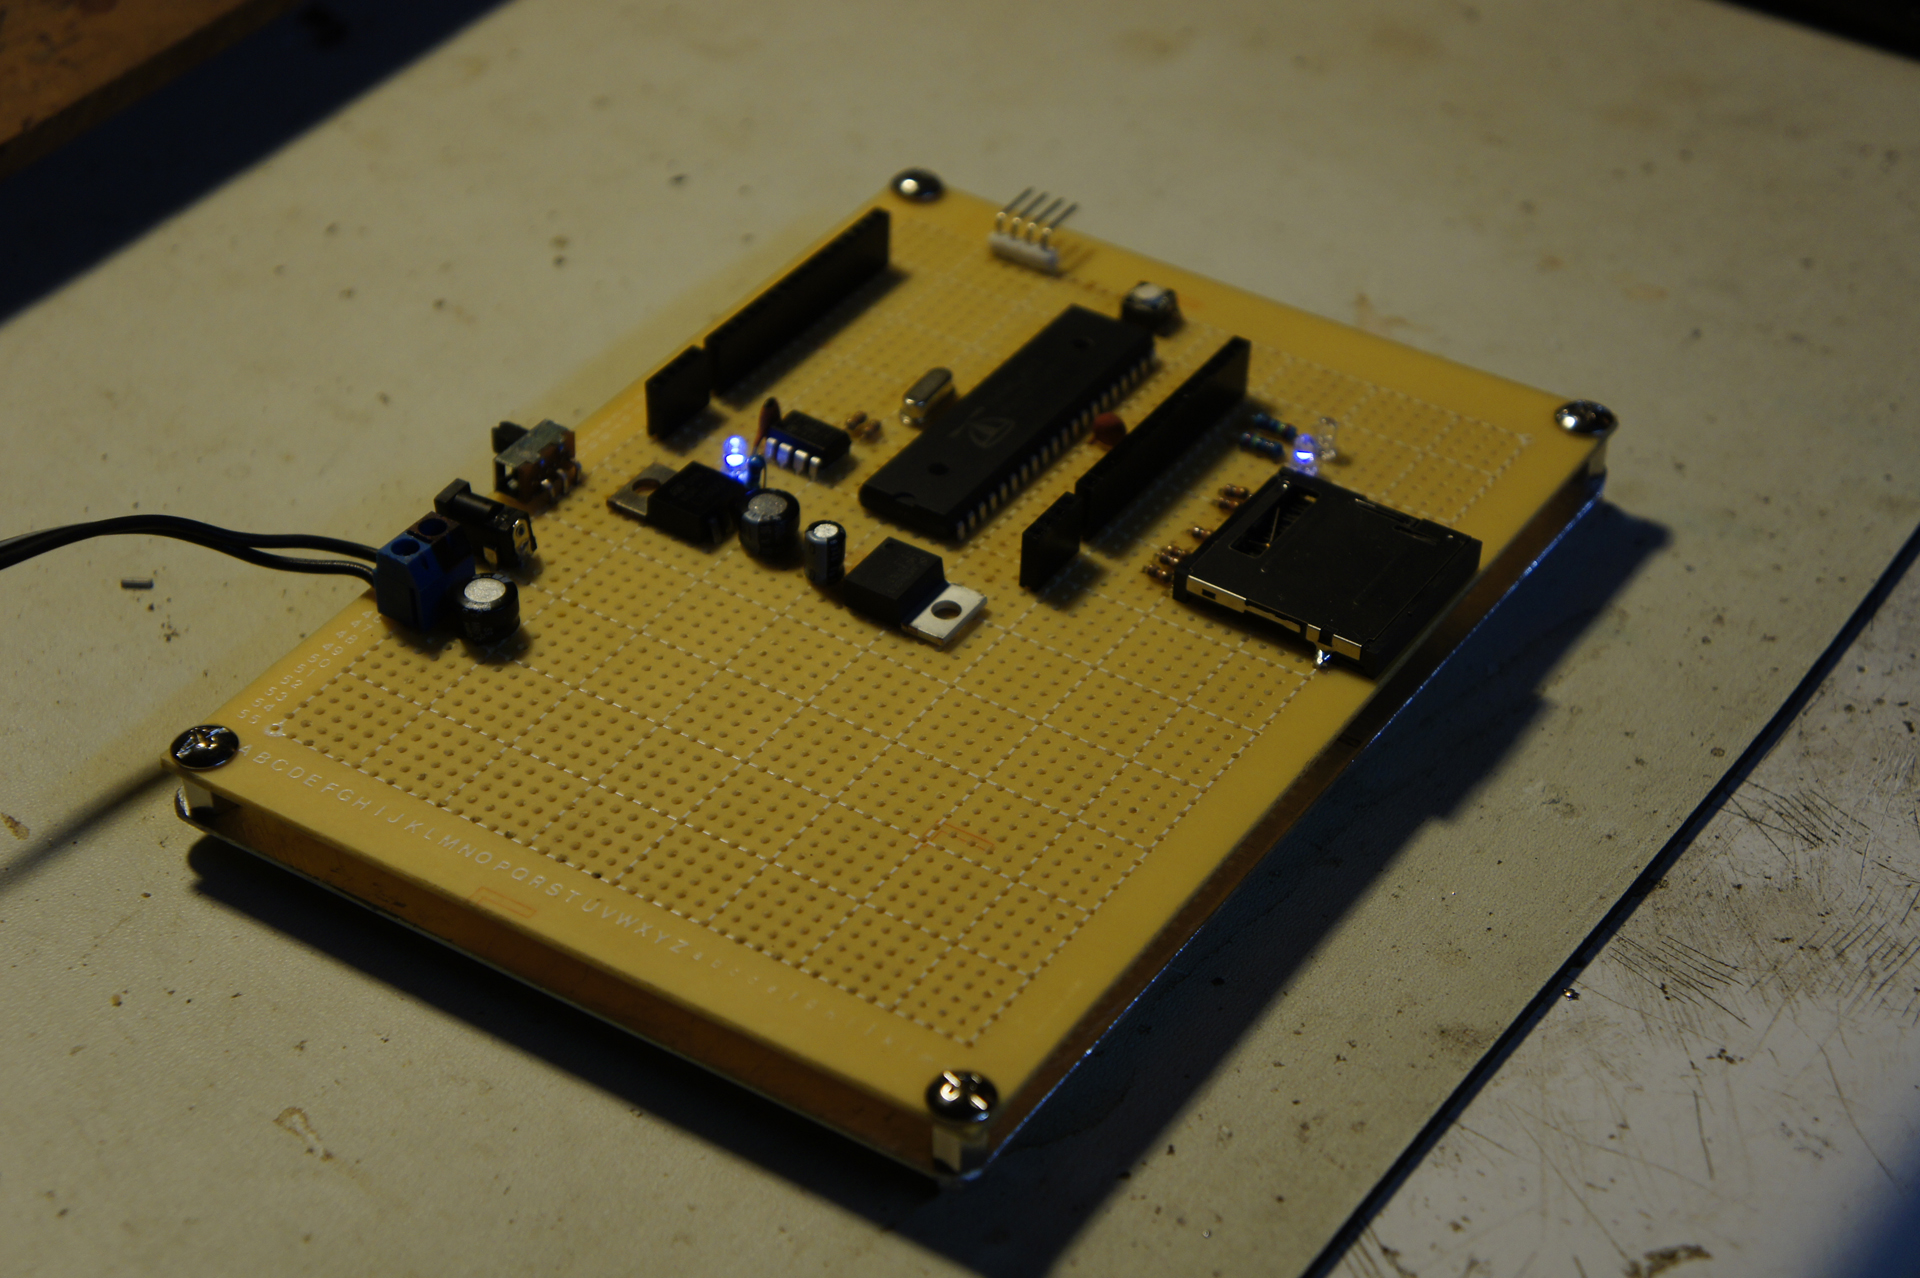
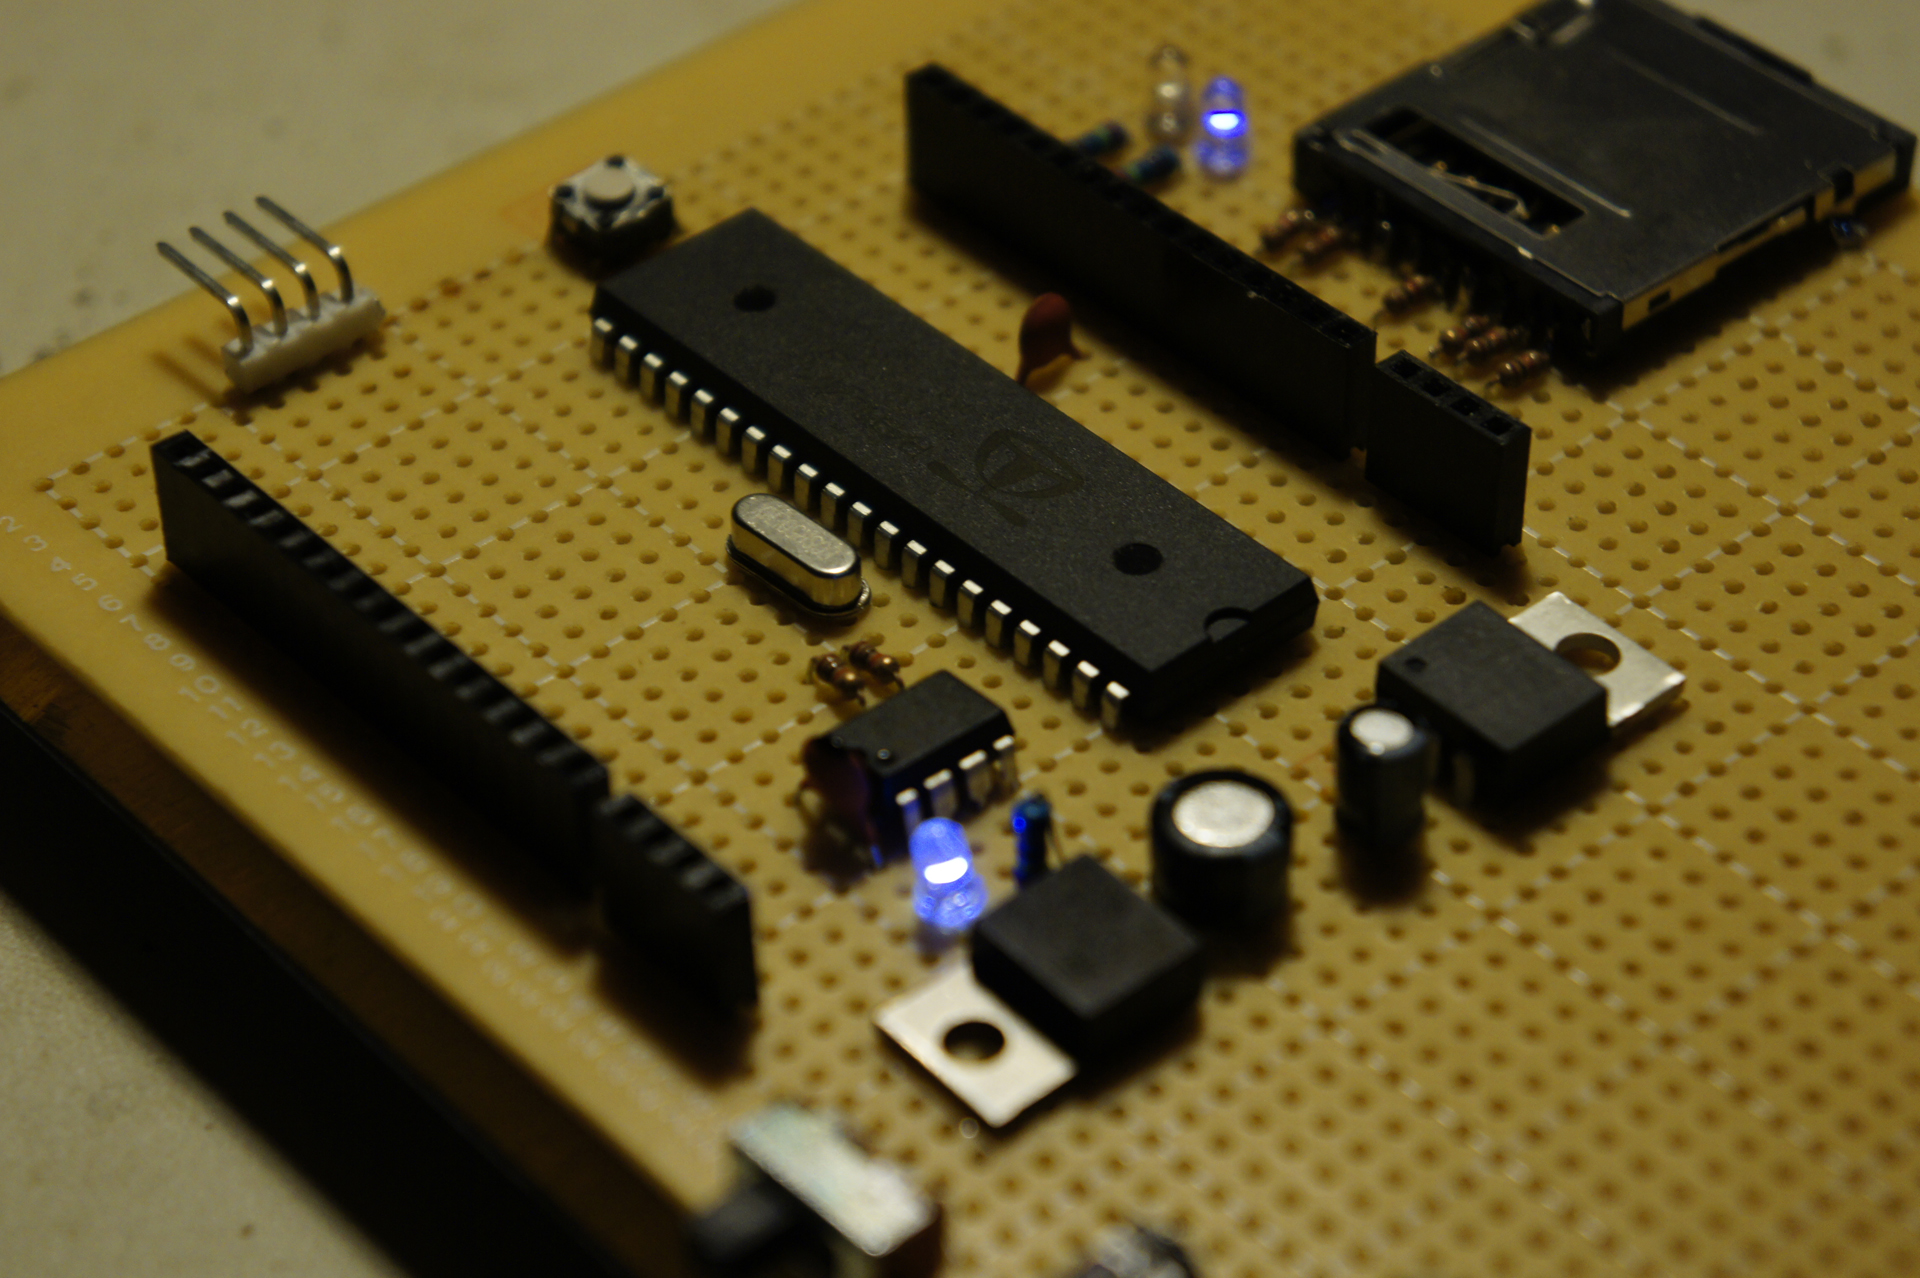
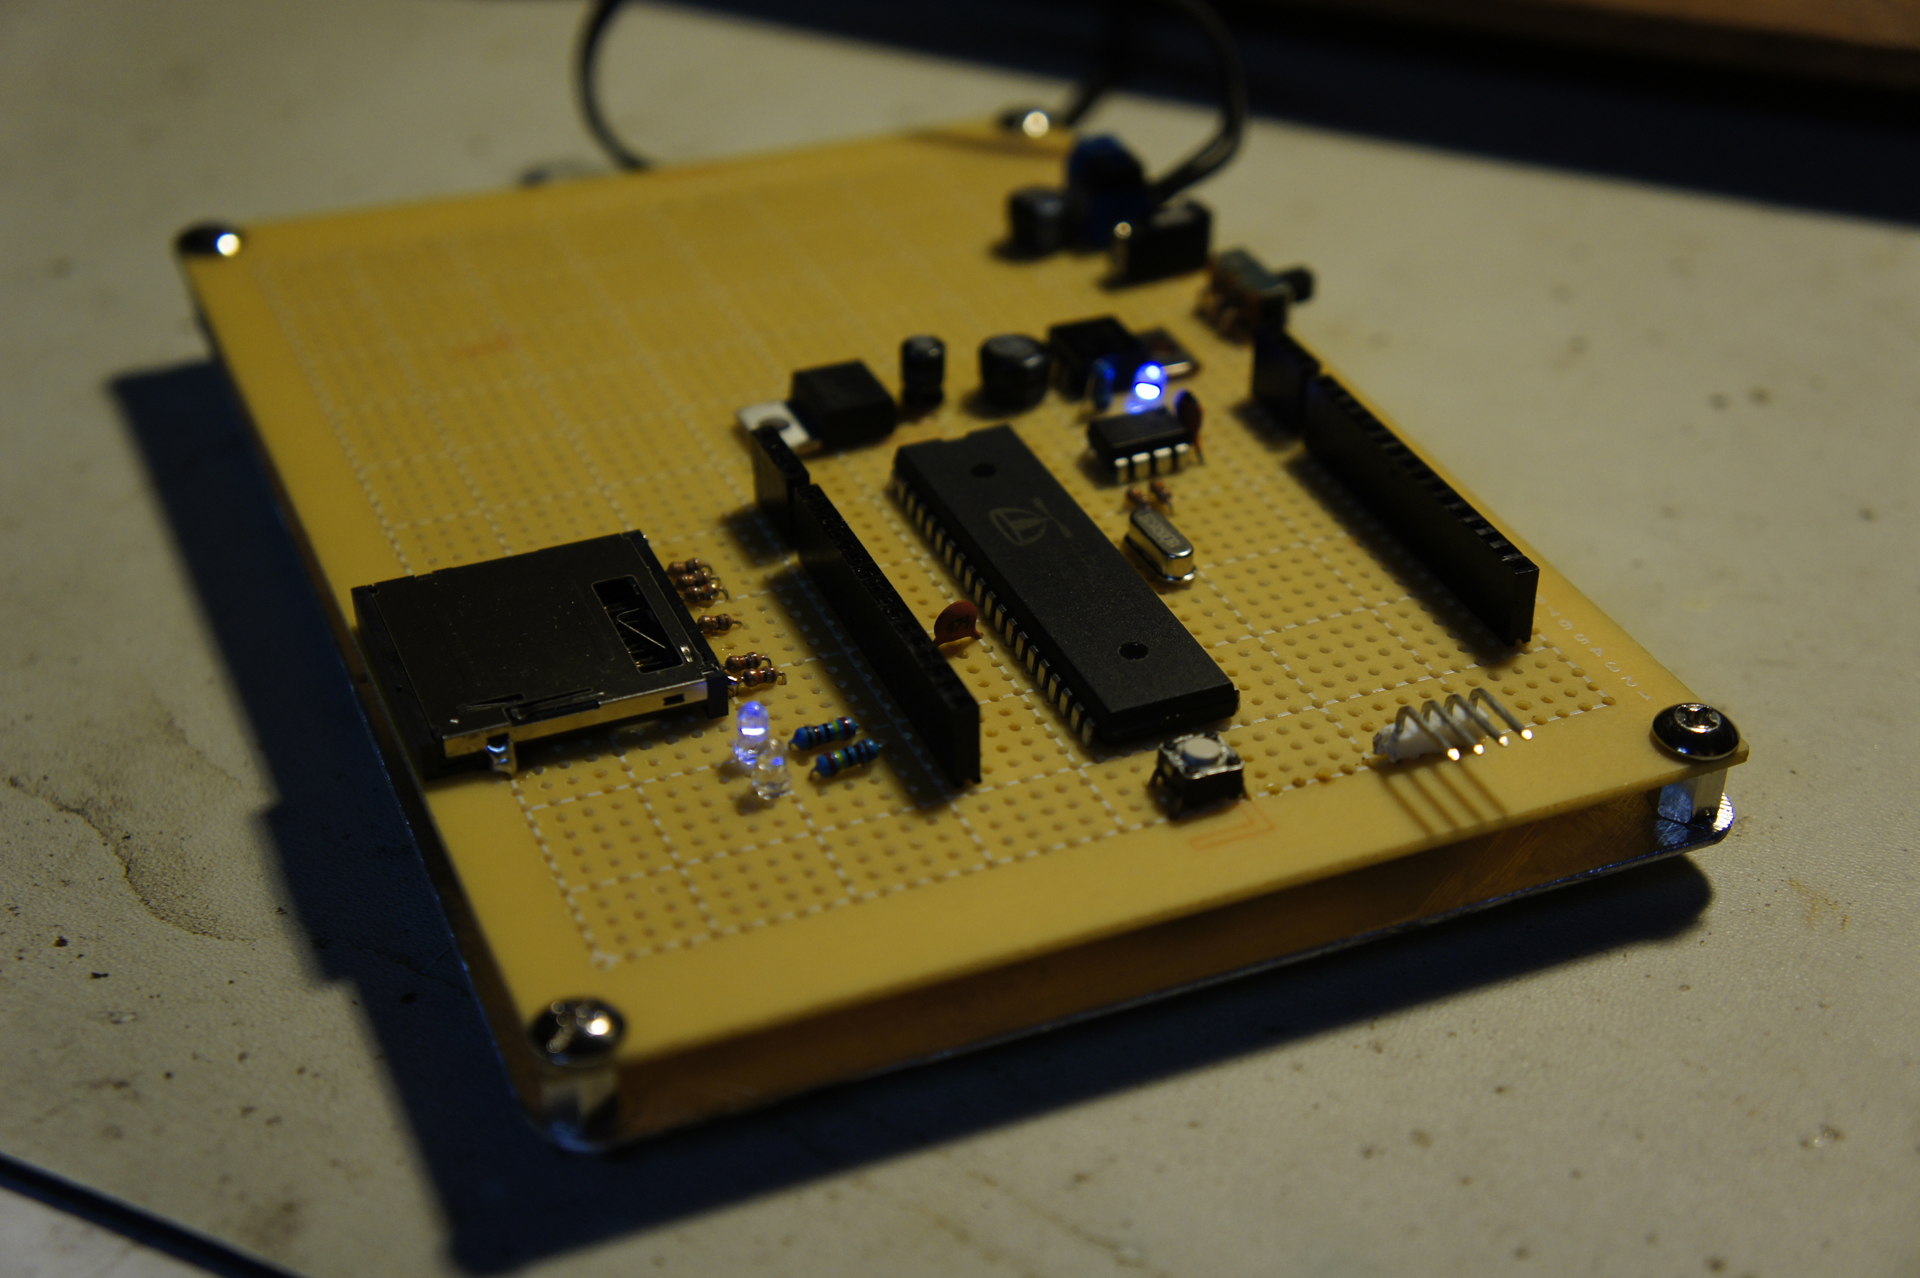
However at the time of this writing it was out of stock and I needed the board quickly so I decided to build my own on proto board. The Gadget Gangster is built off a .1″ pitch so copying the layout was easy to do on proto board. I decided that the Dev Board I would make would be much more flexible as I can add on more standard features like an Analog to Digital Convertor without having to add a shield.
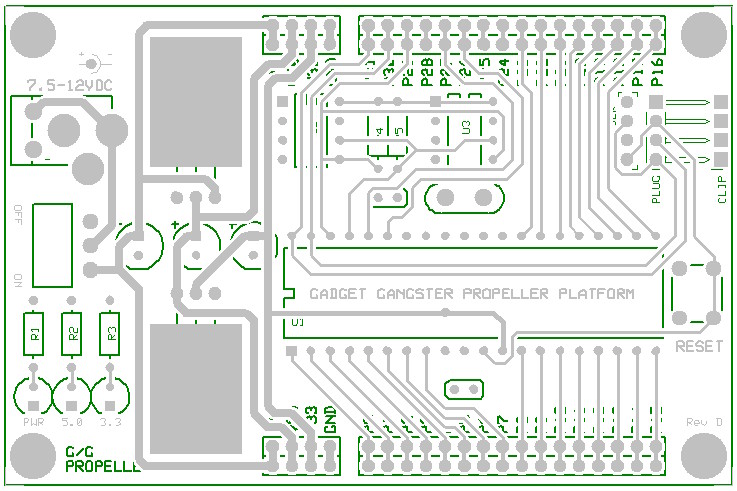
I looked up a couple schematics and layouts which I have included below.
Gadget Gangster PCB Layout
Gadget Gangster PCB Layout 2
Gadget Gangster Full Schematic
Propeller Proto Board Schematic – Refer to Pg5.
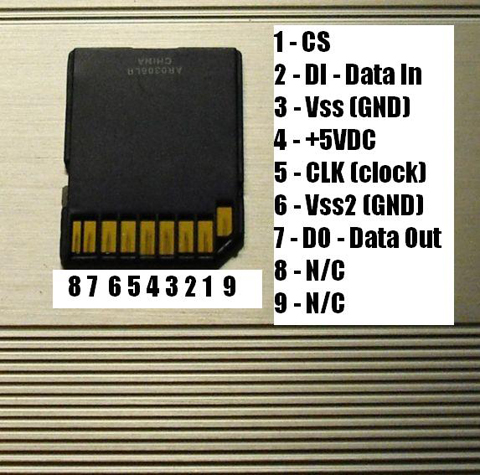
SD Card Pinout – Not mine, found it on the web.
SD Card Pinout 2 – Look at SPI mode.
Interfaceing a SD card with the propeller
Besides VDD and VSS on the SD card every data line (CLK, DO, DI, RSV) should be pulled up to VDD with a 10k resistor.
Here is a incomplete parts list for the project. It just includes all what you will need. Some stuff like capacitors are not on the list as I had those on hand.
Digi-key Part #’s
1 – P8X32A-D40-ND – DIP Propeller
1 – 101-00405-75-ND – SD Card Slot
10 – CF18JT10K0CT-ND – 10kOhm Resistors
1 – 24LC512-I/P-ND – EEPROM
1 – LM2937ET-3.3-ND – 3.3V Regulator
1 – XC1711-ND – 5Mhz Crystal
2 – S7014-ND – 14 Pin Female Headers
2 – S7002-ND – 4 Pin Female Headers
Some things you will also need. I had these on hand so I don’t have part numbers.
3 – 100uf 16V Capacitors (Electrolytic)
2 – .1uf 50V Capacitors (Ceramic)
1 – Power Connector
1 – Power Switch
1 – 7805
1 – Power LED and Resistor to match for +5V source
1 – Normally Open Tact Switch
1 – 4 Pin Male Right Angle Header
You will also need a 7-12V DC power supply that fits the power jack. I used a Sony 9V DC supply that I had lying around.
This Dev Board also needs the Prop Plug for the USB connection. This can be used over and over again so if you are planning on making several Propeller projects then it is cheaper to go this route.
I would suggest you build the power circuit first and test it with a multimeter to make sure it is operating correctly before hooking it up to the microcontroller. This ensures you don’t ruined your $8 part and have to wait 4 days for the replacement to come in.
For the proto board; Radio Shack sells really inexpensive proto boards. For $4 they sell there 4″x6″ which is what I used for this project.