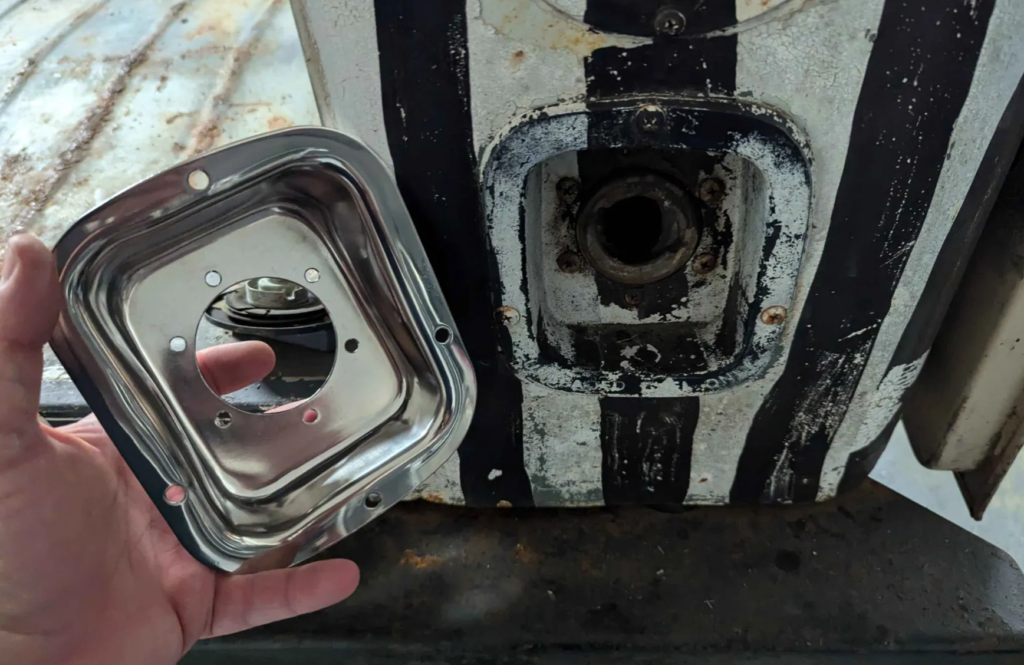
My friend had this polished stainless fuel filler for a CJ/YJ in his part box. He ended up going with a chromed unit. Well It looked like the same part on the DJ but the DJ one was plastic and warped. Lets see if the stock CJ/YJ filler will fit.
Looks similar minus the bottom mounting hole is on the CJ/YJ unit and the DJ doesn’t have that.
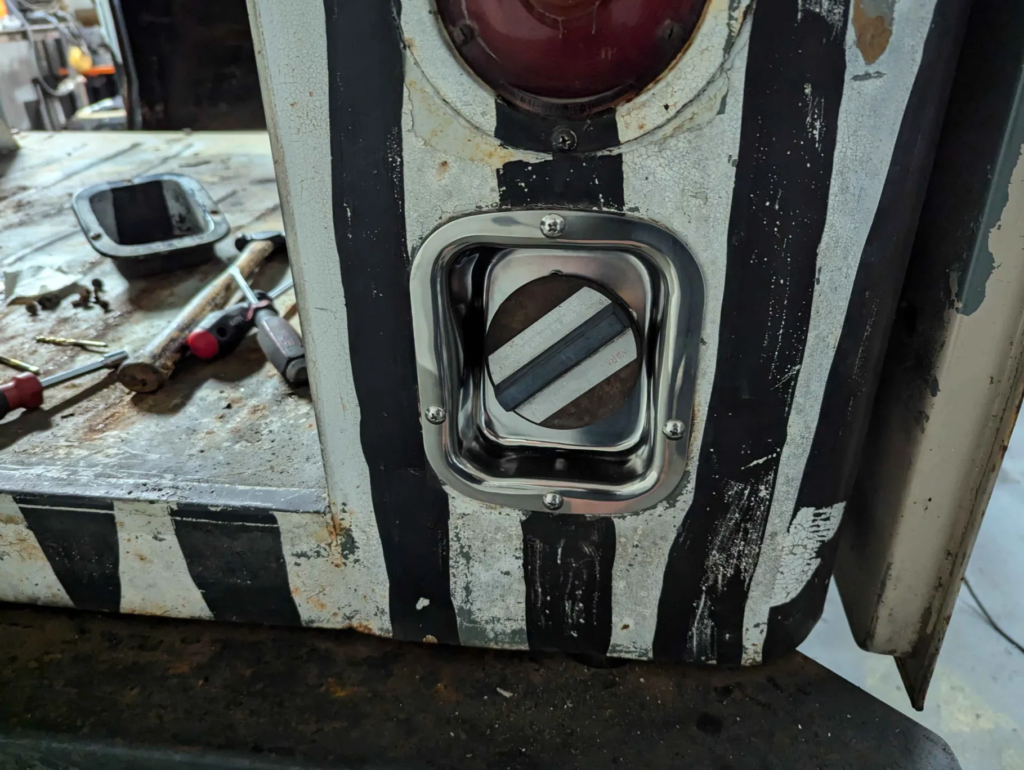
Fits perfect. Just had to drill out the bottom hole and tap it for a 10-24 thread.
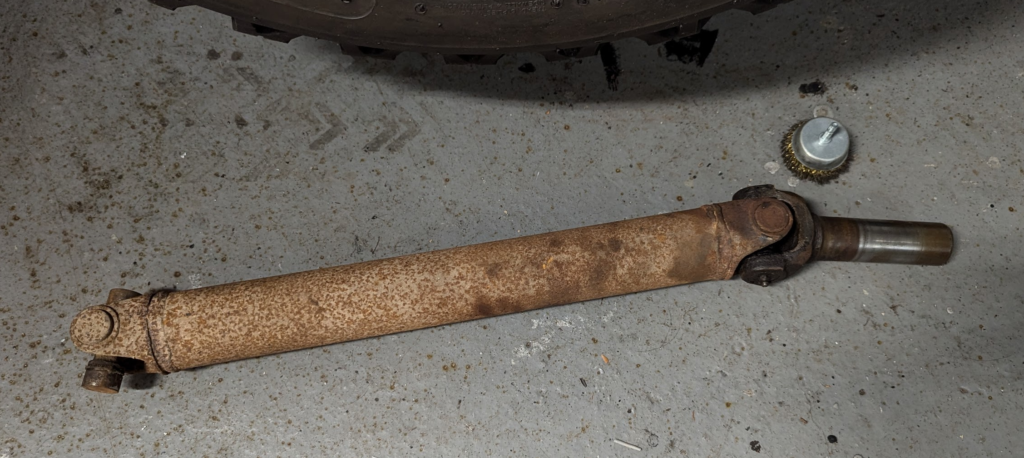
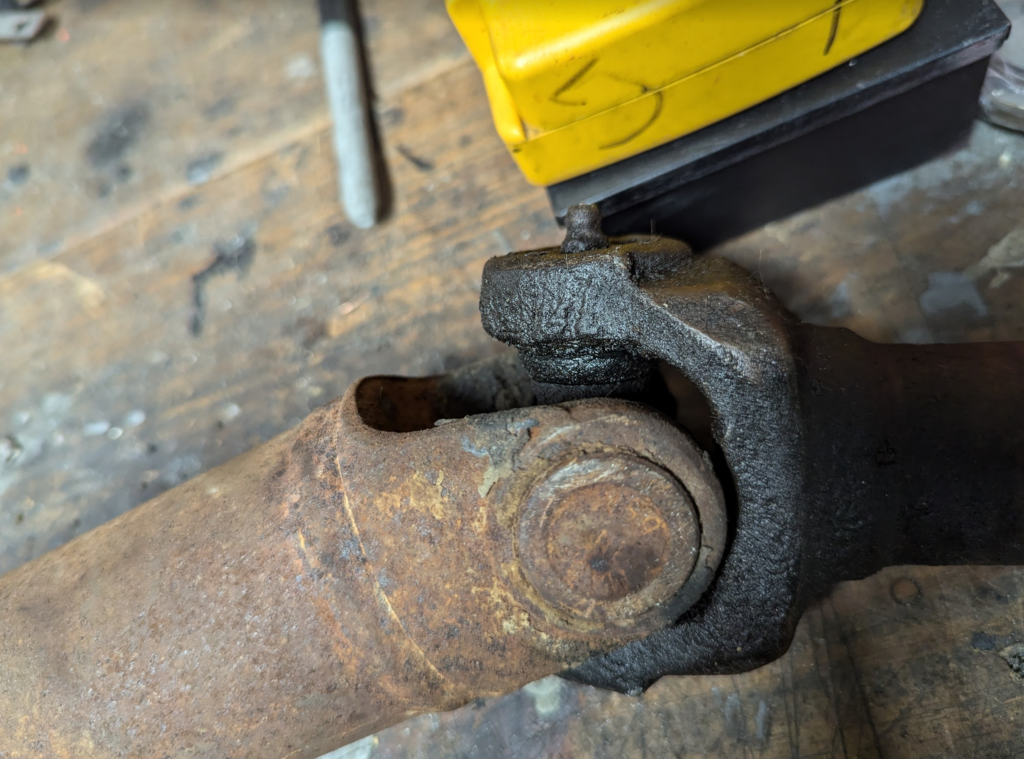
The u-joints on the DJ had a tad of play in them but moved well and didn’t seem to cause any problems. I had to remove the driveshaft since I am currently working on the transmission and decided to rebuild the u-joints with new grease.
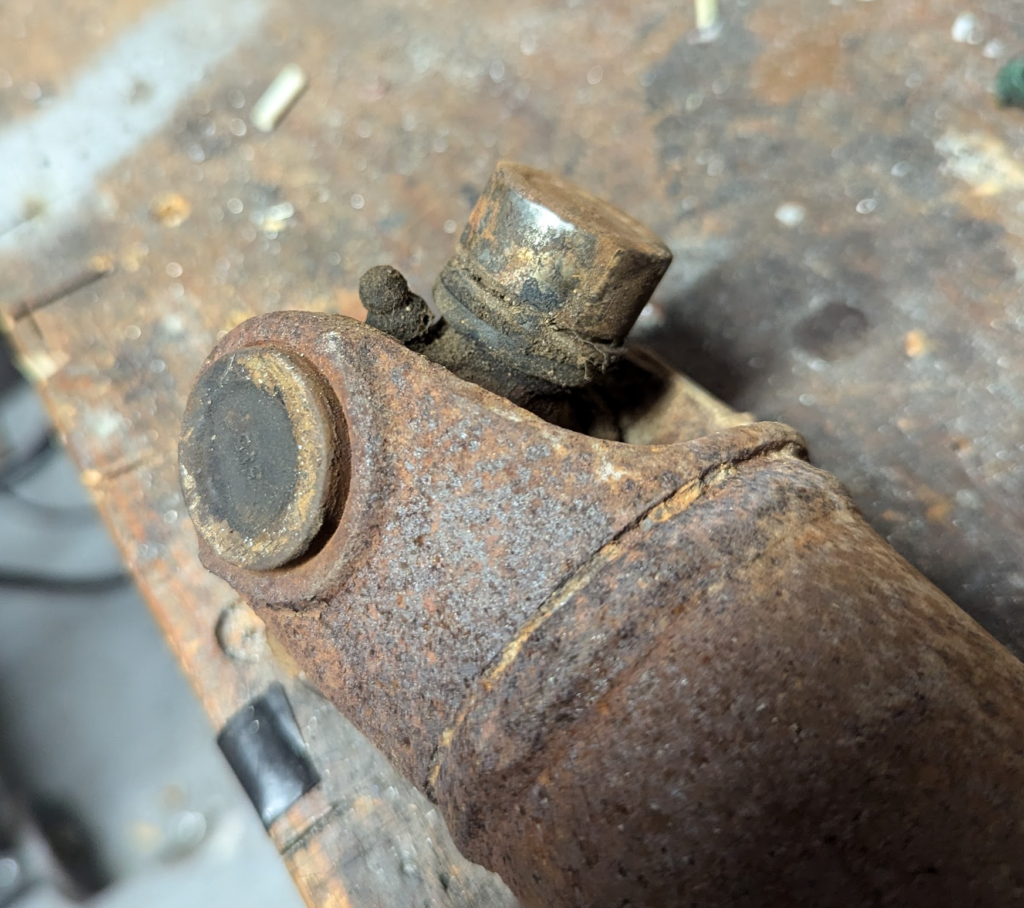
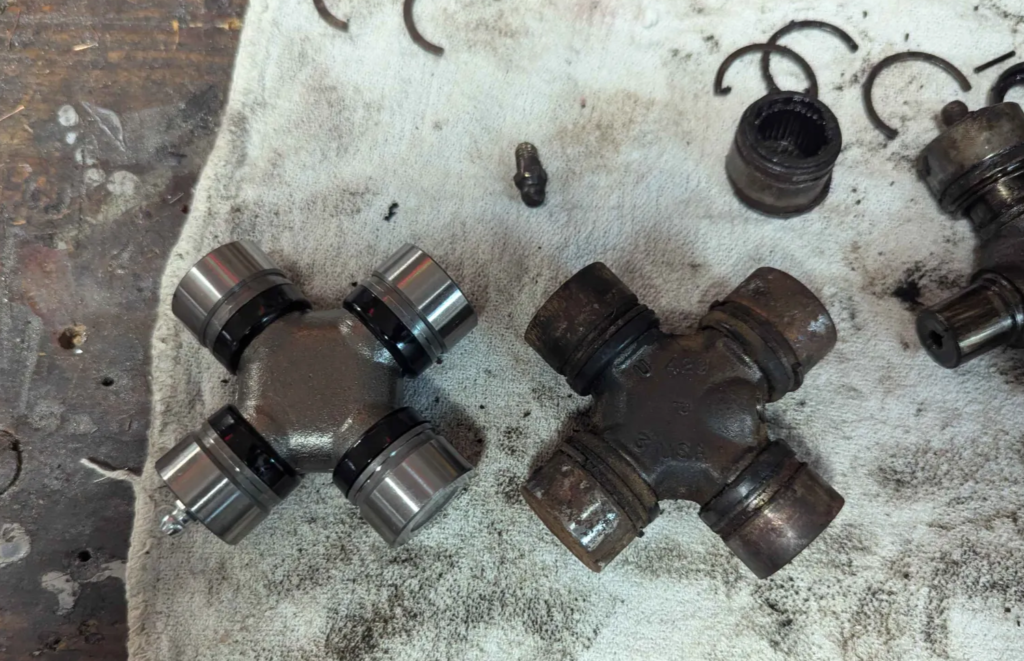
Well the little play in the u-joints was cause the end caps are missing some of the rollers for the bearings! What is also weird about these u-joints is they are internal clipped instead of external clipped like ever previous jeep driveshaft I have worked on.
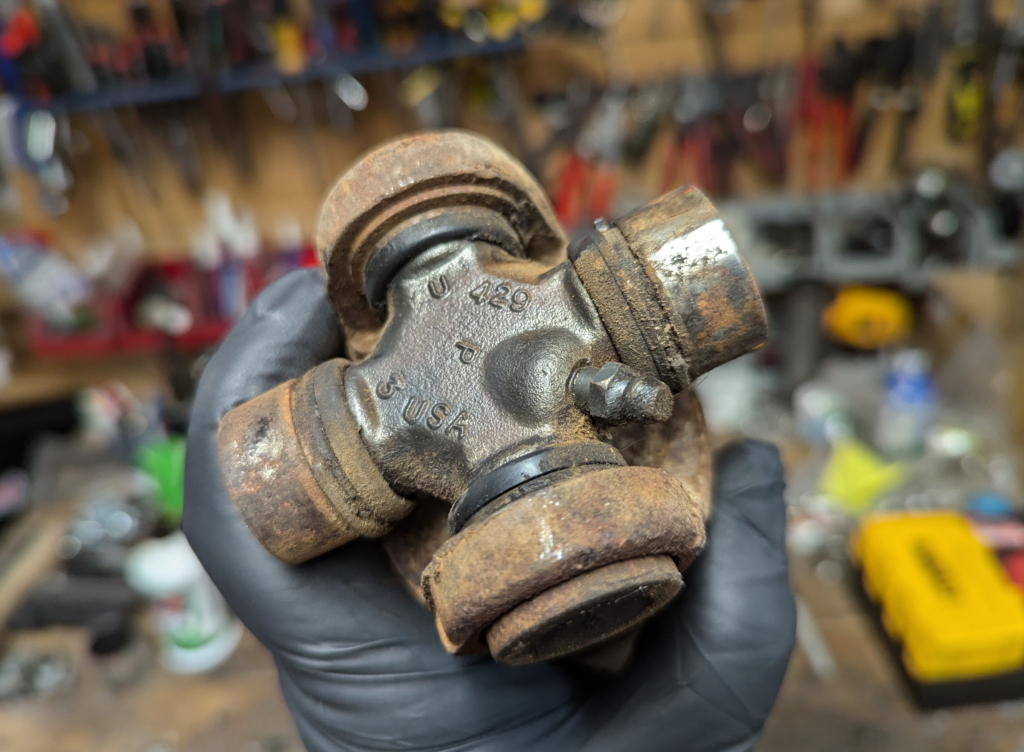
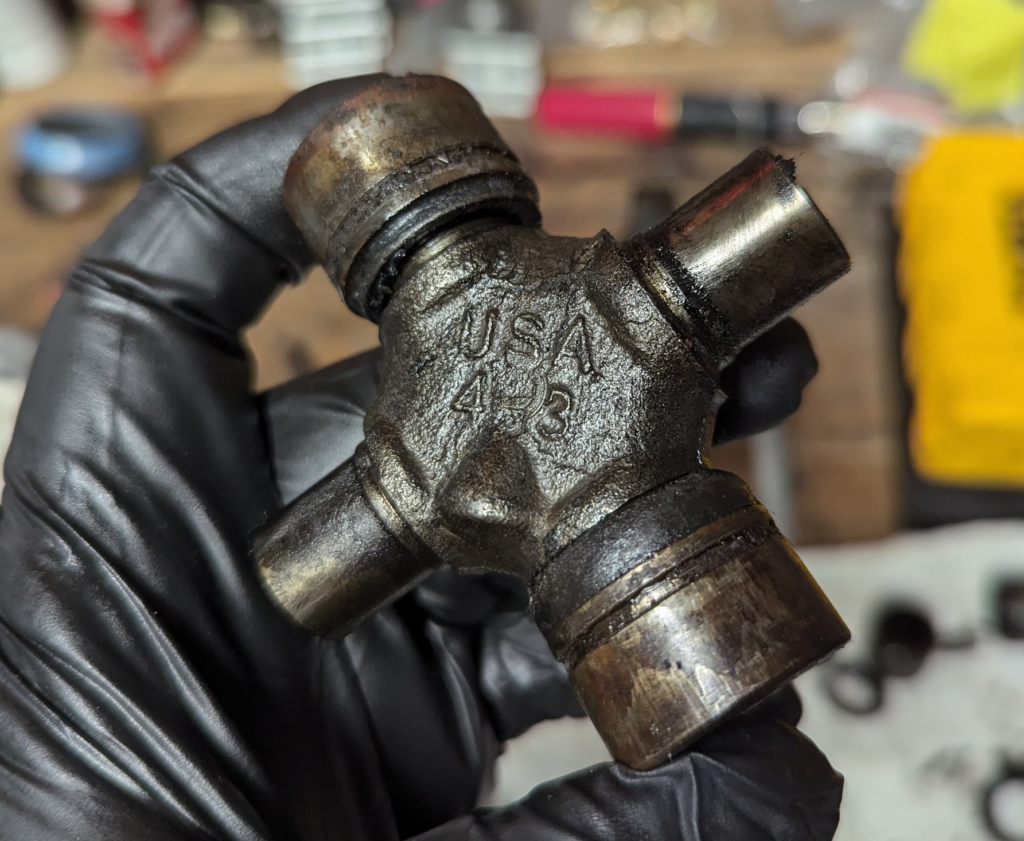
Both u-joints are different. One end has a 429 stamping and the other is USA 4 – 3. Maybe that last one is some sort of soccer score? ;) Googling 429 u-joint the Moog 429 pops up but that part does not match the physical dimensions of this 429 u-joint.
These u-joints don’t match up with the typical 1310 style u-joints you see on Jeep driveshafts and there are no part catalogs for the DJ-5G to tell us what the cross parts are for these. So we are going to need to measure everything.
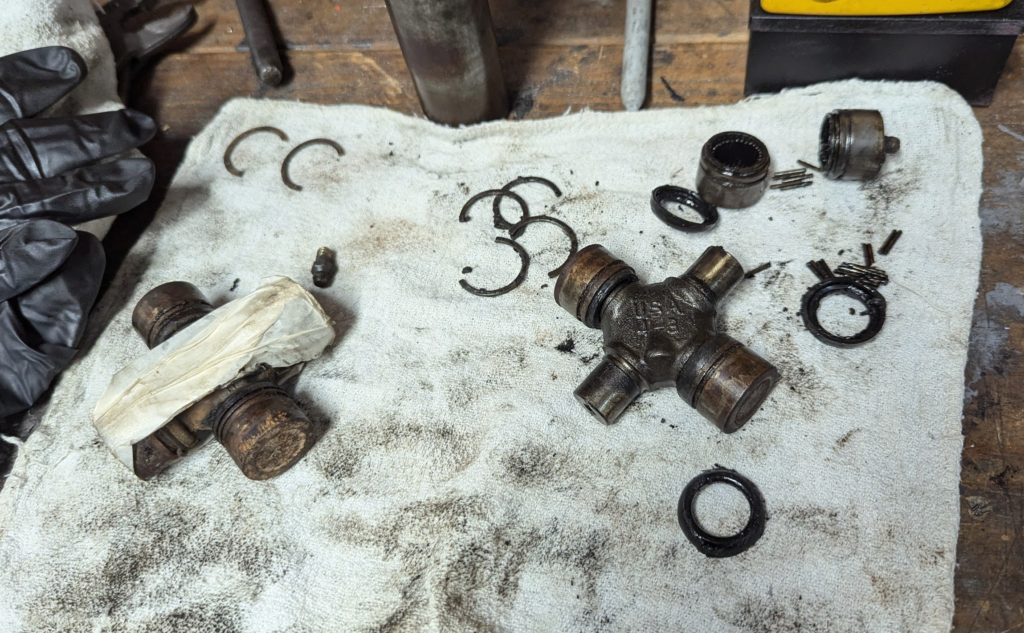
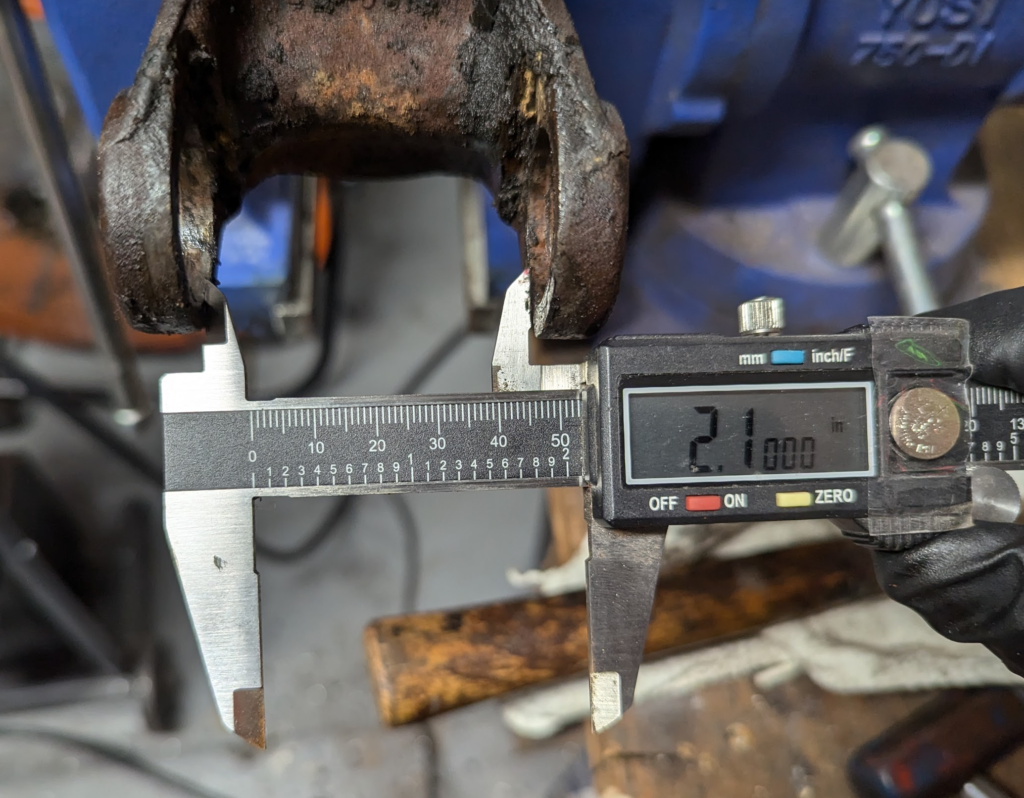
Inner locking area is around 2.1″ wide.
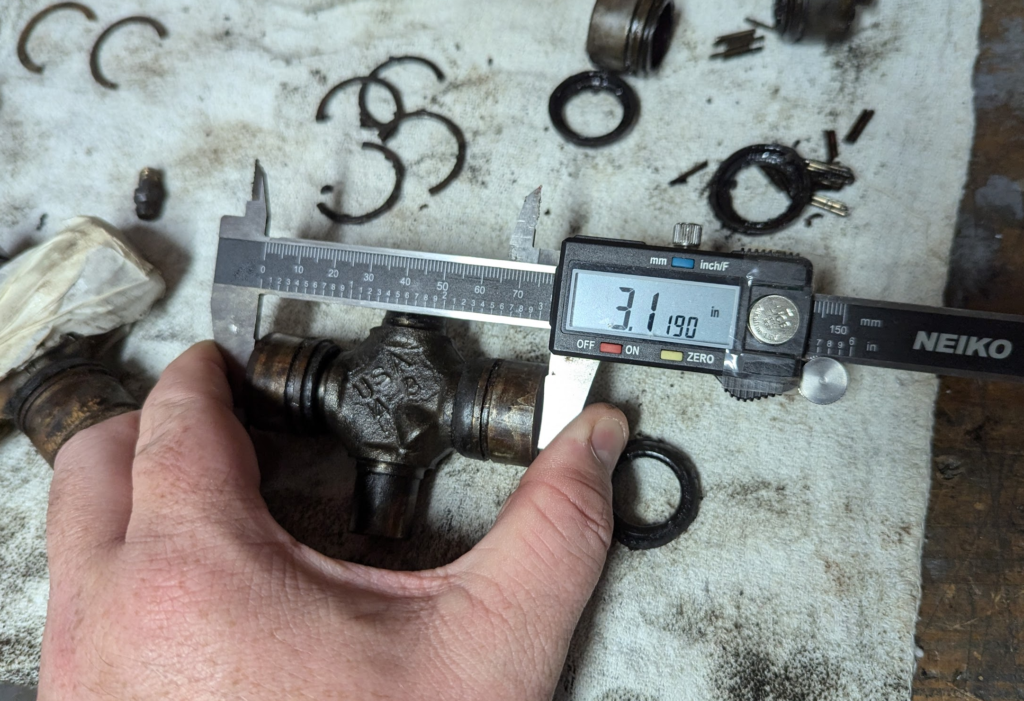
End caps are around 1.079″ in diameter.
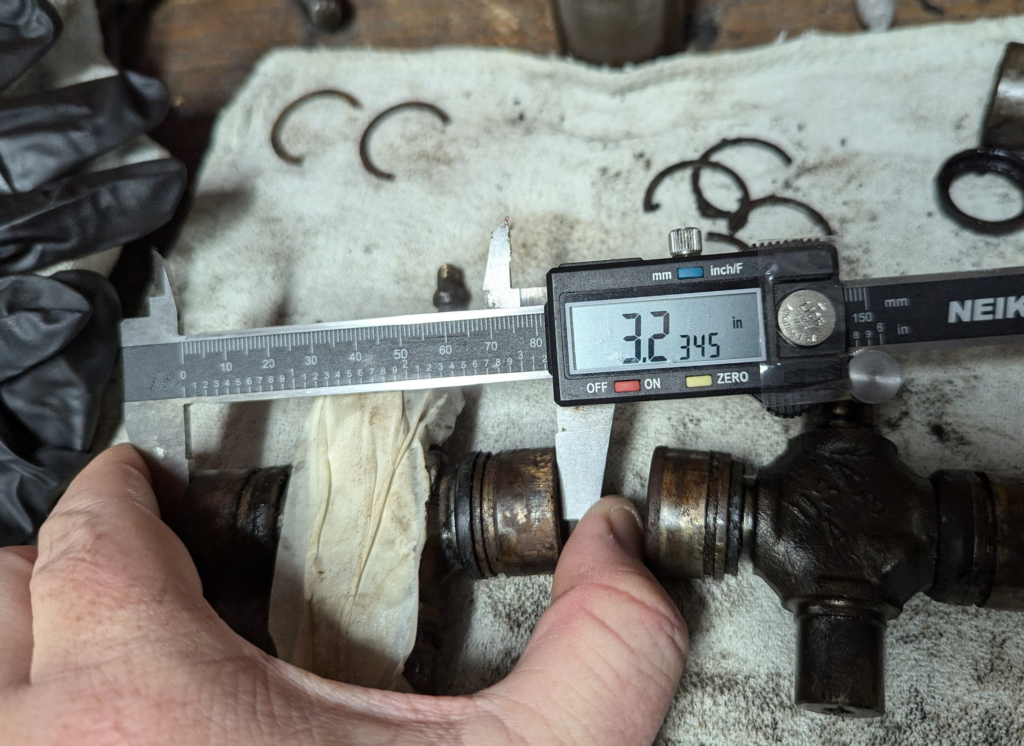
End cap to End cap span is in the 3.2″ range.
This website has a good list of different u-joints by size. I would love to find a more comprehensive list if someone knows where I can find one.
Doge 7260 is the only u-joint that comes close to the measurements. Thats 2.125″ inner lock and 1.078″ cap diameter.
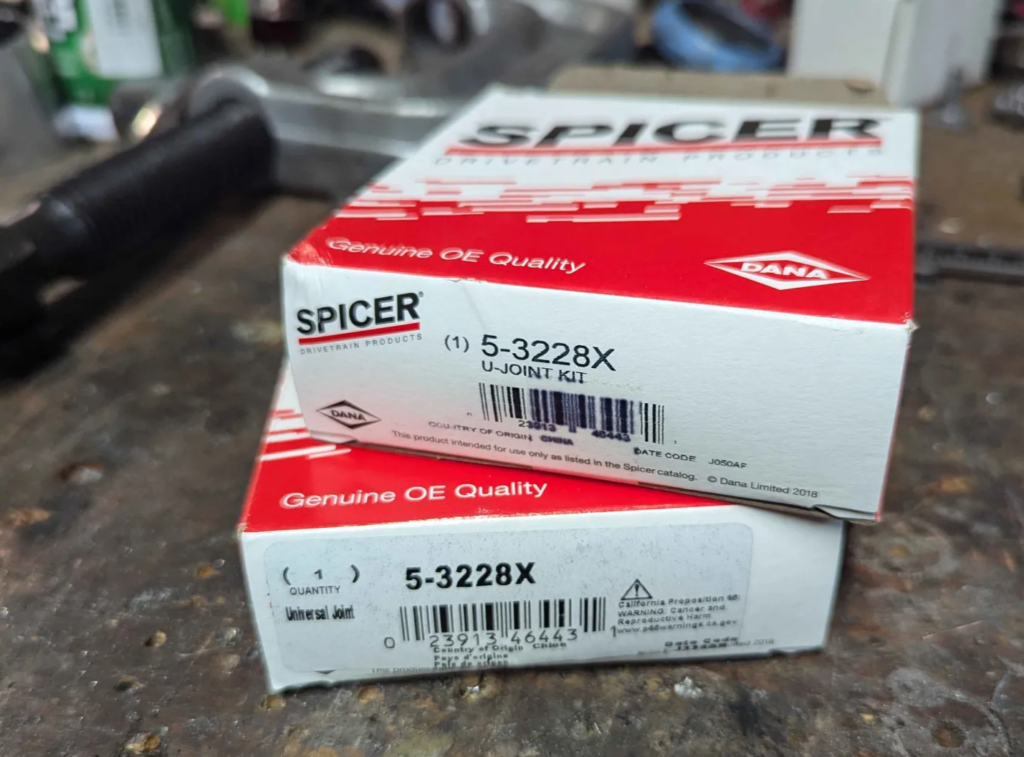
Dana Spicer 5-3228X is the u-joint I ordered. This has the grease insert in the cap which makes greasing easy. The ones with the grease insert on the cross or spider part is always a PITA to get grease in… doesn’t get broken by rocks tho!
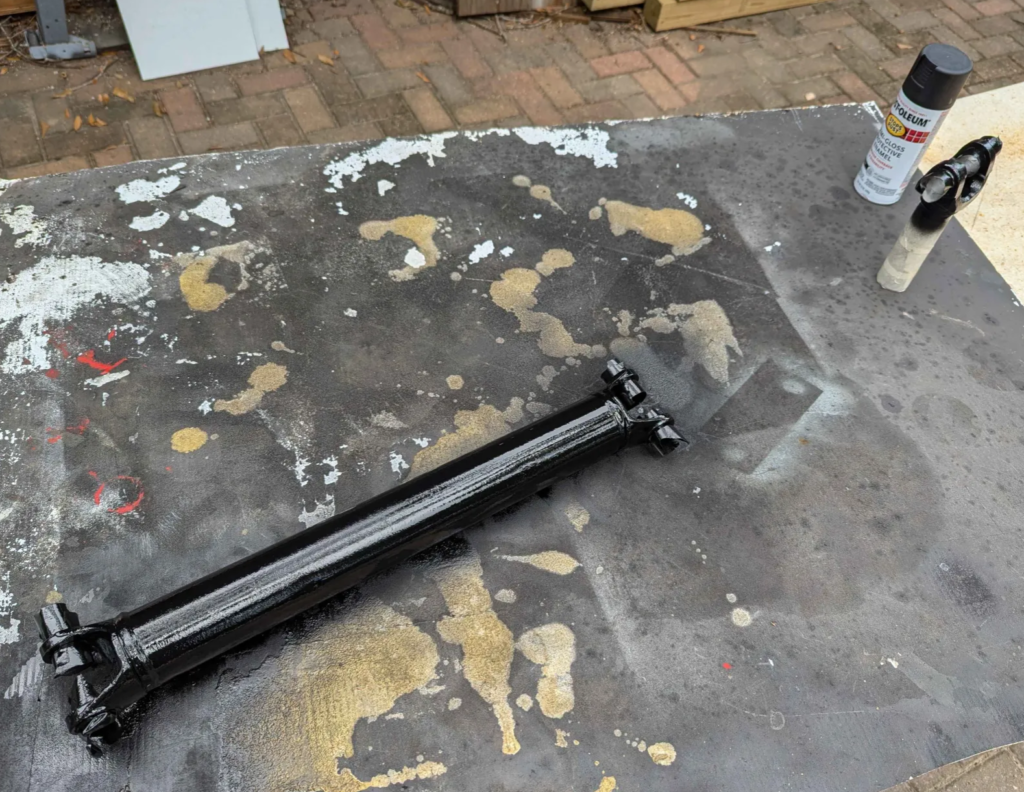
While waiting for the u-joints. I wire-wheeled the slip yoke and driveshaft and gave it a coat of everyone’s favorite rust-oleum semi-gloss black. Turns everything into a new old stock part!
Then the u-joints arrived.
They look the part and measure up the same. Lets press them in!
That driveshaft is way to nice for this rusty jeep!
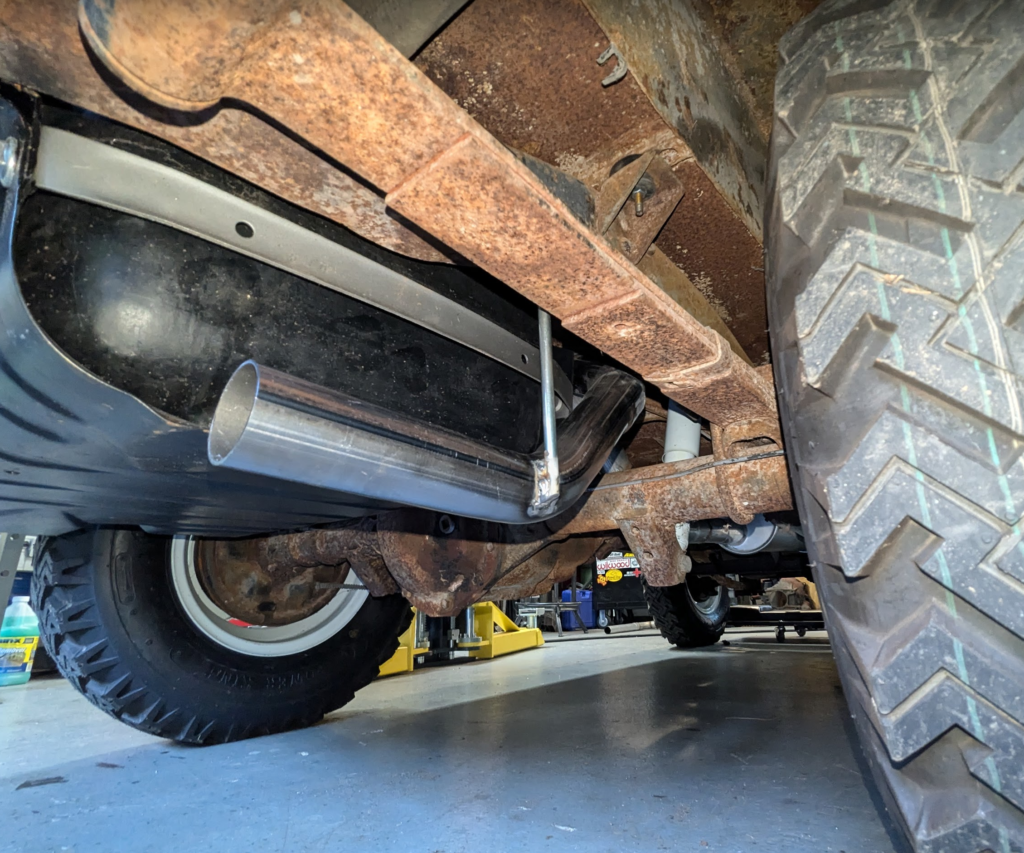
The exhaust system I built for the DJ originally was just to get something on the Jeep to prevent myself from going deaf. It was still way to loud and sounded like bung holio.
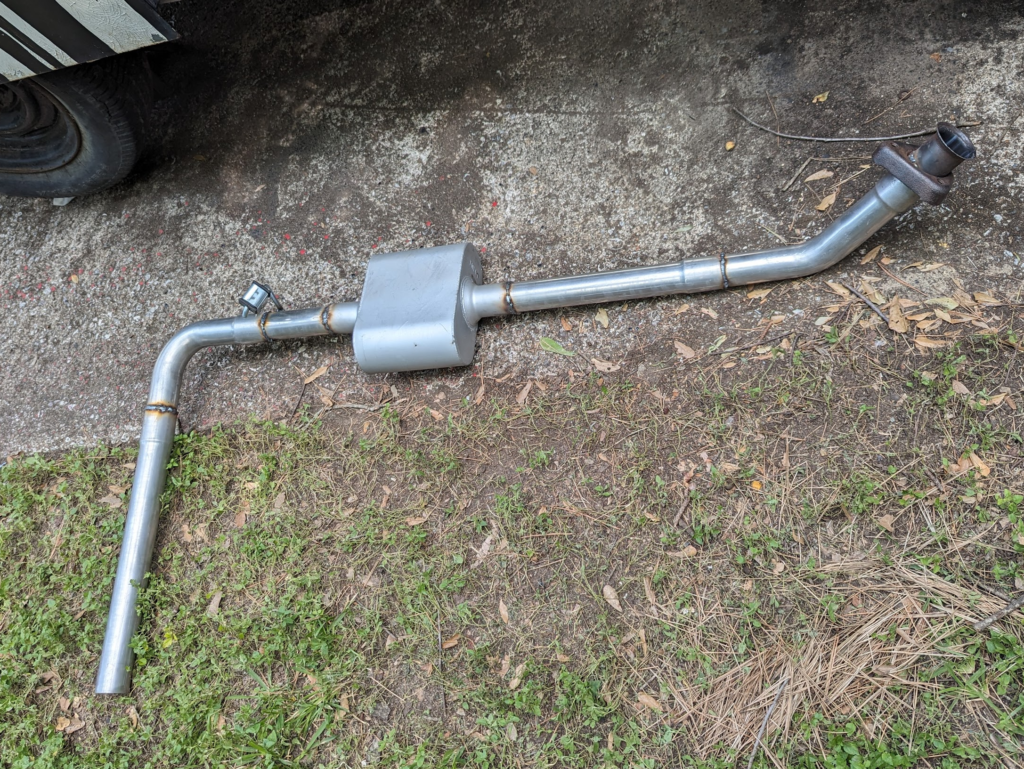
Above is what I built. Used parts I had left over from previous projects. That muffler is tiny! The exhaust also dumps right before the rear tire. This looked cool but when you had the doors opens you always got exhaust when stopped. The new exhaust needs a larger muffler and a proper over axle exhaust tail pipe.
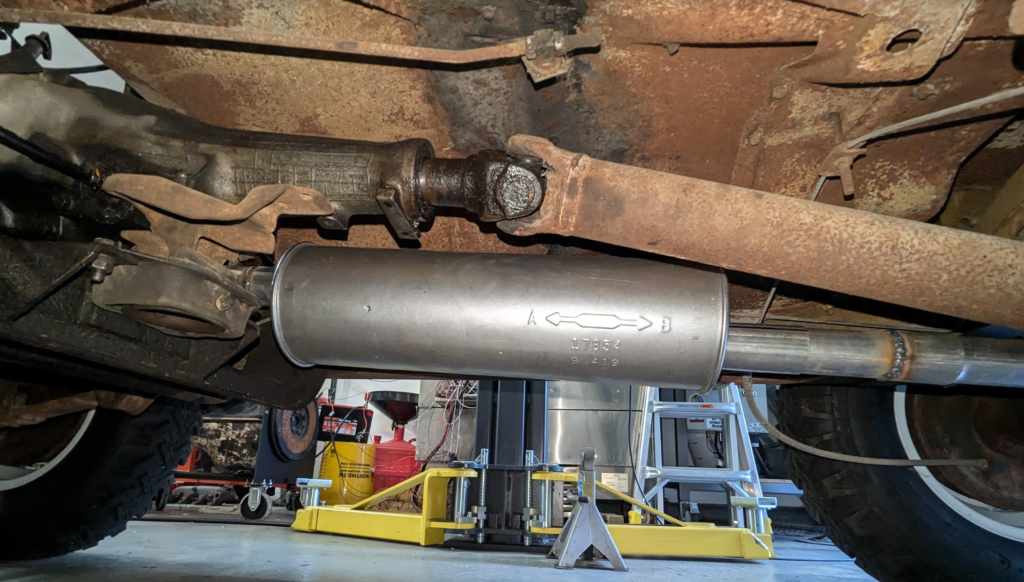
The exhaust from the manifold all the way back is all 2″ mild steel tubing. New muffler is a Walker SoundFX Universal 17854. It barely fits but it does fit. Could be shorter. For exhaust hangers I really like using Walker part number 36516.
The exhaust bolts to the manifold with the stock setup (3 bolt setup) but I swapped out the hardened steel donut with a 2″ crush gasket. I never could get the hardened steel donut to seal but the crush gasket sealed up first try!
After the muffler there is a slip fitting that the rest of the tailpipe slides into. An exhaust clamp holds the two together.
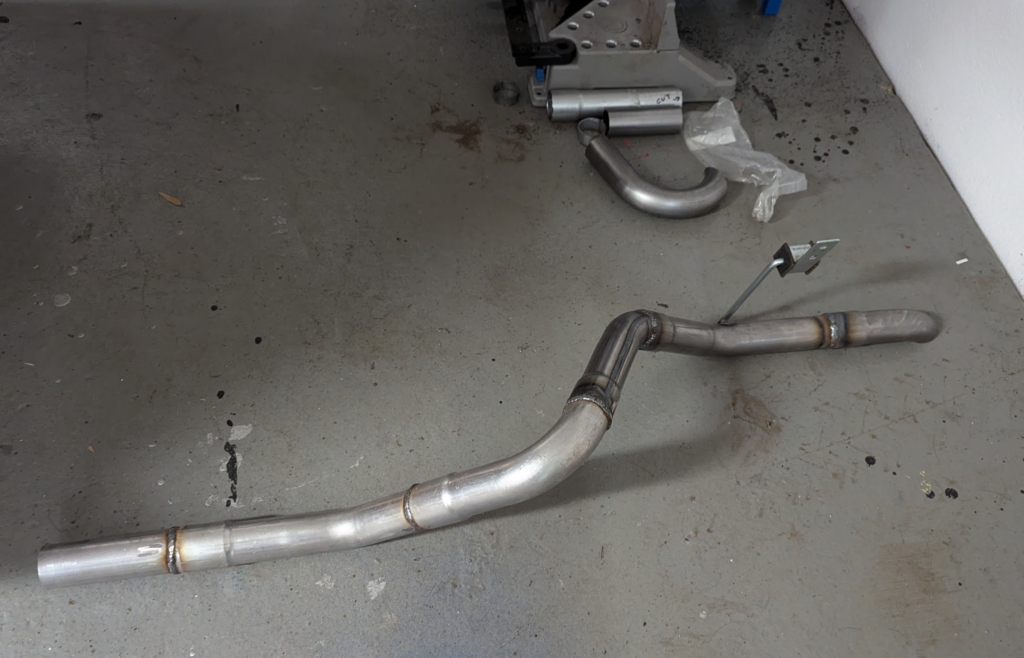
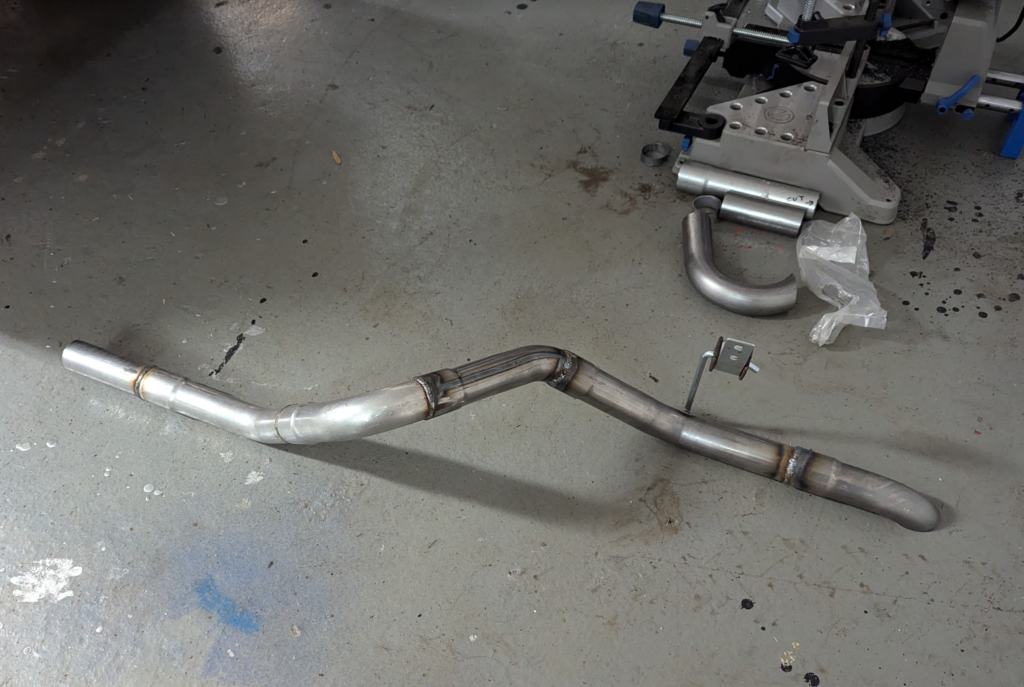
This is the tailpipe all welded up. The tailpipe was cut from a 180 piece of tubing. You can see the left overs from the cut.
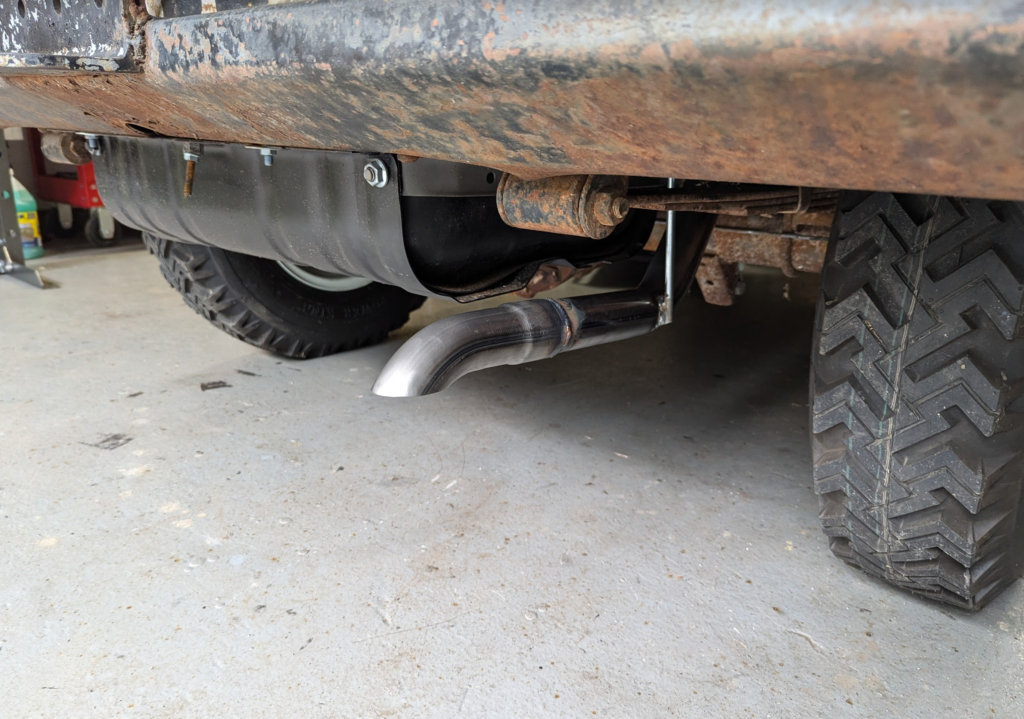
Exhaust installed back in!
Here is what it sounds like. The new muffler sounds much better (no rattle 4 cylinder noises) and fixing the manifold to down pipe connection got rid of the nasty exhaust leak.
And from the driver seat. Sorry for the YT Link for this one.
Looks like the spark plug wires on the DJ jeep have some micro cracks. Manifested as a spark hitting the valve cover here! Good thing the DJ jeep’s part box has a full set of new spark plug wires.
Easy fix. Interesting that the engine didn’t really have any problems running like this but the cracks would probably get worse over time.
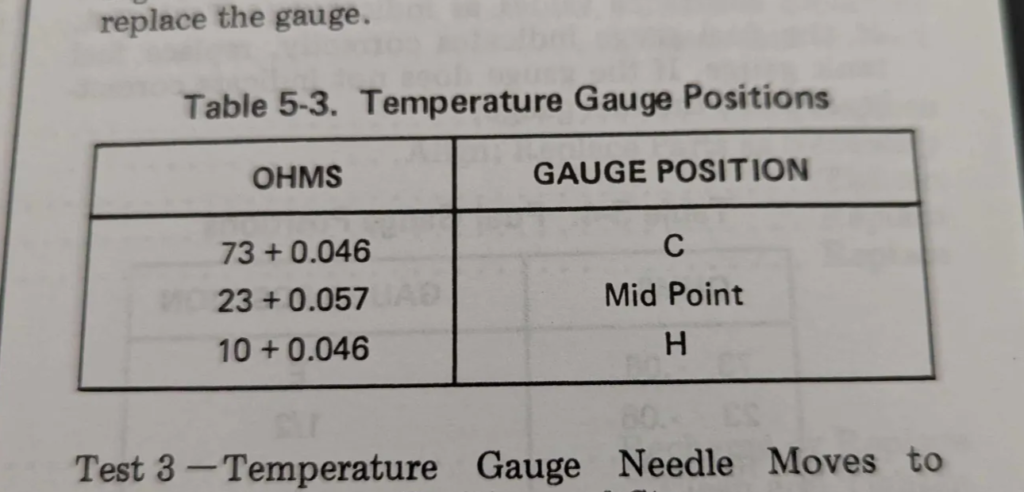
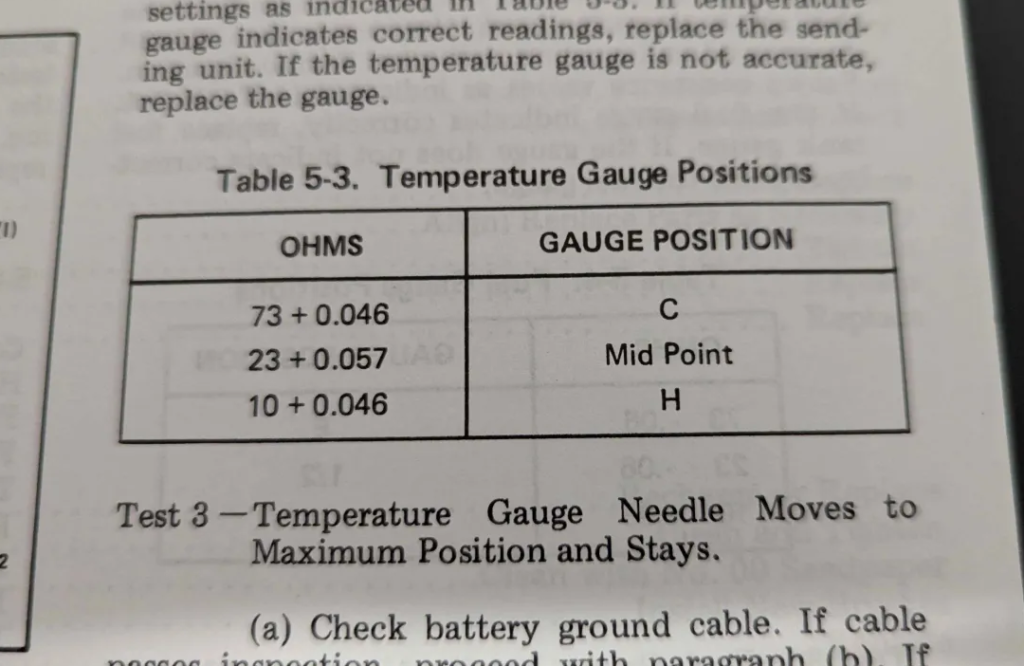
When i was getting all the wiring and electronics working for the DJ jeep, the temperature sensor didn’t seem to work. Turned out the sensor was the wrong resistance range. The factory servcice manual says the sensor should read like the following.
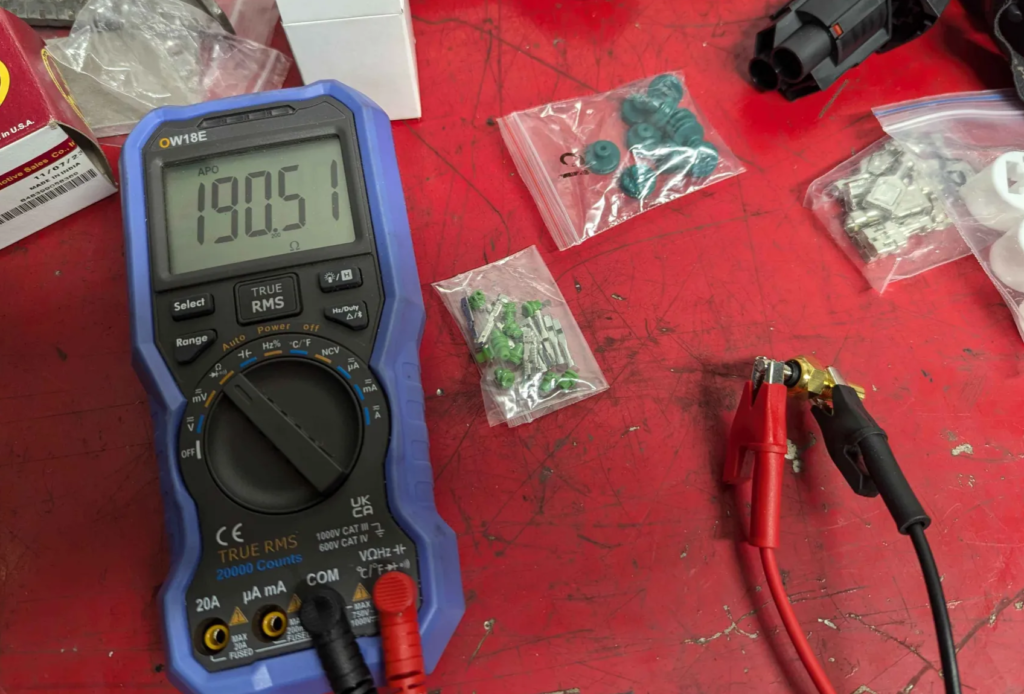
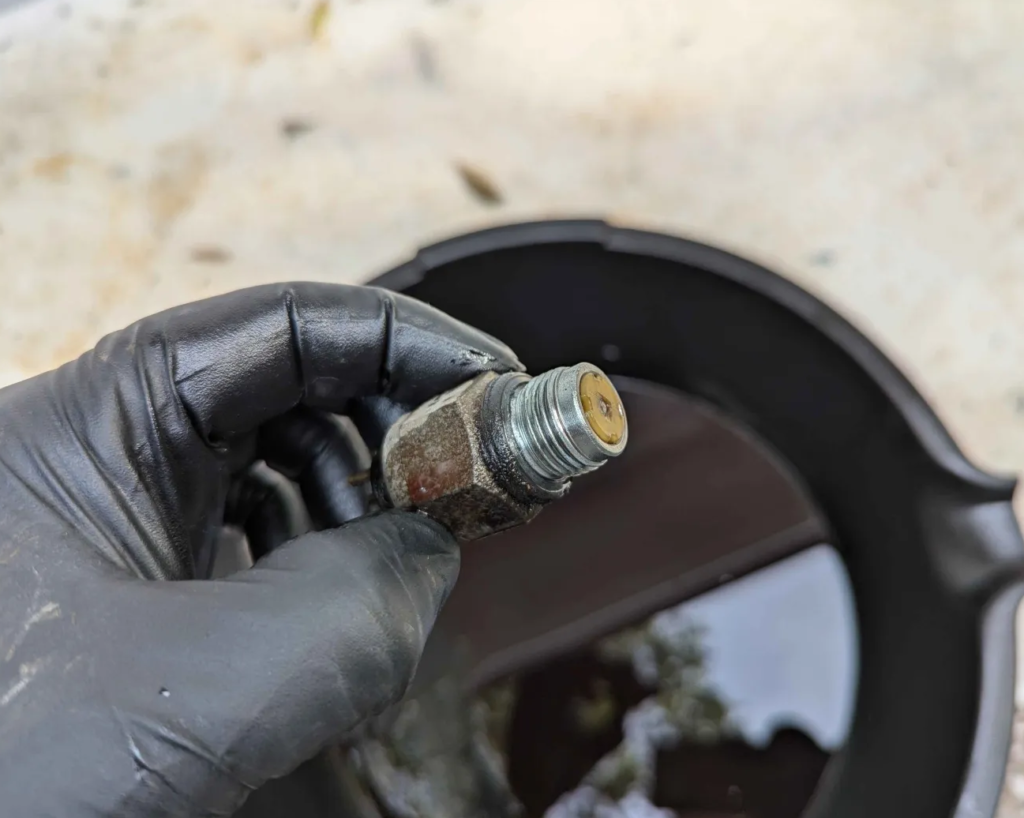
After some searching I found that the part should be J3177593. When it arrived I tested it.
Hmm at room temp (cold?) I am reading 190 ohms. This is similar to the sensor I was using. Not a good sign.
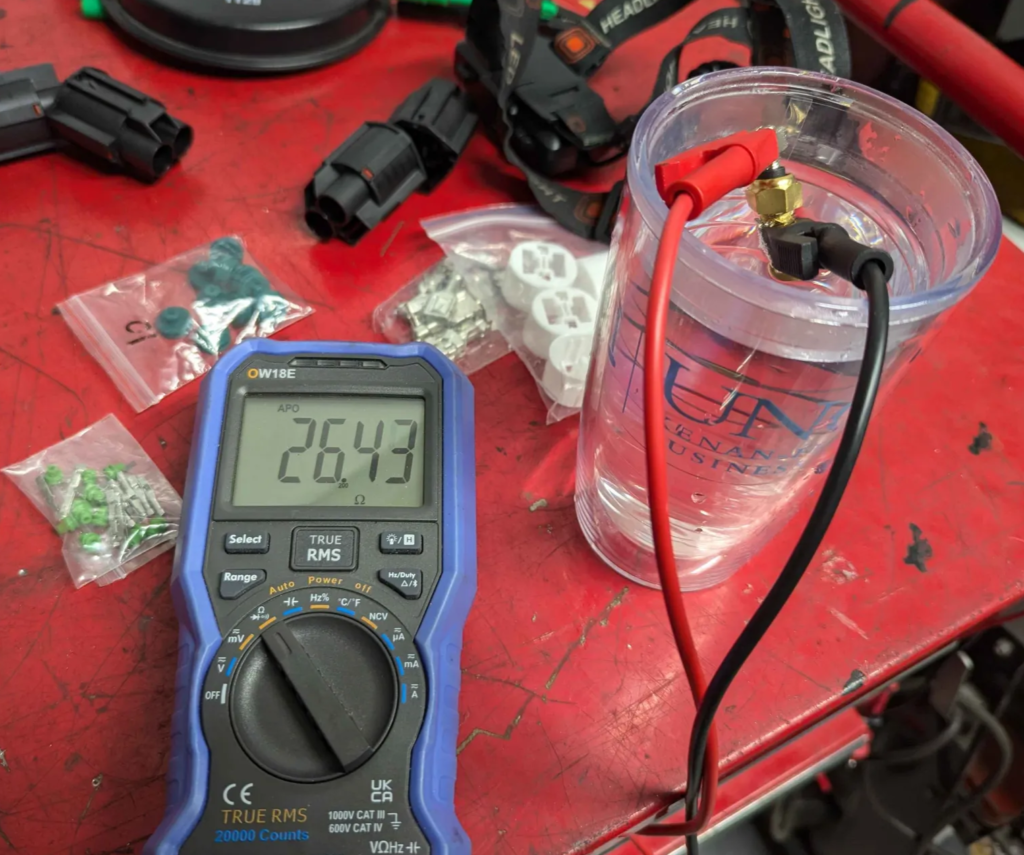
In ~200F water, we are measuring 26 ohms. Which is closer to what we want! The current sensor the DJ has was reading around 66 ohms at this temperature.
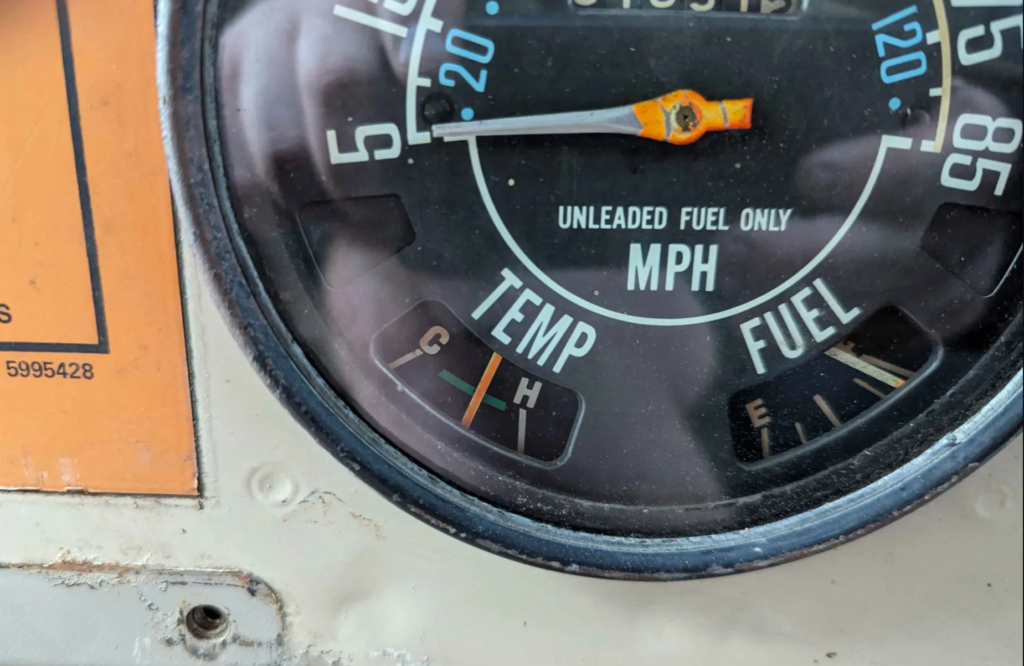
I installed the sensor and brought the engine to temperature. The gauge is in the middle of the green area.
Lets call this a success! Temperature “idiot” gauge is working. If it hits the H area that is the “turn it off now” range of temp :)
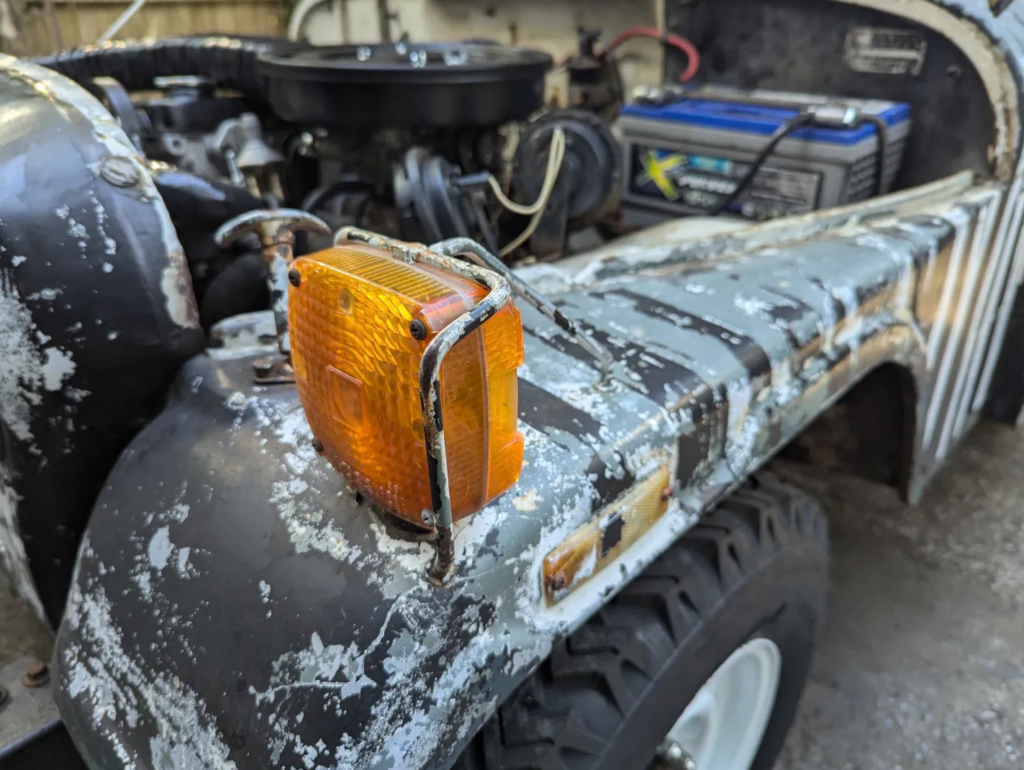
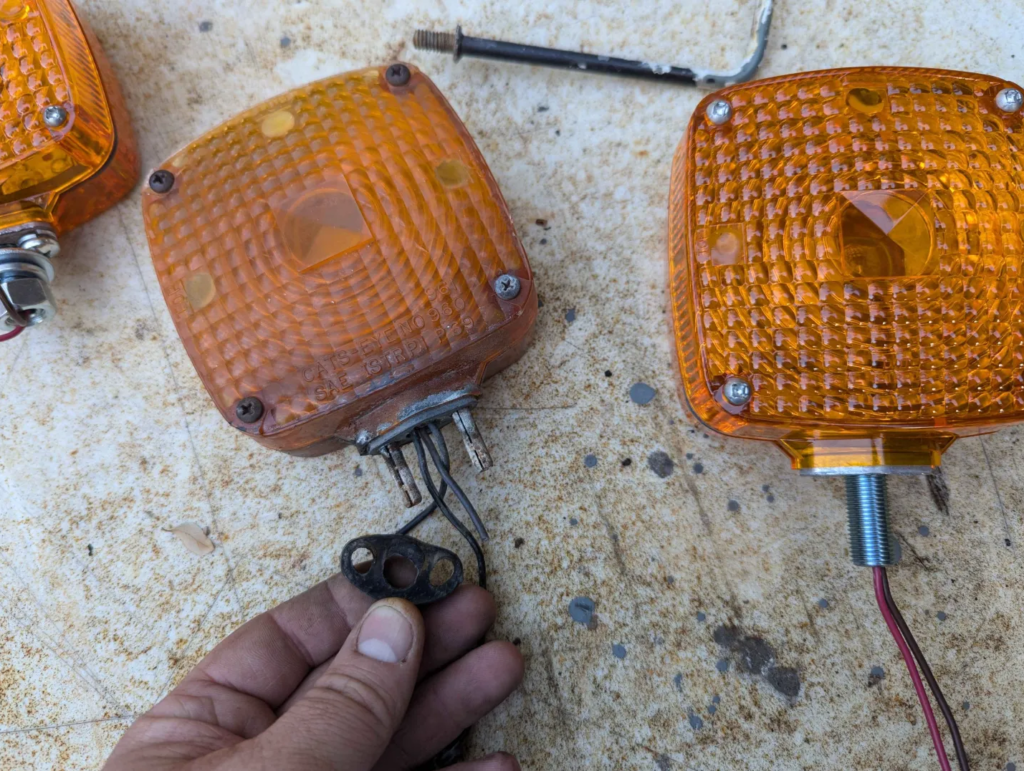
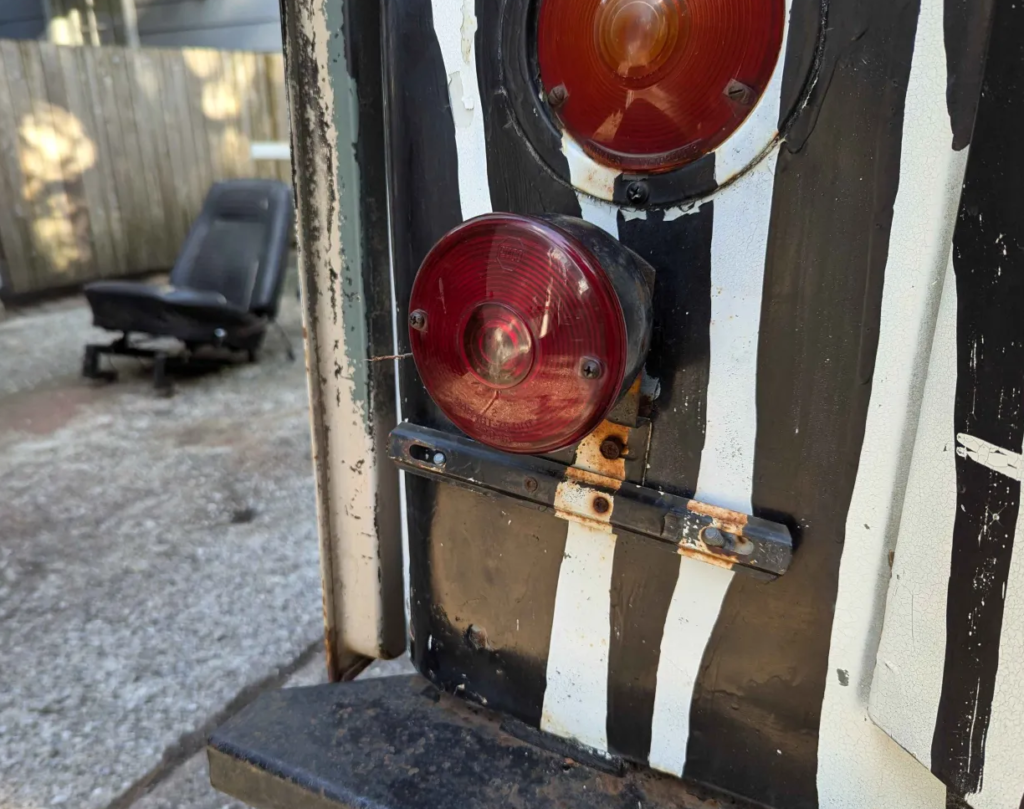
The original turn signals are crusty and leak water inside. I wanted to rebuild them with new lenses but the internals and the bulb housings contacts are all rusted and corroded up.
No one makes the same lights anymore but I found these on ebay that are similar.
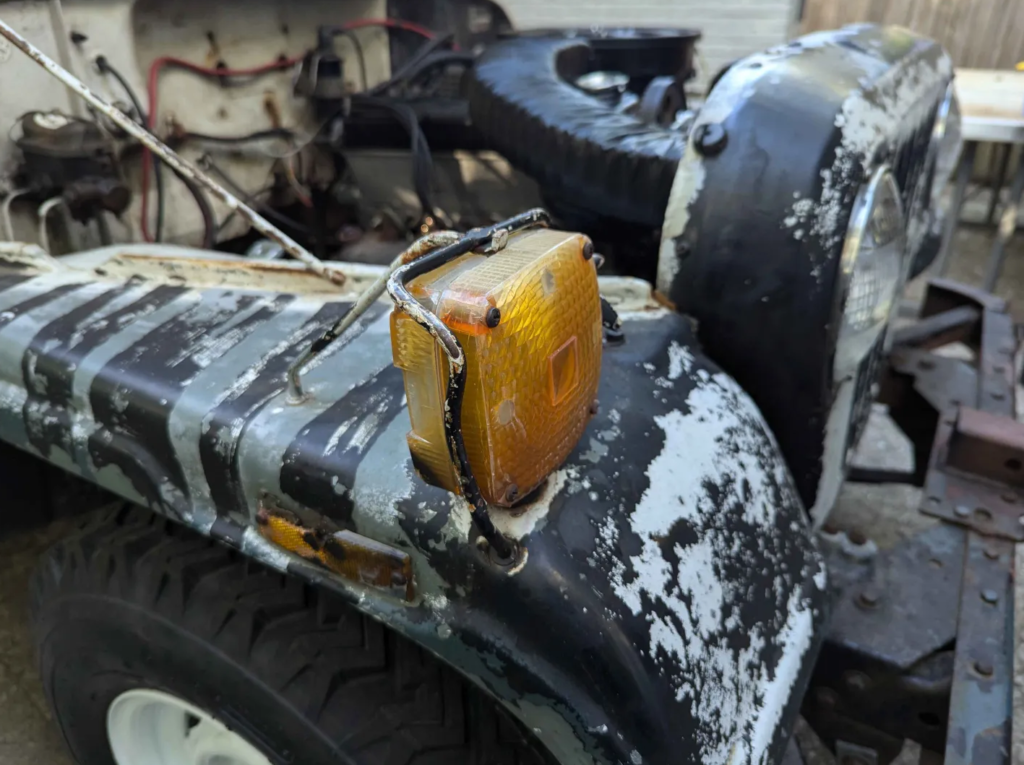
I had to adapt the stock plastic bracket/spacer to fit the single threaded stud. Then bolt it on and wire it up!
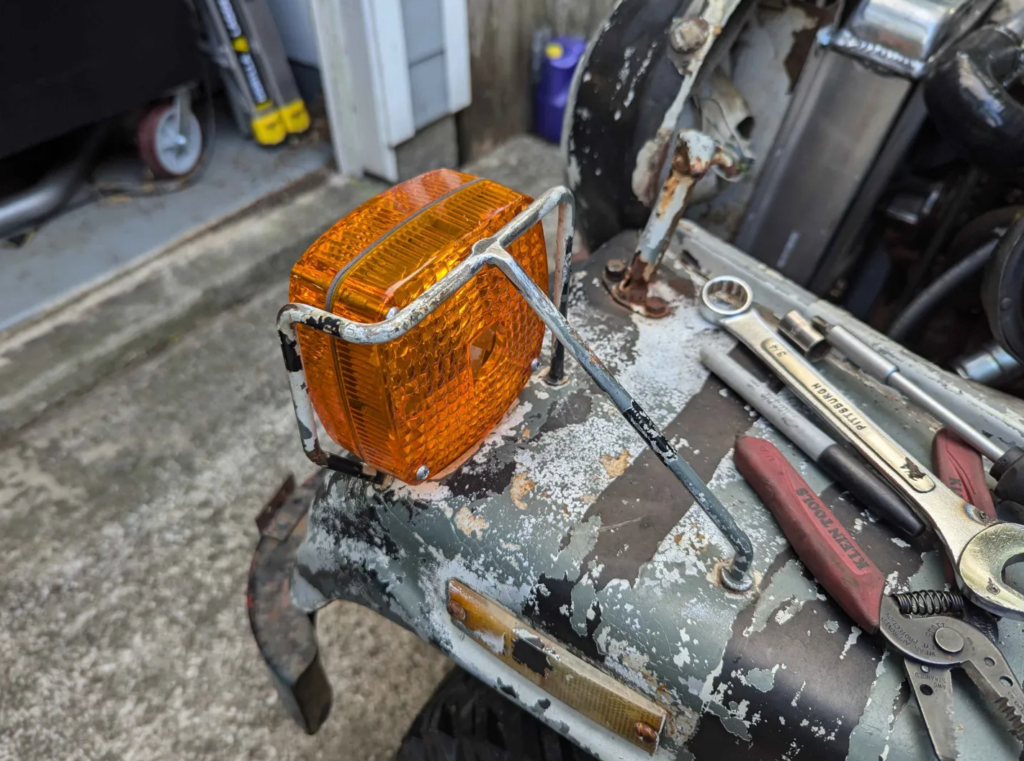
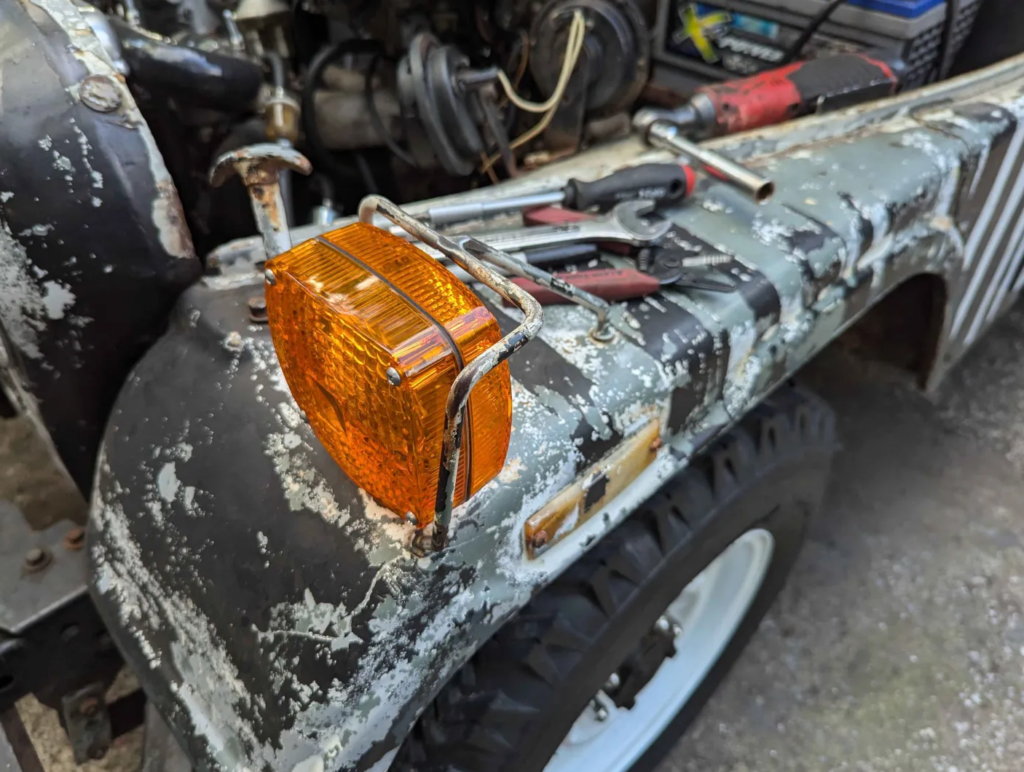
These new lights don’t have provisions for the metal cages to snap on. I could leave off the metal cages but part of the look is the cage. I welded the cages together to make up for this.
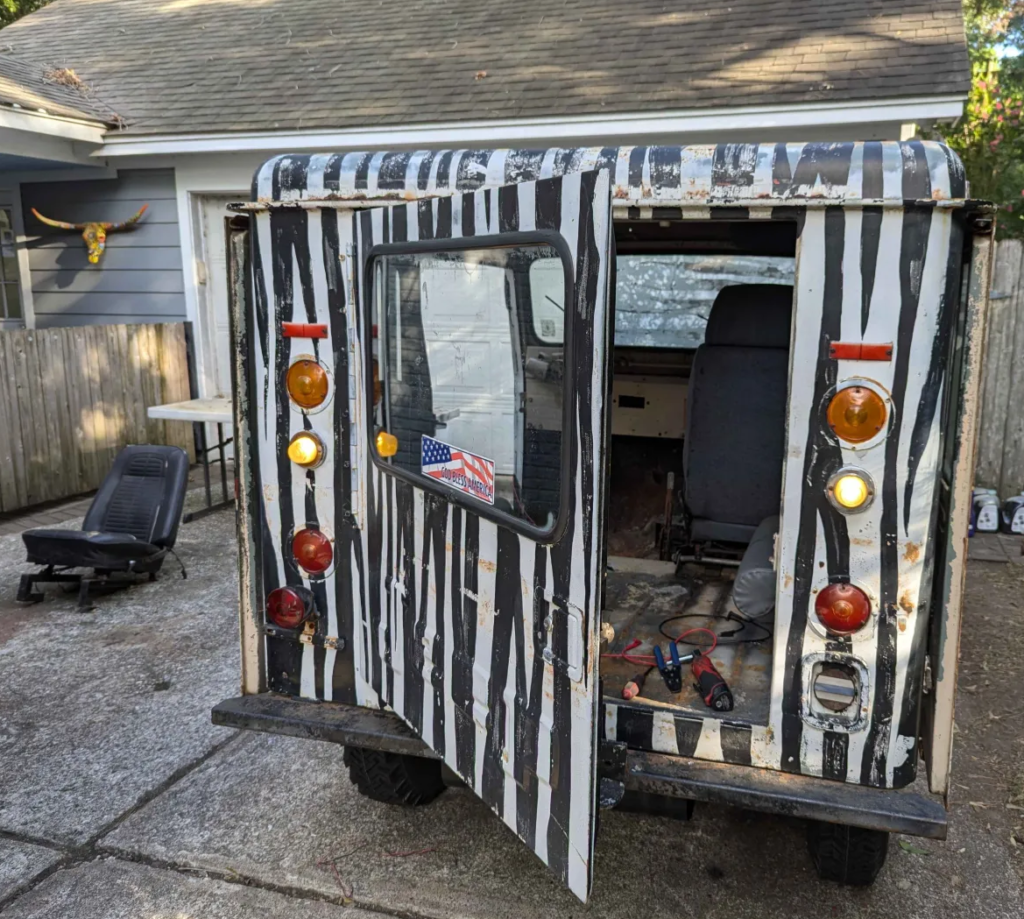
With the front headlights and turn signals working, lets go to the rear.
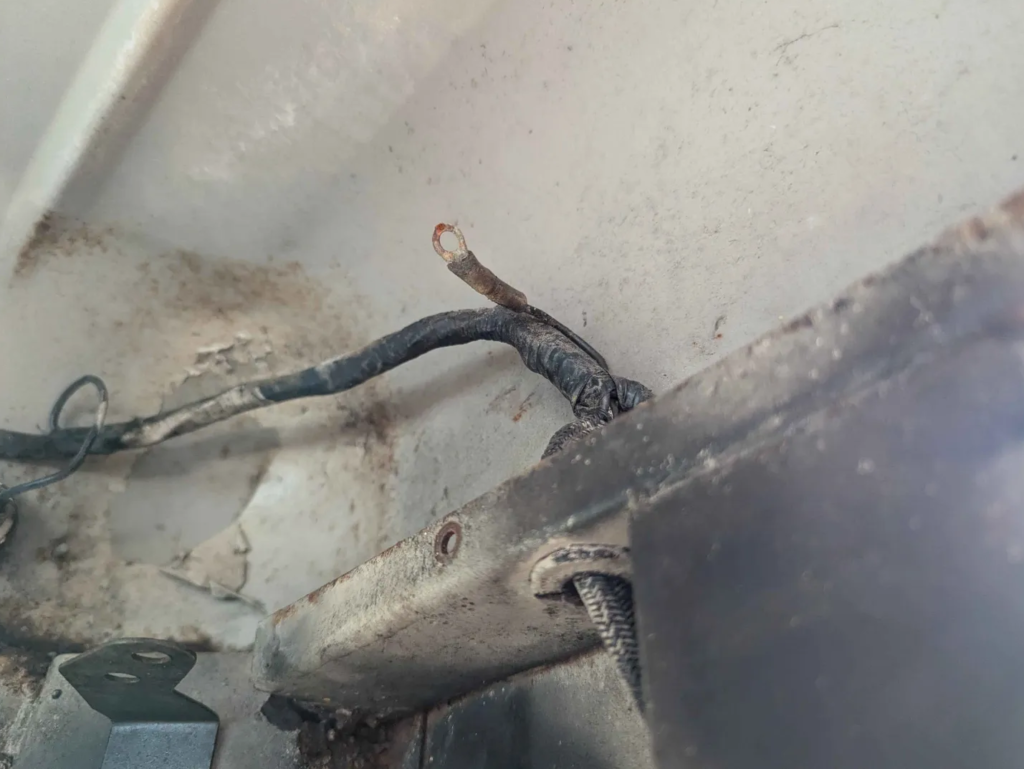
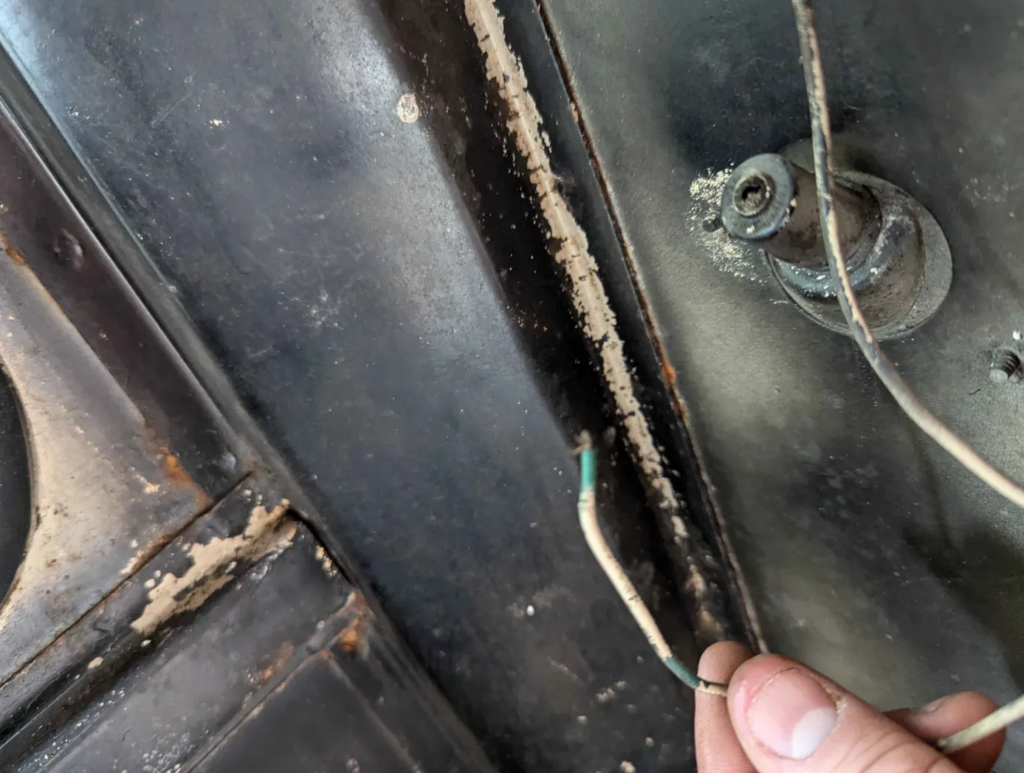
None of the lights in the back worked. Working through the harness I found this ring terminal not attached to anything.
This terminal is connected to the ground side of the entire rear lights…. Well clean up the terminal and attach it to the chassis. This got most of the lights working. Brakes and Turn signals. Back up lights still don’t work tho.
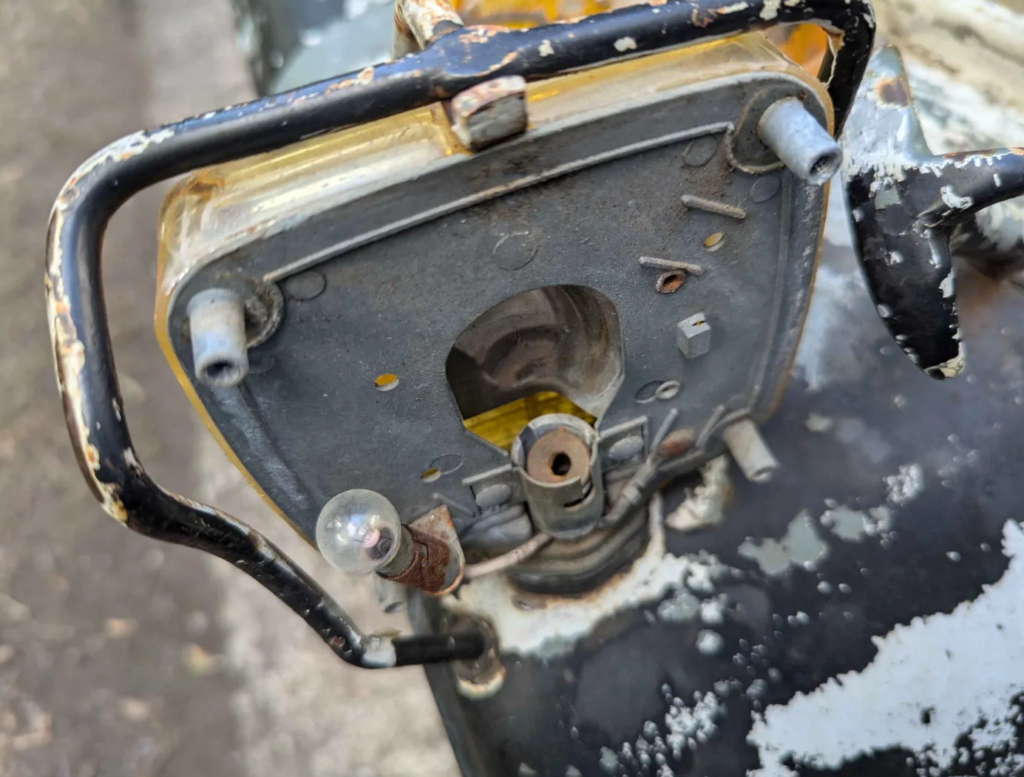
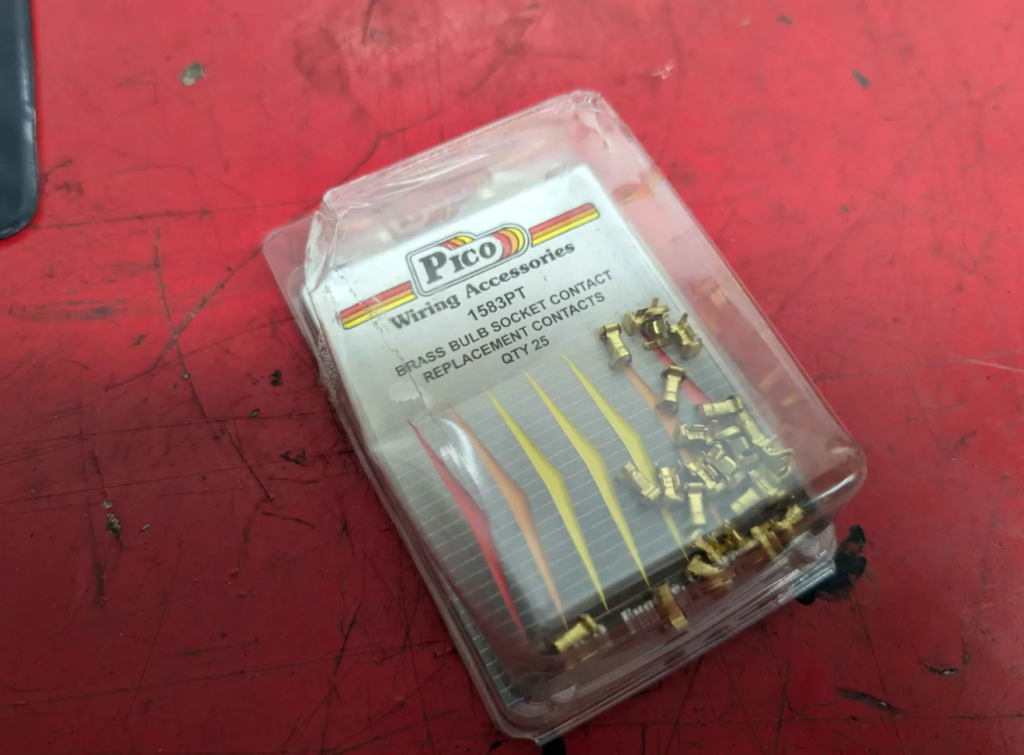
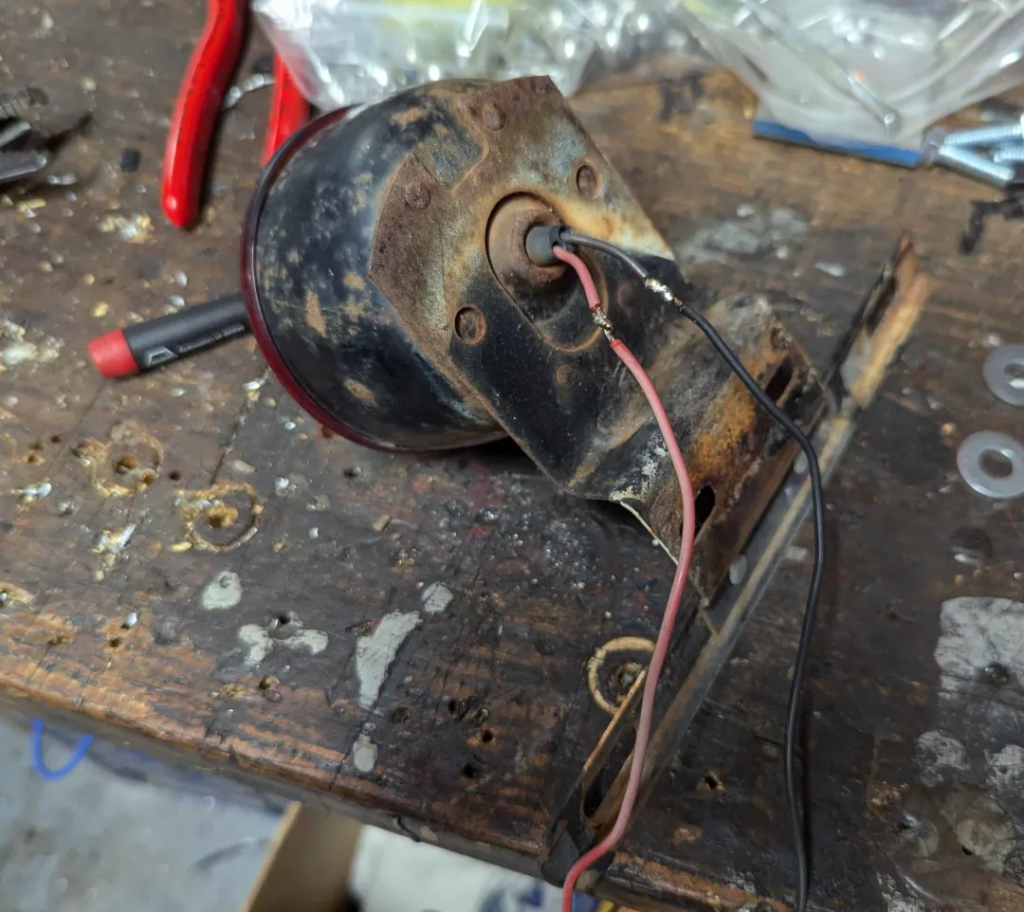
Taking apart the lights and I find that the bulb terminals are gone/corroded.
Pico makes crimp on bulb socket contacts. Part Number 1583PT. Kinda pricey but they allow you to rebuild old light housings with new contacts.
After putting it back together the rear lights still didnt work! Testing the neutral safety switch indicates that the switch is also broken, this switch also controls the reverse lights. Bypassing the NSS lights up the rear back up lights. Definitely the switch. Ordered a NSS that fits the TF-904 transmission.
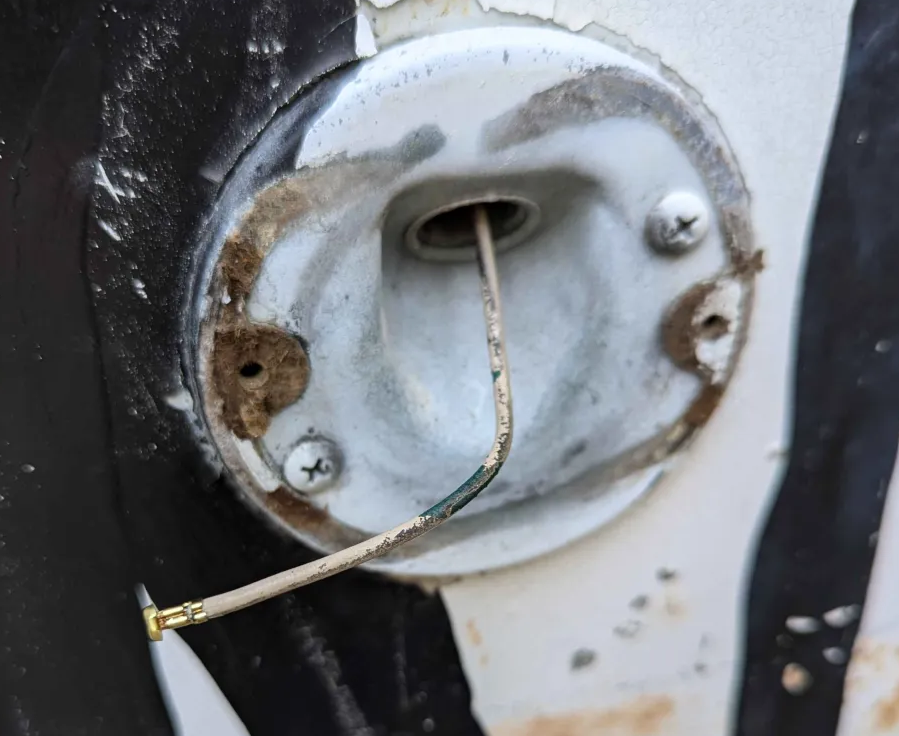
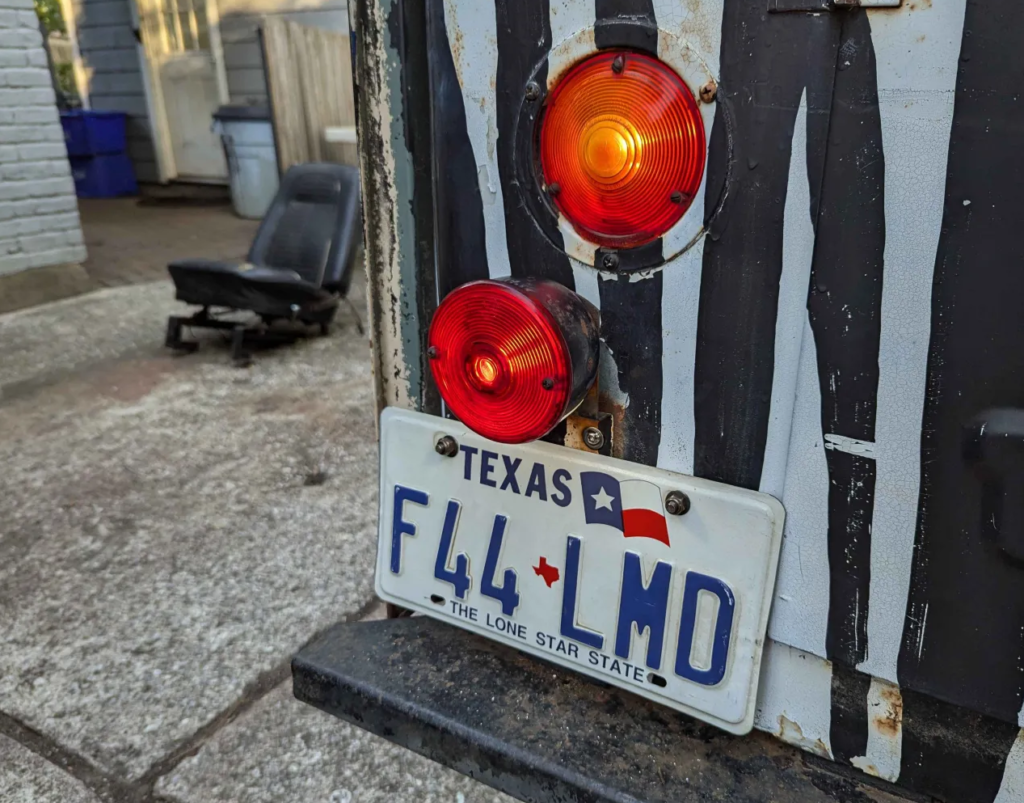
Last light to get working is the license plate light. The one on the Jeep isnt original but lets get it working since it exists.
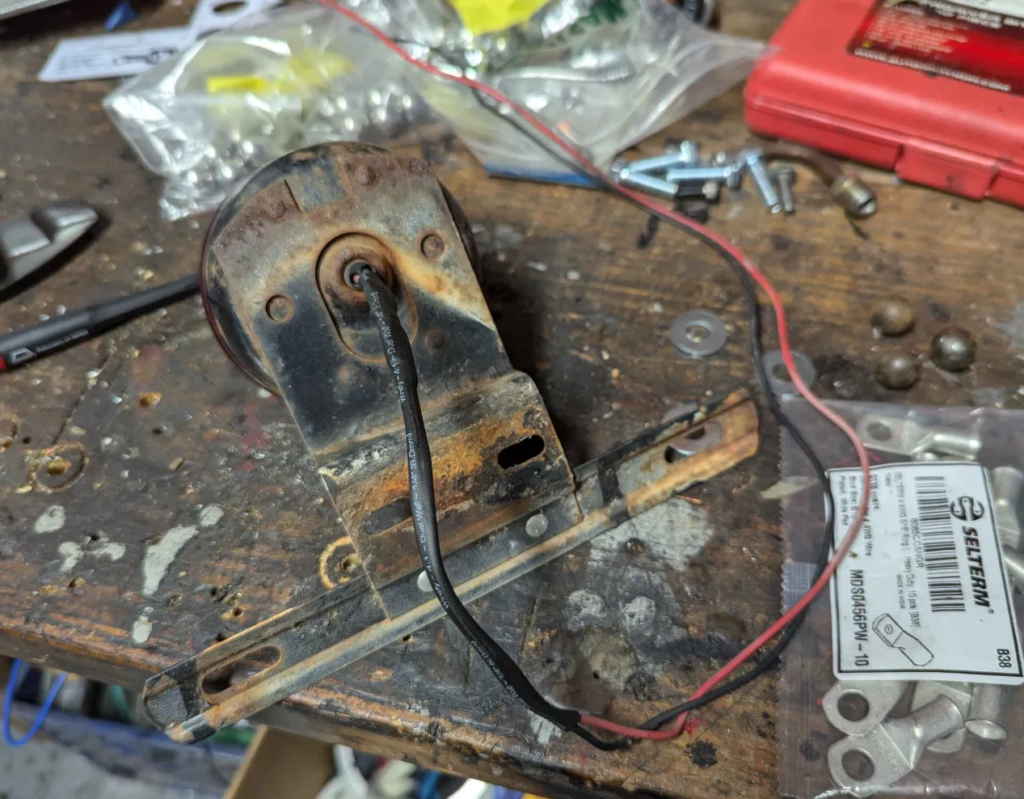
The wiring was all jacked up so I cut it and put on new wires.
Then wired into the harness!
A couple days later, the new NSS arrived. Pulling out the old on shows what is going on.
The switch is jammed up. Replacing the switch got the safety part of the ignition system operating correctly and the reverse lights now work with the shifter in reverse.
After getting all the electrical working on the Jeep, I noticed that the only gauge not working was the temperature gauge. The gauge would always keep in the “Cold” region no matter how hot the engine or sensor got.
The factory service manual says the resistance values are for the gauge and sensor are:
Cold engine is supposed to be around 73 ohms off the sensor, 23 ohms for operating temp, and 10 ohms for hot.
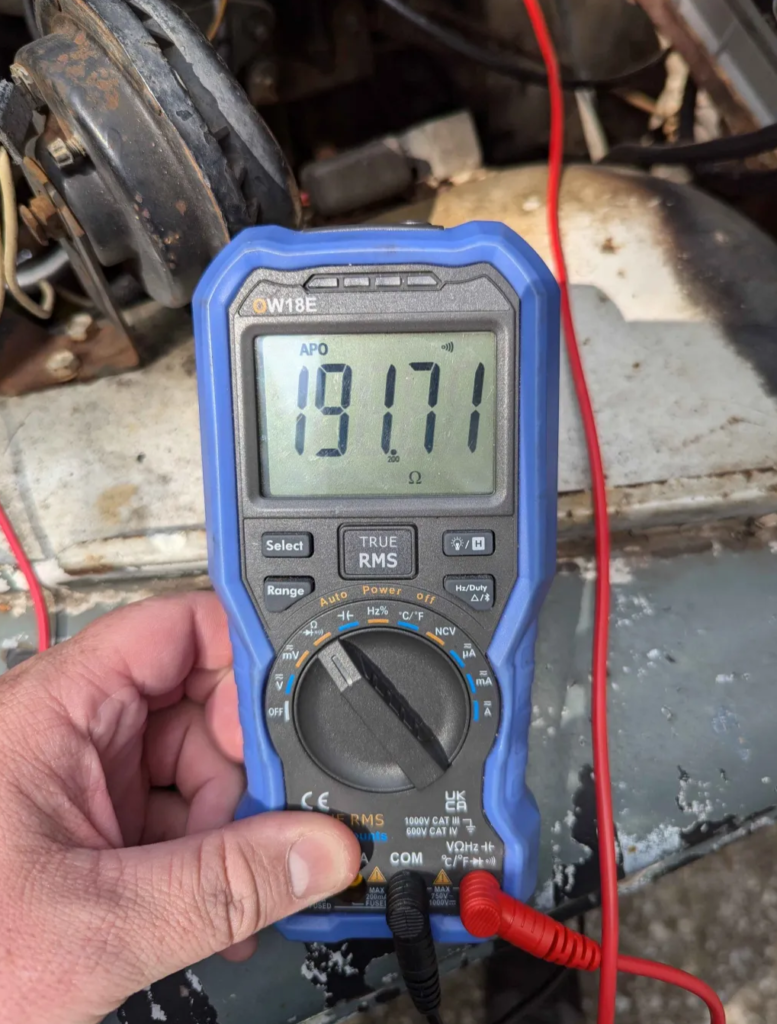
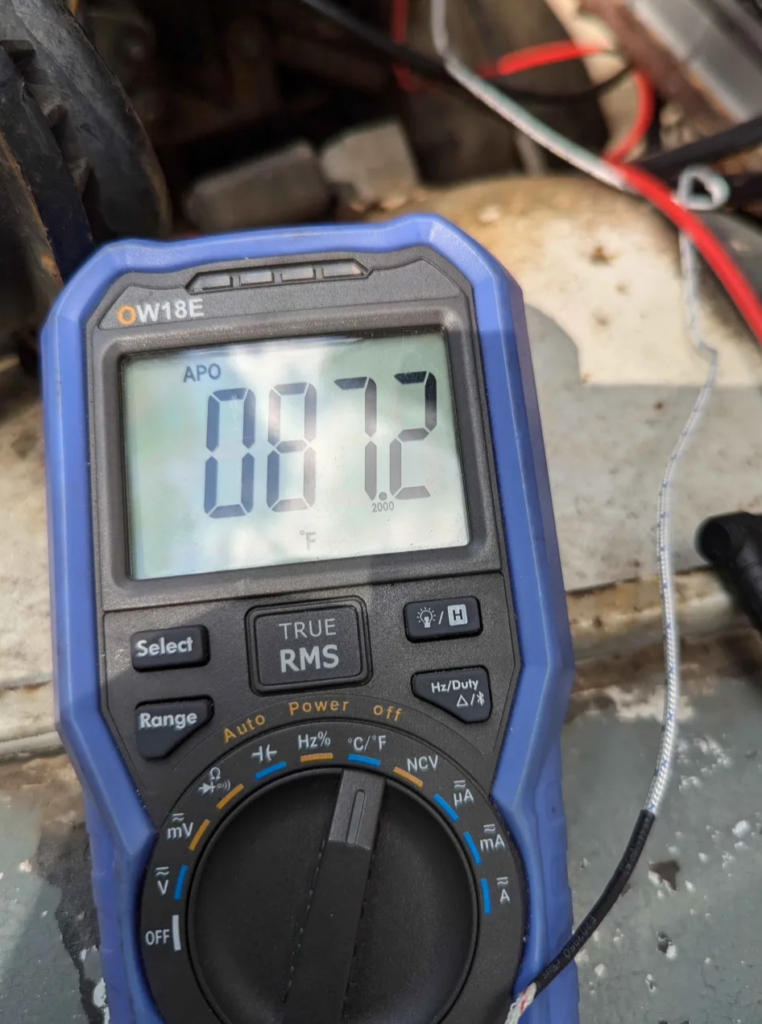
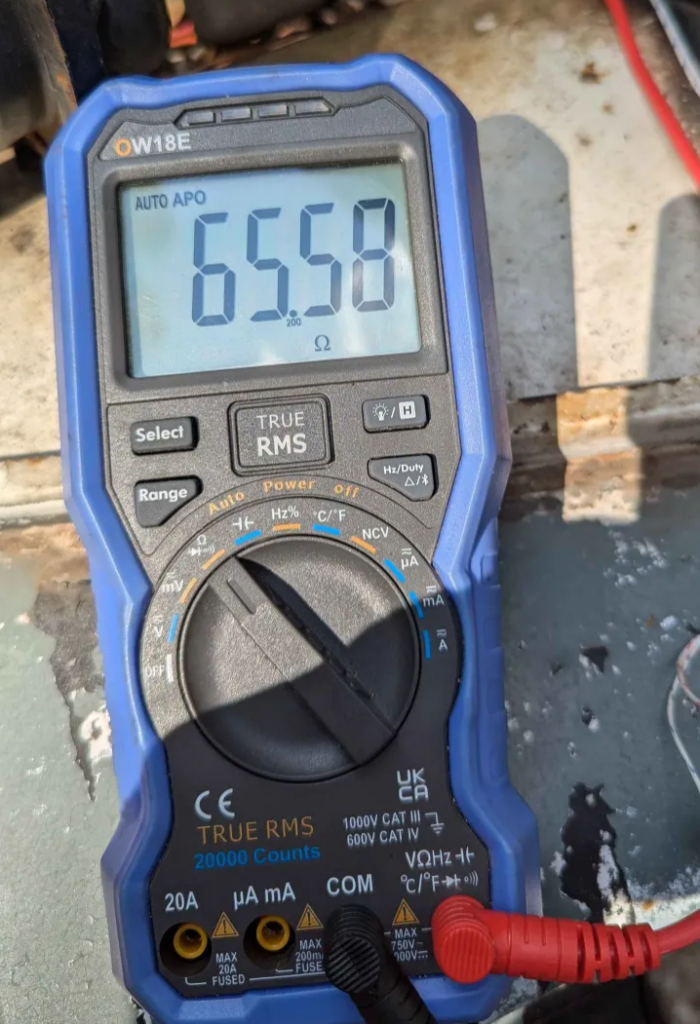
I taped a thermocouple to the sensor body and measured the resistance of the thermistor sensor.
At ~87F the sensor is measuring ~192 ohms. That is way to high! But lets heat up the engine and see what we get.
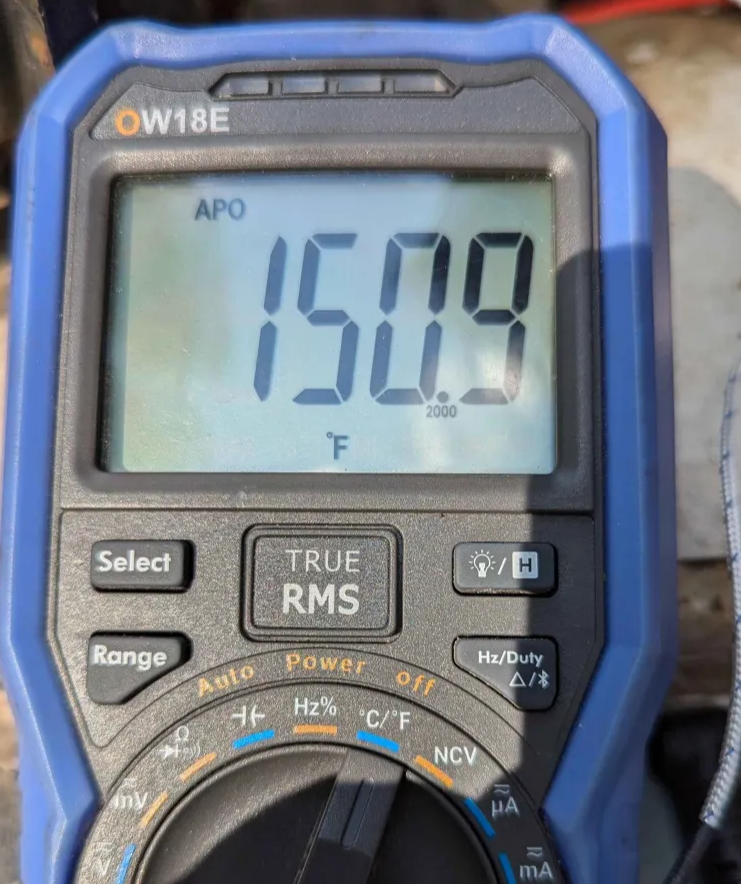
With the engine heated up to 151F the sensor is reading 66ohms. This is barely off the “Cold” mark the service manual says.
To test the gauge. I got a 22 ohm resistor and a 10 ohm resistor and “simulated” the sensor with them. These resistors moved the gauge to the appropriate spots! So the gauge is working correctly.
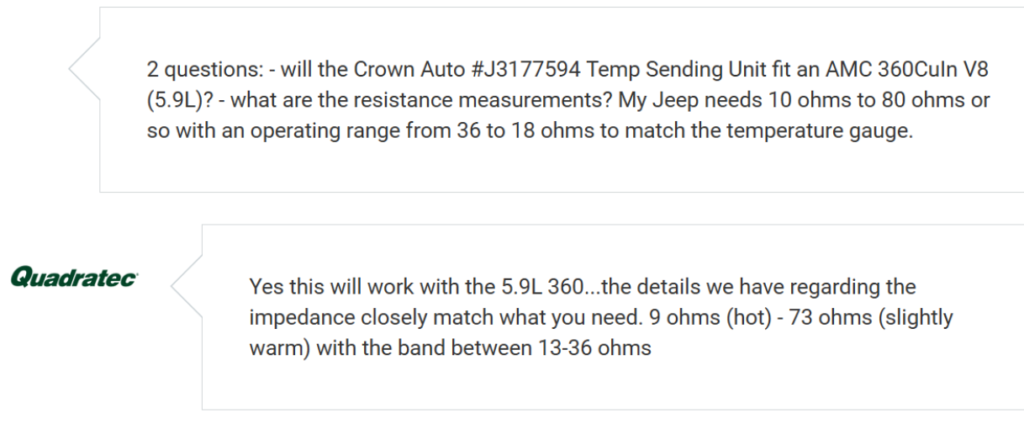
Finding a sender/sensor that works for this seems to be tough. Jeep used a couple different sensors and gauge combos over the years. According to Quadratec customer service, Crown’s J3177594 has the correct range.
I got this part on order and lets see if it works!
The Jeep needed new tires bad. The ones it came with where dry rotted, leaked, and even one exploded on the previous owner with it just sitting in there driveway!
What to get? Well I want to keep the look of the Jeep as stockish as I can for the wheels and tires. These Jeeps had really thin tires and wheels.
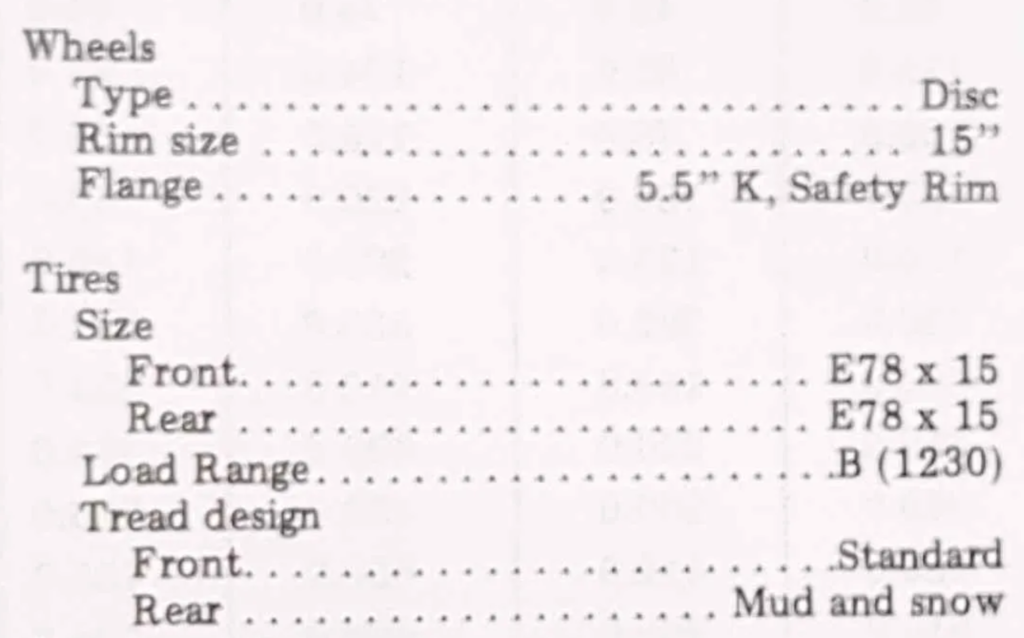
Here is what the factory service manual said the Jeep came with. Tire size is E78 x 15 and Wheels are a 15″ 5.5″ K.
Well these are not modern sizes at all! But this makes sense. These jeeps came with bias ply tires with tubes.
Lets try to find new wheels first. The bolt pattern on these Jeeps are 5.5″ x 5 pattern with a 4.25″ center bore. Common CJ Jeep pattern so that is good. Width is 5.5″ and 15″ diameter. The wheels the Jeep came with fit the Jeep but are actually 6″ wide. I know its only 0.5″ but i want to keep it skinny wheeled. I also don’t know what “K type” is as well? I have found some links on some old forums about the different type of wheels Jeep had but the link was dead.
I found this seller on Ebay that has original reproduction wheels for CJs that are 5.5″ wide and are for tubeless tires. Perfect!
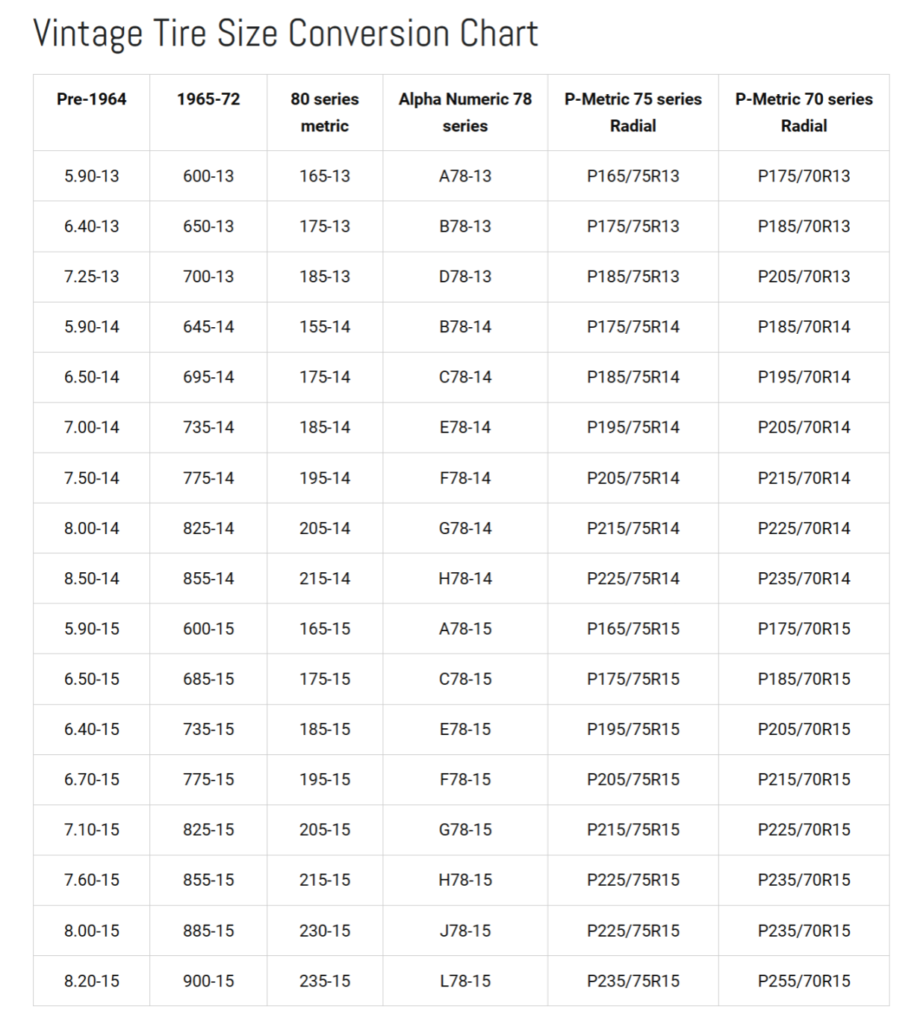
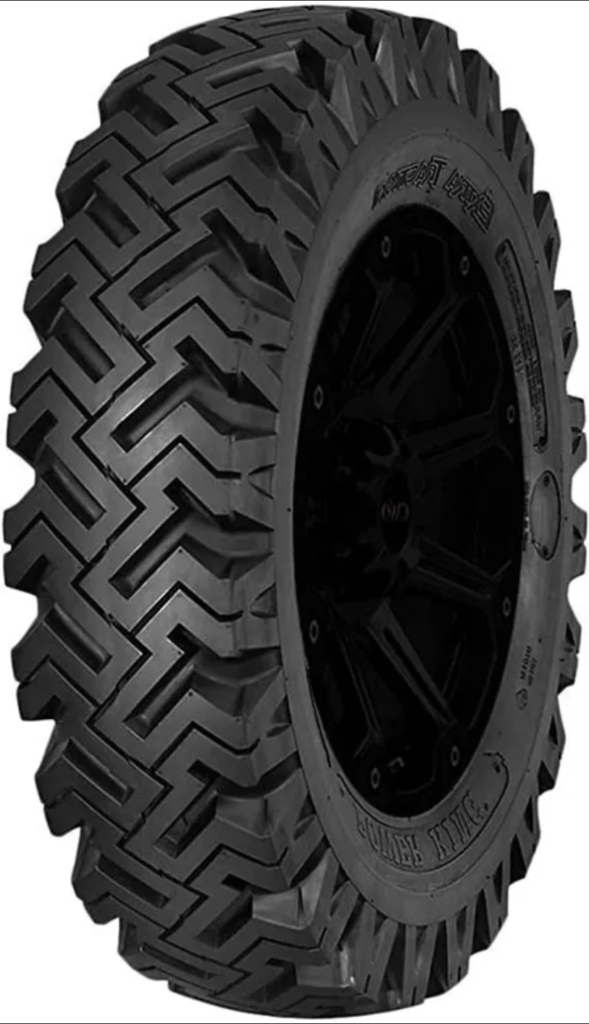
Now on to the tires. E78 x 15 is an old school bias ply tire size.
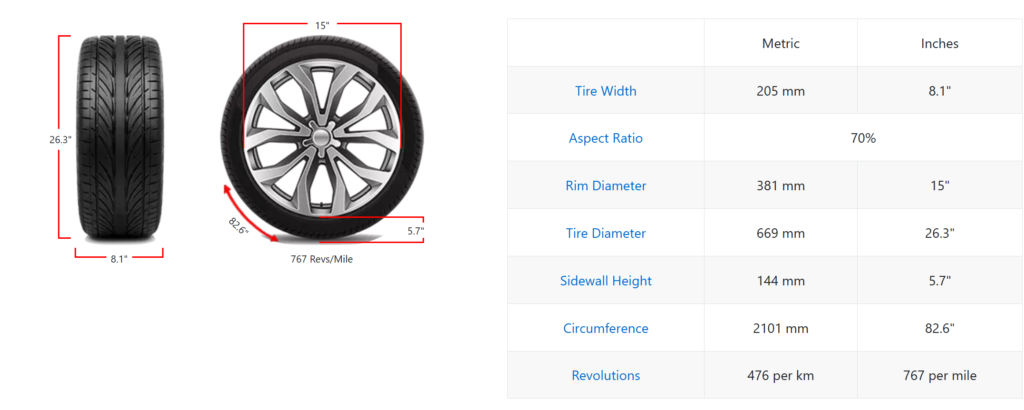
This chart says the tire should be around a 6.4″ wide tire. Modern size says P205/70R15.
The modern tire is ~27″ diameter and ~8″ wide. That is way to wide! No wonder the turn stops on this jeep where jacked way out. The wider modern tires where rubbing at full steering lock.
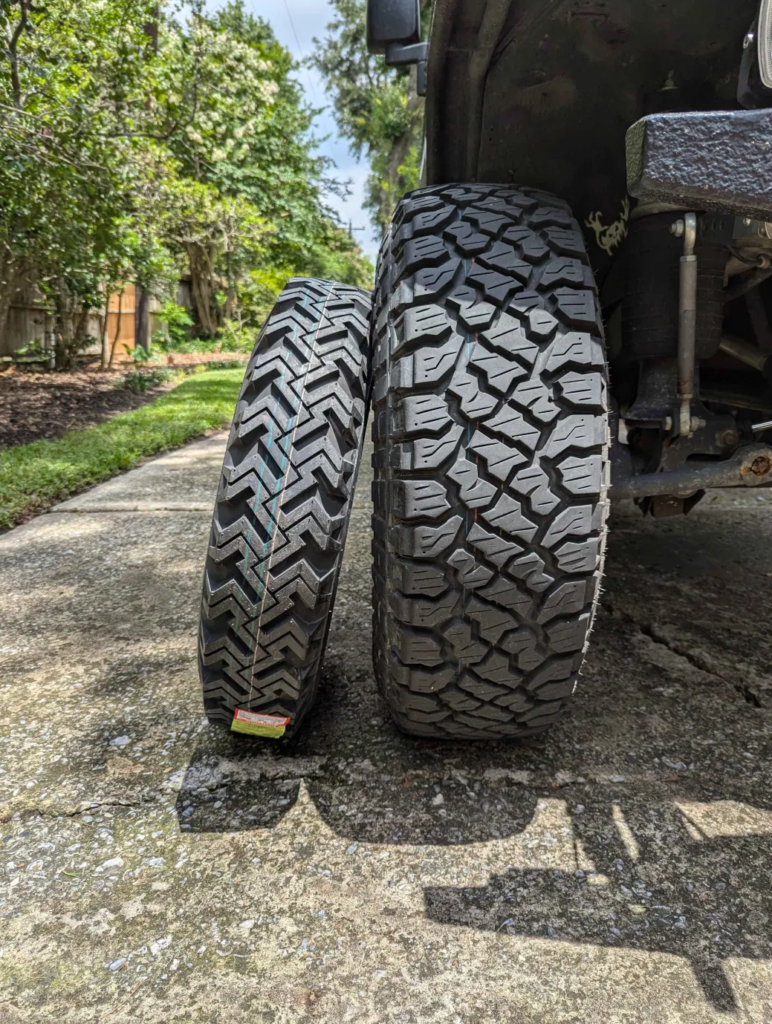
These tires are a bit taller then the stock ones that came on the DJ Jeep but atleast they are near the same width and look the part.
Here is how these 7.00-15 bias ply tires stack up next to my TJ Jeep’s 35″ x 10.5″ tires.
After mounting the tires and setting the pressure in the tires. 18psi in the front and 24psi in the rear.
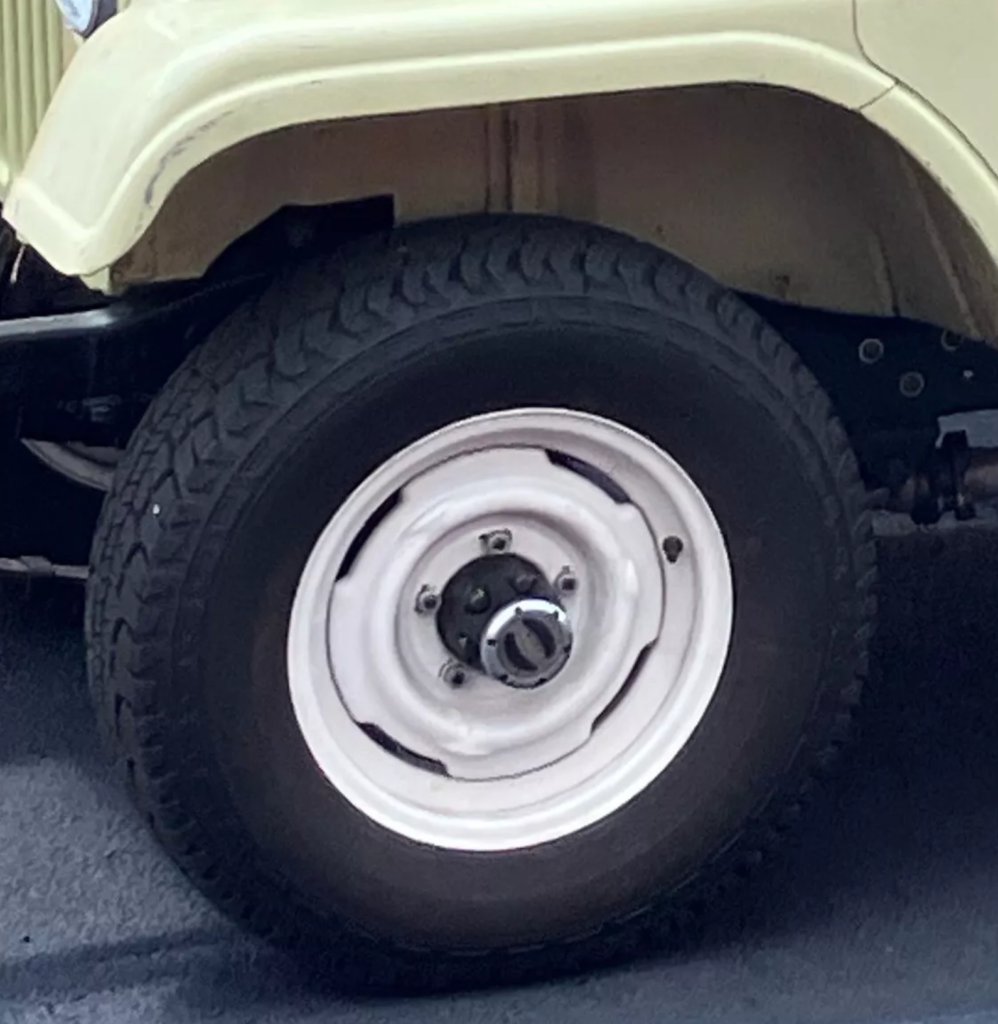
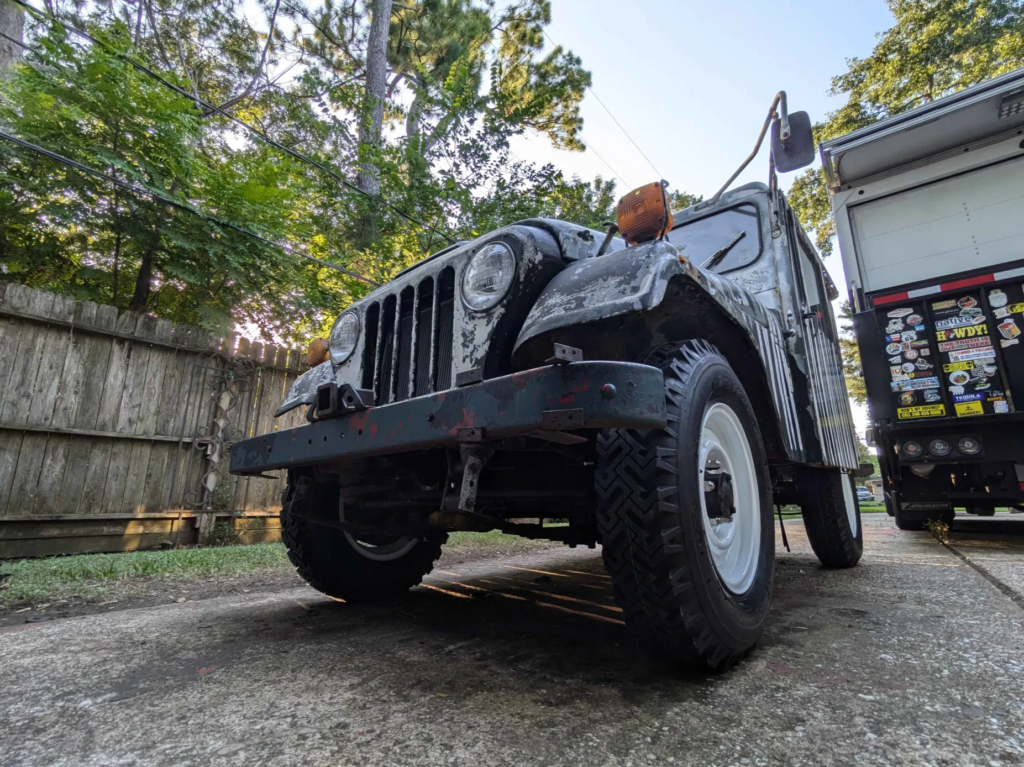
Tires and wheels look great on the DJ!
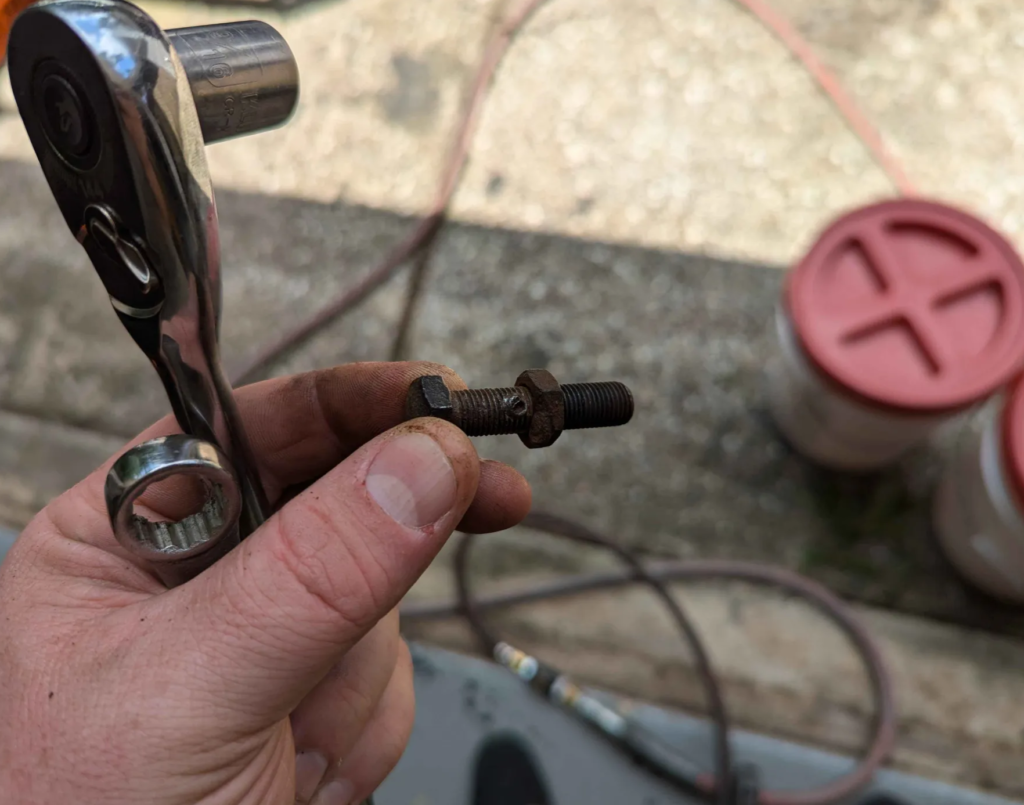
With the proper width of the tires, I adjusted the steering stops as far inwards as I could. Sometime in this Jeep’s previous life, someone welded the adjuster nut to the bolt so I could only adjust it so far. These are 3/8-24 fine thread bolts so next time I am at the hardware store I will pick up some so I can gain even more turning radius.