
The WS2801 is an interesting chip. It is a constant current LED driver with 3 drivers that the current can be set individually. This lends the WS2801 to be useful when driving RGB LEDs. Each channel runs off an internal 8-bit PWM (total 24-bits) that is serially clocked in over a 2-wire (data and clock) scheme. This gives each channel 256 levels of brightness. The WS2801 can also be chained together with other WS2801 chips to reduce I/O usage. It can drive up to 30mA of current per channel from 3.3V to 5V which is a fair bit of power.
What if more power and current are needed though? Page 9 and 10 of the datasheet shows that a NPN transistor like a 2n2904 can be used to increase the current sinking capacity. This is all good unless you need even more power. N-type mosfets can be gated to the outputs of the WS2801 in a similar fashion.

Above is an example schematic on how to connect the mosfets to a pair of WS2801 chips. The polarity pin (POL pin3) is pulled down to put the WS2801 into driving mode. The feedback pins (XFB pin4,5,6) are pulled to ground putting the driver in constant voltage driving mode. Pull up resistors are needed on the mosfet gates as the outputs of the WS2801 are open-drain gates.
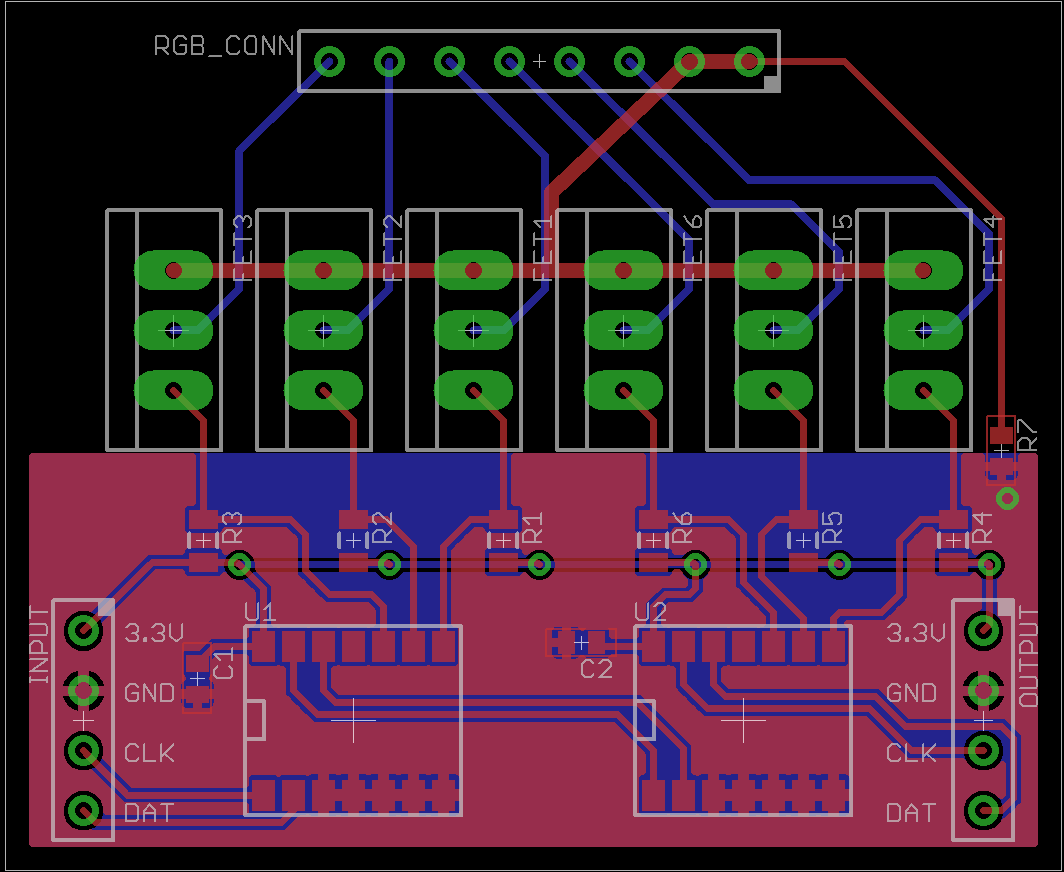
Demo layout of the dual WS2801 schematic. The WS2801 chip is a really nice chip to layout as the pinout is well thought out. Because two power sources are used (3.3V and voltage for the LEDs) the grounds must be connected to give the same reference voltage. A zero ohm resistor at R7 is used to connect these two grounds. A ferrite bead could be used here as well to reduce noise crossover if the high voltage LED power source is noisy.
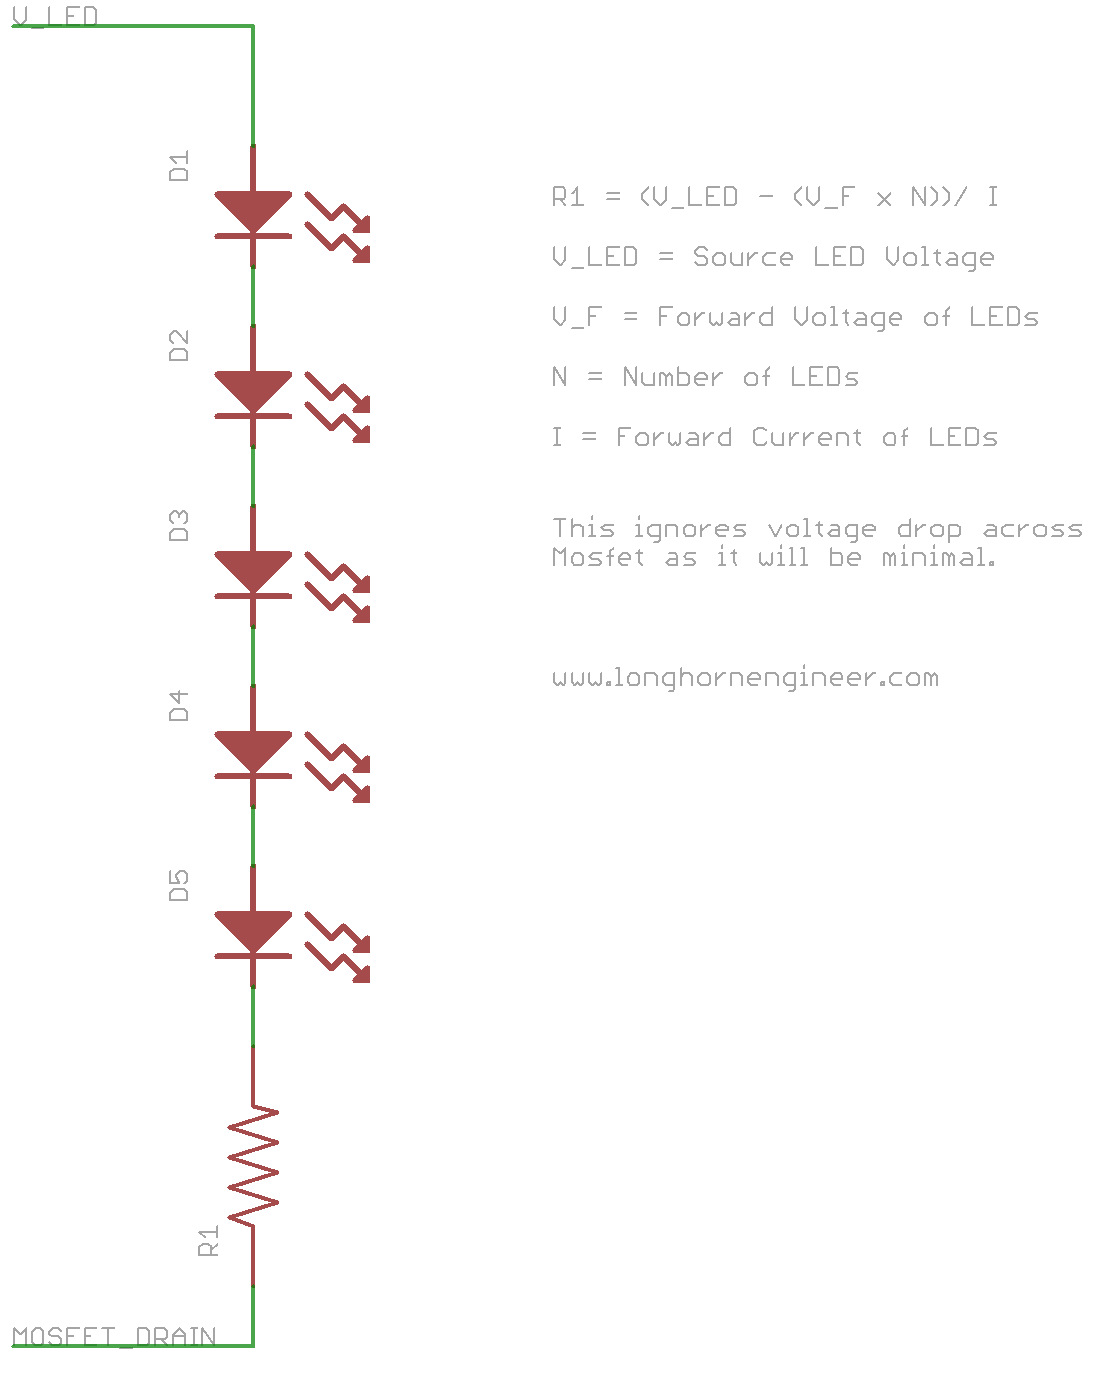
The high power LEDs should be connected to the mosfet drain through a current limiting resistor. Multiple LEDs can be connected together serially if the supply voltage is high enough. The voltage drop across the mosfets can be generally ignored as the resistance is usually around .2ohms for low resistance series (RSon) mosfets.
R1 = (V_LED - (V_F x N))/ I
Where
R1 = Resistor value
V_LED = High voltage LED source
V_F = Forward voltage of the LEDs
N = Number of LEDs
I = Forward current of LEDs
Also you have to make sure your resistors are large enough to handle the current load.
RW = (V_LED - (V_F x N)) x I
Where
RW = Resistor watt rating
V_LED = High voltage LED source
V_F = Forward voltage of the LEDs
N = Number of LEDs
I = Forward current of LEDs
For example the OVSPRGBCR4 RGB LED will be used. The source voltage will be 24V and 7 LEDs will be chained together. The forward current (If) of all 3 channels is 250mA. The forward voltage (Vf) of the red channel is 2.3V and the Vf of the green and blue channel is 3.4V.
RED:
(24V - (2.3V x 7))/ .25A = 31.6ohms
(24V - (2.3V x 7)) x .25A = 1.975W
GREEN & BLUE:
(24V - (3.4V x 7))/ .25 = .8ohms
(24V - (3.4V x 7)) x .25A = .05W
Finding a resister to work with the Green and Blue channels of the LED is fairly easy but the Red channel is a bit difficult due to the high power rating needed. A quick look on mouser yields limited selection of 32ohm resistors in a big enough size to handle 2W but two 16ohm 1W resistors in series would work just as well and are much easier to find.
I am using this method to drive banks of RGB LEDs on the PinHeck Pinball System for general cabinet illumination. The Eagle files of the schematics and board layout are on GitHub. I also have some demo SPIN code for the Parallax Propeller chip to drive the WS2801 that I wrote awhile back.